Introduction
The tutorials, demos, and other documentation for rendering in Smash Ultimate can be accessed from the navigation menu. Many of these pages contain interactive demos using WebGL, which should work on most computers, phones, and tablets. The Col, PRM, and NOR texture pages are a good starting point. Click the search icon to search any of the pages on this site.
The main Github repository contains documentation pages that serve as quick references for material parameters, texture types, etc. The documentation pages are updated more frequently than the website but contain less detailed explanations.
Conventions
The terms “texture” and “map” both refer to the images used to color a model to adjust its shading. The term “texture” is the technical term used for programming 3D and 2D graphics. The term “map” is usually combined with a specific usage of a texture like “albedo map” or “ambient occlusion map”. The guides use both terms interchangeably.
RGB colors can use integer values like 255, 0, 128 or floating point values like 1.0, 0.0, 0.5. Textures typically only allow values between 0 and 255, which converts to a floating point range of 0.0 to 1.0.
CustomVector parameters have 4 parameter values. These values are floating point numbers like 0.0, -200.4, or 1.3333. The 4 values will be referred to as XYZW or RGBA. For example, CustomVector11.g and CustomVector11.y both refer to the second value for CustomVector11. CustomVector11.w and CustomVector11.a both refer to the fourth value. Values can be written as (r, g, b, a) or (x, y, z,w ). Mixing and matching representations in the same context will be avoided where possible.
The four values of a texture can also be written using the “texture.b” or “texture.z” notation depending on if it makes more sense to refer to the channels as RGBA colors or not. Phrases like “PRM alpha”, “PRM.a” or “PRM.w” all refer to the fourth channel of the PRM texture. Not all alpha channels are used for transparency, but the convention in image editing programs is to show the fourth channel as alpha regardless of its usage.
Tools
- SSBH Editor - view, edit, and validate models
- ssbh_lib_json/ssbh_data_json - command line tools for editing model formats as text files
- smash-ultimate-blender - import and export models with Blender
- Switch Toolbox - edit bntx and nutexb files (Windows only)
- Ultimate Tex - batch convert texture files like bntx, dds, or nutexb
- Smush LUT - edit color_grading_lut.nutexb files
Support
Report any bugs in issues if one of the links is broken or a page isn’t rendering correctly.
Credits
Textures
Textures are special image files used to render models and other effects in game such as UI elements. Compressed textures in Smash Ultimate use the same compression as DDS files. Textures can do more than control the color of a model and enable a variety of effects in game liked baked lighting and shadows, environment reflections, and color grading. Most textures are 2D textures and depend on a model’s texture coordinates to map the 2D textures to the 3D geometry of the model.
Texture Names
Texture names in Smash Ultimate are paths to the texture file. All model textures are stored in .nutexb files, so the file extension is omitted. A texture name like “def_mario_001_col” refers to the file “def_mario_001_col.nutexb” in the model’s folder. The string value stored in the .numatb file is the corresponding texture’s file name with no extension. This can be a file in the current directory like asf_ashley_col or a full path like /common/shader/sfxPBS/default_Params. Cube map textures can specify #replace_cubemap to use the current stage’s reflection cube map.
Default Textures
Any material can reference default textures stored in the /common/shader directories. Note that the red and yellow checkerboards that appear for invalid models are rendered in screen space using shaders and don’t use any textures. For a full list of default textures, see Default Textures.
Editing Textures
In game texture files are stored in a memory layout optimized for the Switch using a process called “swizzling” and must be converted using dedicated tools before the textures can be edited and viewed on a computer. Most textures in Smash Ultimate are also compressed using compression formats like BC7 or BC6. These formats are identical to the formats used for DDS files and can be edited using standalone tools or image editor plugins.
Not all programs that edit DDS files support more modern formats like BC7. Textures can be easily converted to a variety of formats on Windows, Linux, or MacOS using Ultimate Tex. Converting nutexb textures to PNG or TIFF will allow easier editing in more programs.
Col (Texture0, Texture1)
Col maps control the albedo of a model. Albedo is the overall color of an object. Surfaces with higher albedo reflect more light and appear brighter than surfaces with low albedo. This corresponds to the base color input of Blender’s Principled Shader. This is the primary texture to edit when recoloring a model. PRM and NOR maps can greatly improve the quality of a model, but they aren’t strictly necessary.
Col Map Channels
Col maps contain color data, so they should be saved with sRGB formats. sRGB formats have names that end in _SRGB. When rendering in programs such as Maya or Blender, set the Col maps to Color, sRGB, etc to ensure they are properly gamma corrected. Failing to use an sRGB format will result in the textures being too bright and looking washed out.
Albedo/Base Color (RGB)
 Unlike diffuse maps, albedo maps don't contain any baked lighting or shadows. This means most models in game
will have albedo maps that are mostly solid colors. Details are typically baked into the NOR and PRM maps.
Avoid using col map values close to pure white (255,255,255) or pure black (0,0,0). Use col map values below 0.72 (180 RGB) to avoid overly bright models and unwanted glow. A col map set to (180,180,180) will look grey in Photoshop but appear almost completely white in game. The Post Processing Passes page contains more details on why this happens.
The Albedo Recoloring, PRM, and Skin Materials pages all have demos that demonstrate the effects of editing the model’s albedo color.
Opacity (Alpha)
The alpha channel of the col map controls the opacity of the model. A value of 0.0 is completely transparent, and a value of 1.0 is completely opaque. Values in between 0.0 and 1.0 create a partially transparent effect. Not all materials have alpha blending enabled. See the Transparency page for details.
Col Map Naming Conventions
Col maps tend to follow certain naming conventions. The texture name itself has no impact on how the texture is used.
| Col Texture Name | Usage |
|---|---|
| _b | Default Iris |
| _l | World of Light Enemy Iris (Red) |
| _g | Final Smash Iris (Yellow) |
| _w | Default Eye White |
| _d | World of LIght Enemy Dark Iris (Purple) |
| _wd | World of Light Enemy Dark Eye White |
| alp_ | Hair Color |
| def_ | Main Color |
PRM (Texture6)
PRM maps control most of the important shading parameters for the more physically based materials introduced in Smash Ultimate. The different channels of the PRM maps correspond to four separate textures. The red channel is metalness, the green channel is roughness, the blue channel is ambient occlusion, and the alpha channel is specular. PRM maps work similarly to the inputs to Disney’s principled shader, which is the basis for Blender’s Principled Shader and the shading in many modern games.
PRM Color Channels
Although PRM maps are often very colorful (pink/cyan) when previewed in an image editor, PRM maps do not contain color data. Avoid saving PRM maps as DDS or NUTEXB with sRGB formats. sRGB formats have names that end in _SRGB. When rendering in programs such as Maya or Blender, set the PRM maps to raw, non color data, or linear to ensure the values aren’t gamma corrected.
Metalness (Red)
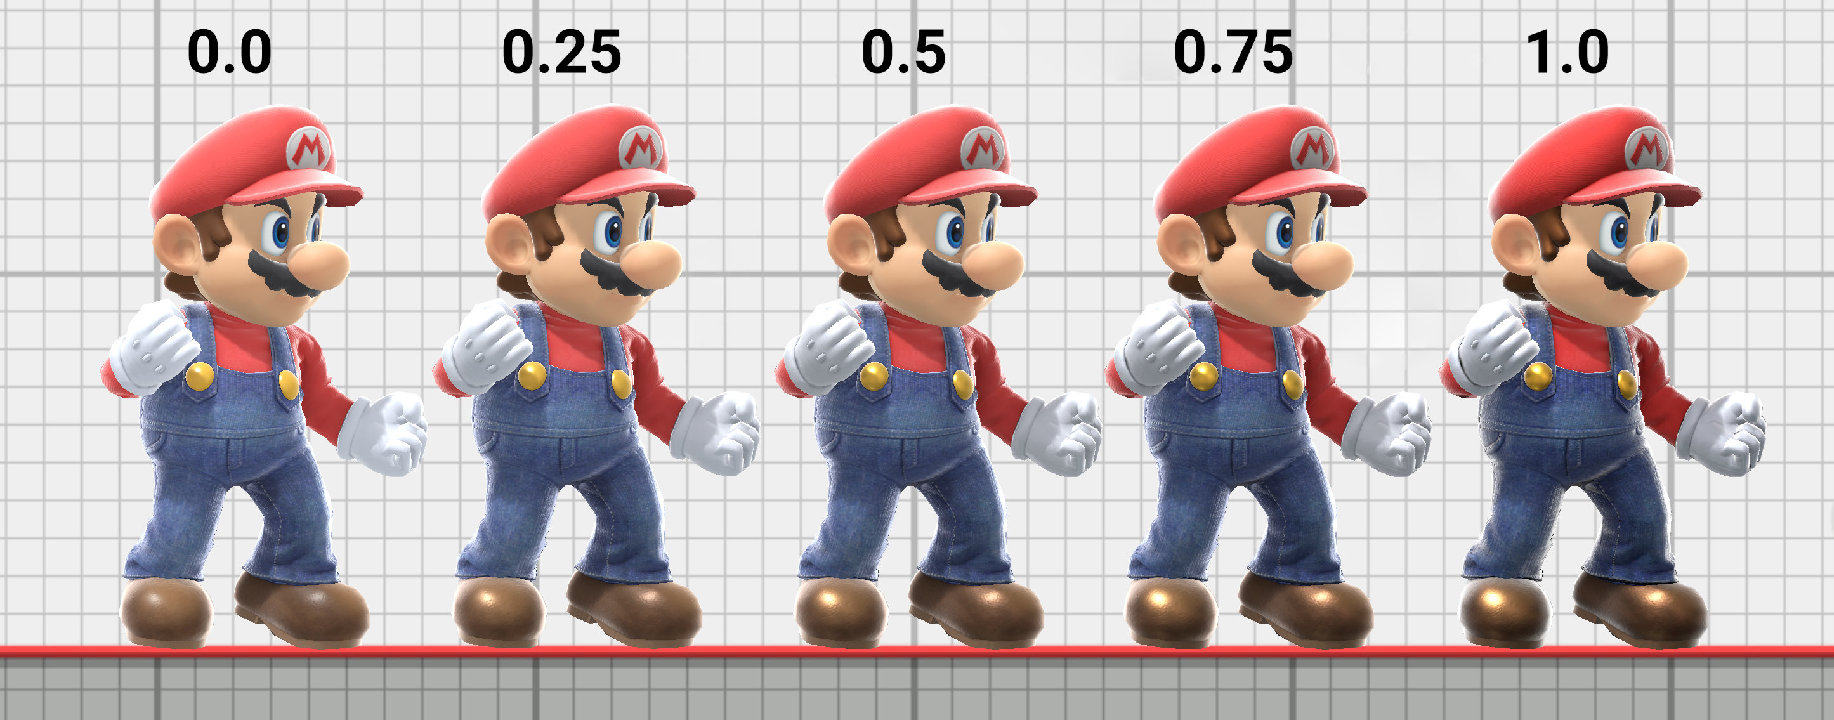 Metalness determines whether a surface is metallic or not and affects both specular and diffuse shading.
In general, materials should be either fully metallic (1.0) or non metallic (0.0).
Values in between 0.0 and 1.0 enable smoother blending between metallic and non metallic regions of a model.
Non metals have a white specular color and the diffuse component is colored by the albedo. The specular intensity for non metals is controlled by the PRM’s specular. Metals have no diffuse component and specular intensity is controlled entirely by albedo. In the demo above, note how the specular highlight becomes closer in color to the albedo color as metalness increases.
Skin materials are a special case and instead use the metalness map as a mask for the fake subsurface scattering effect. See the Skin Materials page for details.
Roughness (Green)
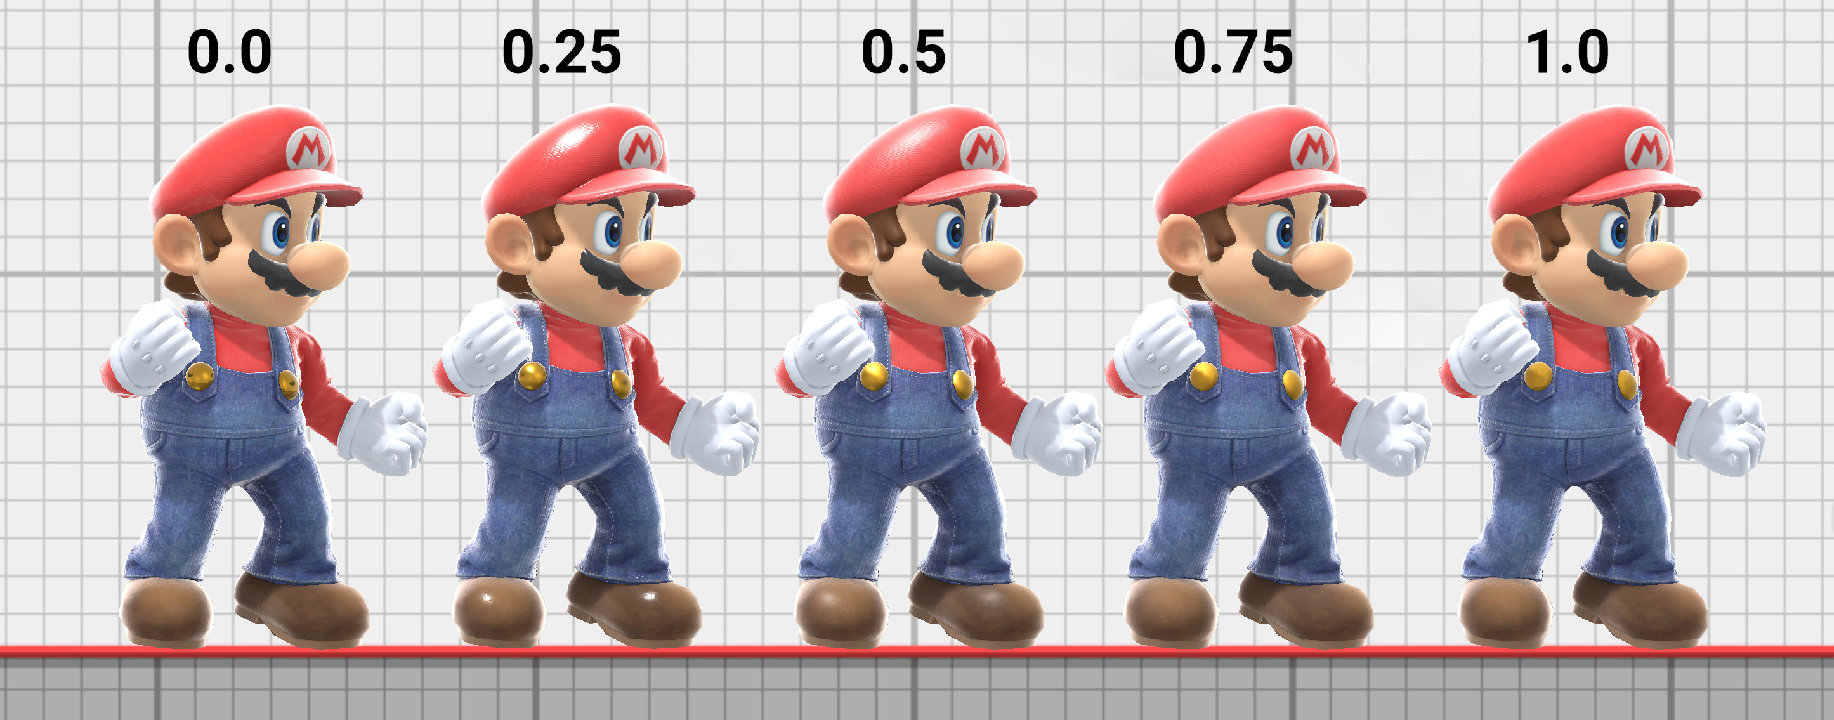 Roughness affects the size of the specular highlight. Rougher surfaces have larger specular highlights than glossy
surfaces.
The environment reflections will look blurrier for larger roughness values for both metals and non metals. This is achieved using a cube map and mipmapping. Higher roughness values use smaller mipmaps, resulting in more even specular lighting. In the demo above, set metalness to 1.0 and experiment with different roughness values.
Physically based surfaces shouldn’t reflect more light than they receive, so larger roughness values make the specular highlight darker to preserve the overall amount of light being reflected. A rough, matte screen, for example, has reflections that are much darker than a glossy screen. Compare roughness values of 0.0, 0.25, 0.5, and 1.0 in the demo above to see the changes in both the size and brightness of the specular highlight.
Ambient Occlusion (Blue)
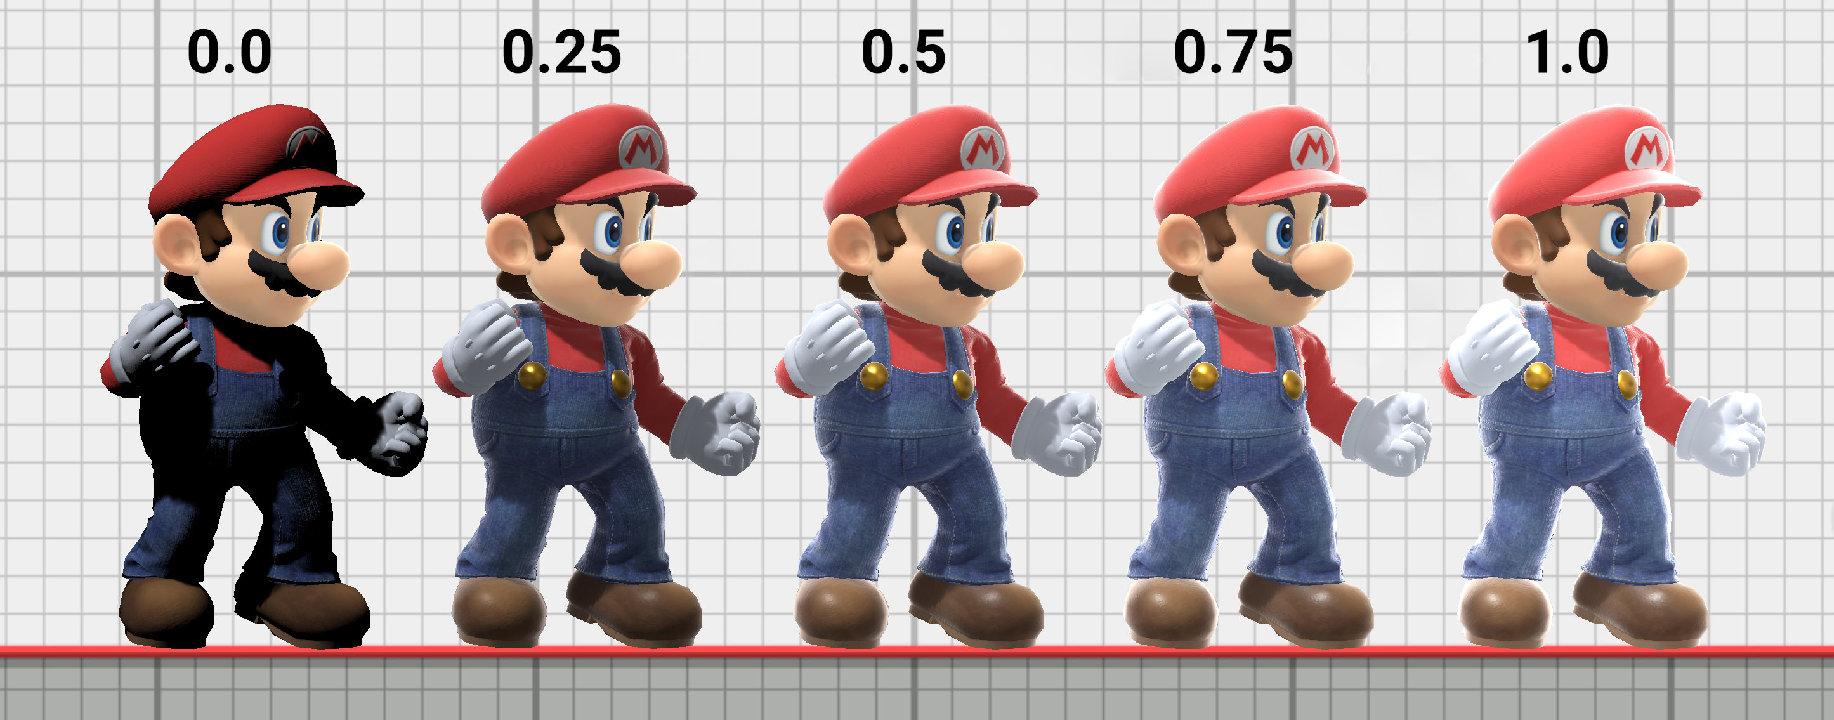 Ambient occlusion maps are a baked approximation of shadows. The “ambient” refers to the soft lighting from the environment such as reflected light from the walls of a room or the sky.
The “occlusion” refers to the darkening effect when light is “occluded” or blocked from reaching the surface. Cracks, crevices, and the corners of walls appear darker than the surrounding surface due to
self shadowing that would be difficult to achieve with realtime shadows. Ambient occlusion maps improves the realism of the model by reducing unwanted ambient diffuse lighting and specular reflections
in certain areas like the backside of a cape or the roof of a character’s mouth.
Ambient occlusion affects the intensity of specular and diffuse ambient lighting. In the demo above, note the differences between setting ambient occlusion to 0.0 for metallic and non metallic materials. Setting ambient occlusion to white (1.0) has no effect.
Specular (Alpha)
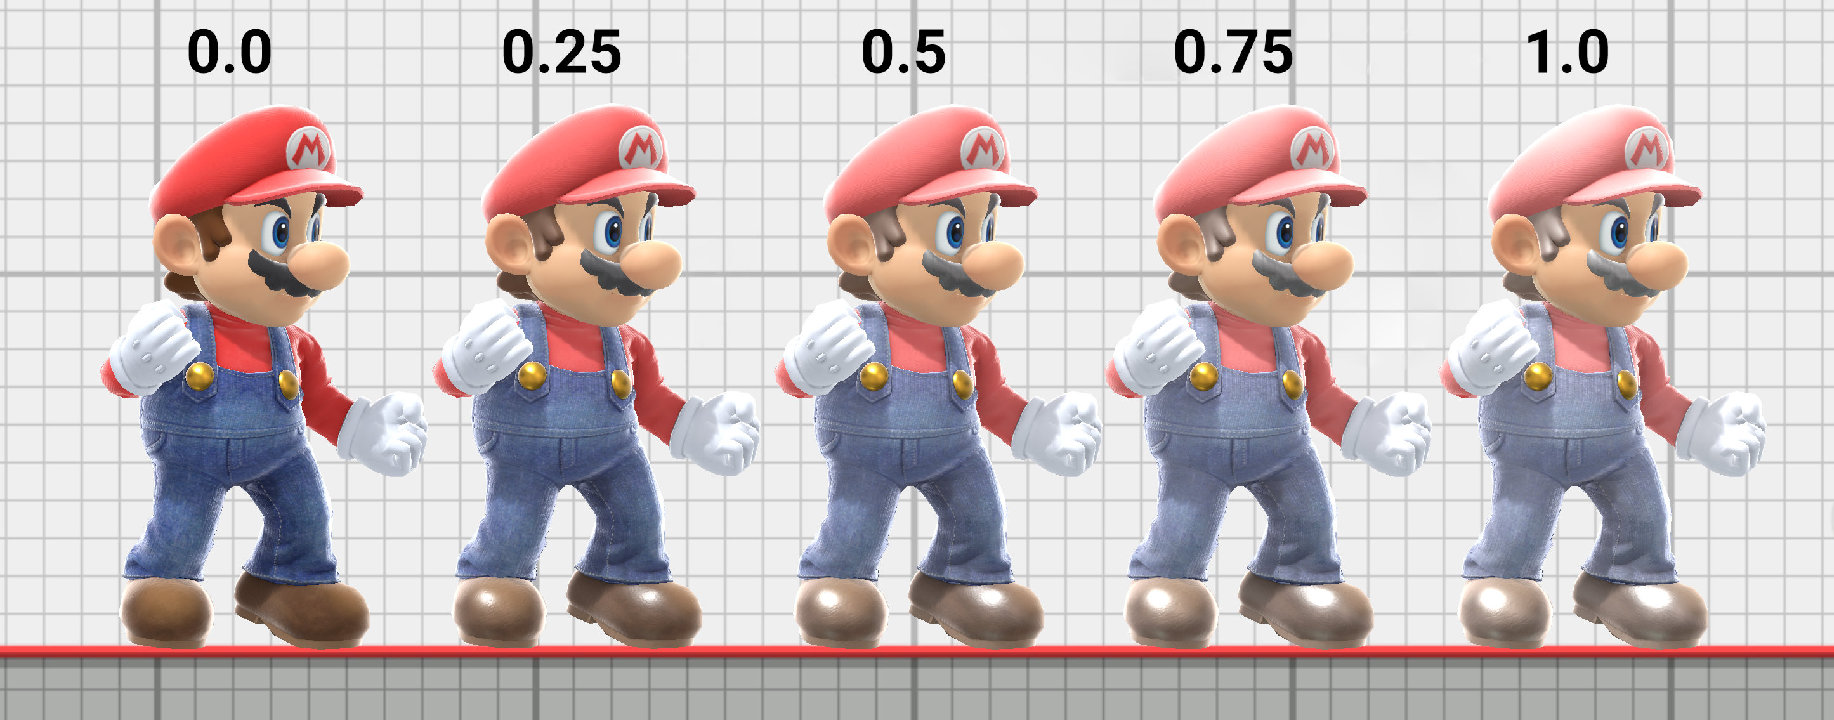 Specular controls the base specular reflectivity of a surface. This effects the intensity of specular highlights and
cube map reflections. The reflectivity always approaches 1.0 at glancing angles. Specular is scaled by 0.2, so a specular value of 0.5
results in a specular reflectivity of 0.1. A reasonable starting value for specular is 0.16 (40 in RGB) to avoid overly bright highlights.

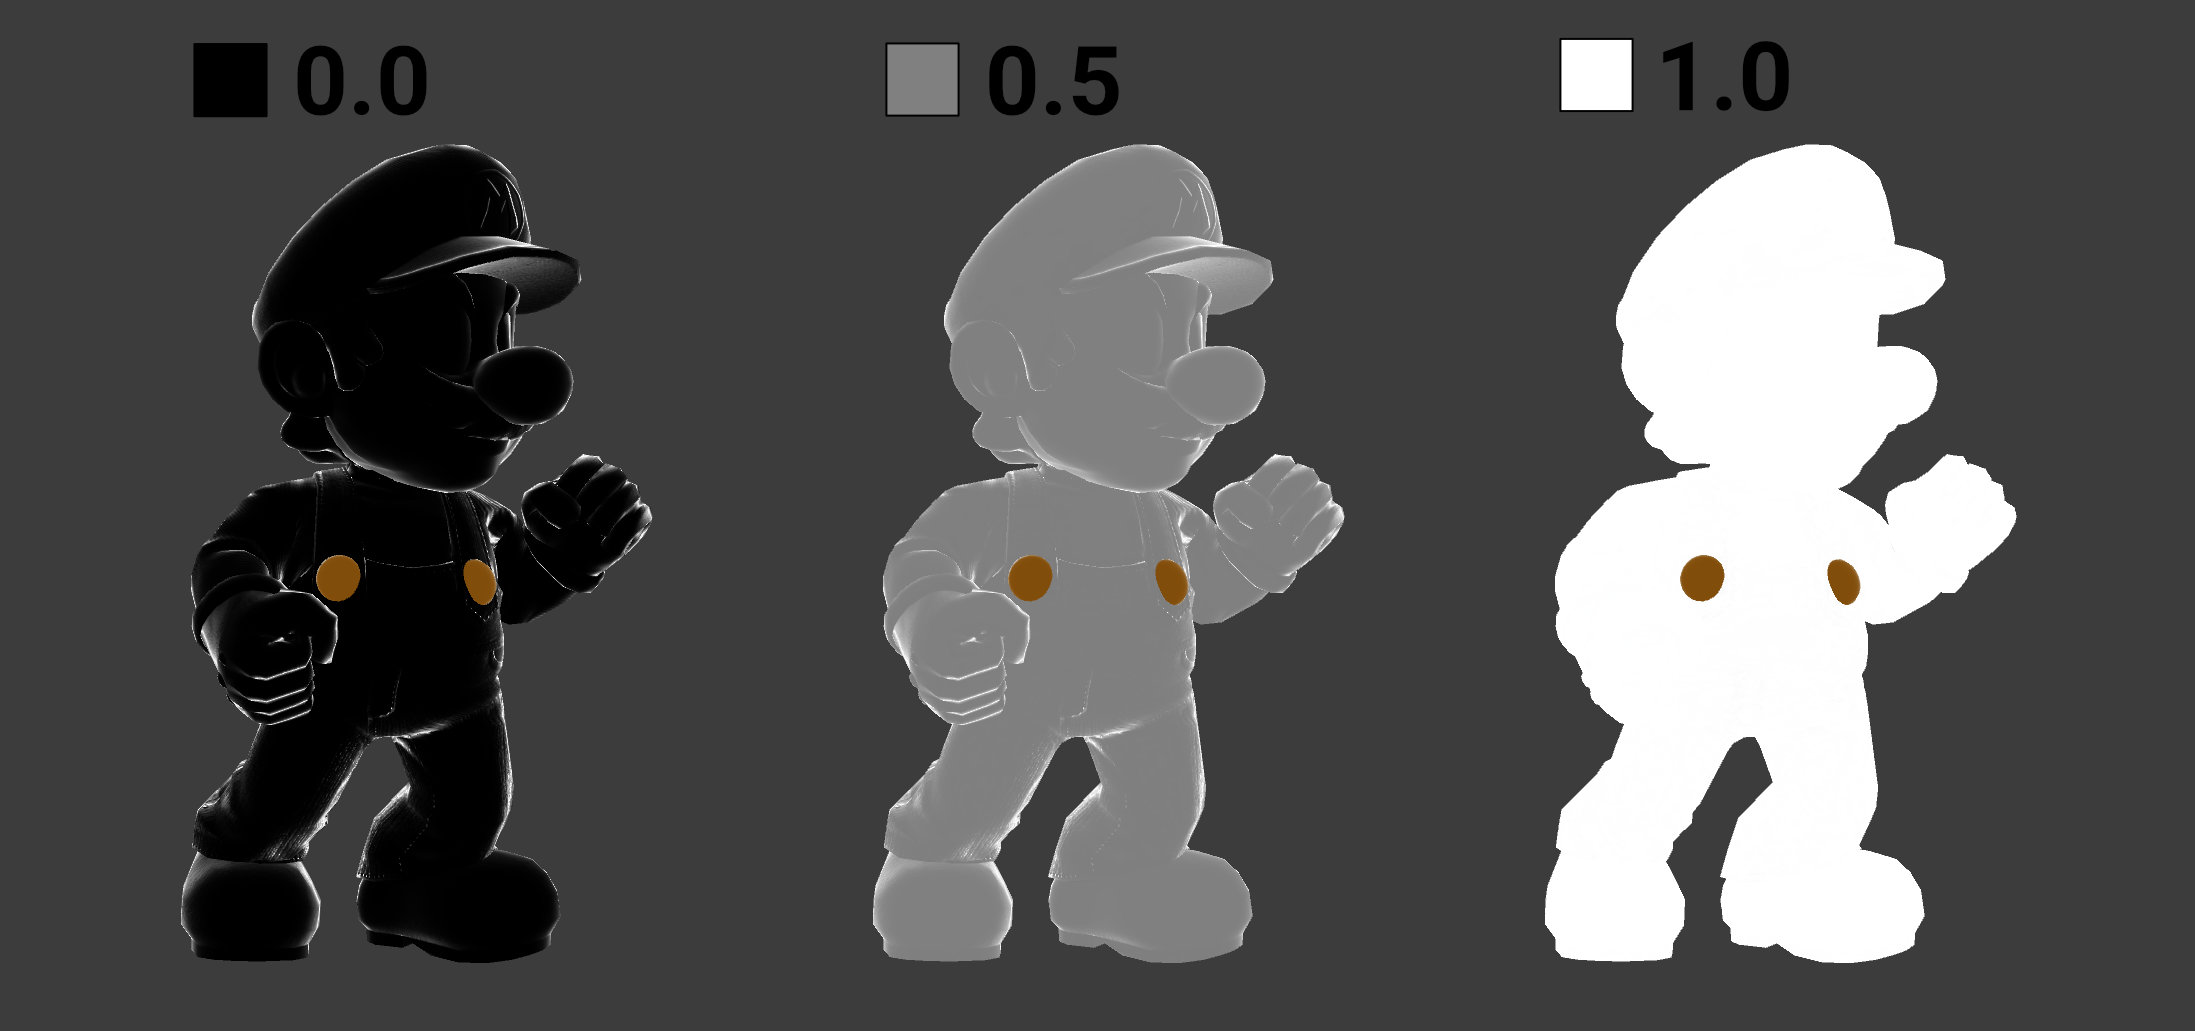
Surfaces in the real world exhibit something called the fresnel effect (pronounced “fre-nel”) where the reflectivity of the surface depends on the angle between the orientation of the surface and the viewing direction. The effect is easiest to see on flat, glossy surfaces such as water or glass. In the below image of Mario, the edges of the model always have reflectance values close to 1.0 regardless of the base specular value from the PRM alpha.
PRM Compatibility Details
PBR textures are rendered slightly differently in different games and applications, so models will look slightly different when PRM maps are used in Blender Cycles or Unreal Engine, for example. This section covers the necessary technical details for accurately adapting PRM maps to work in other sources or adapting PBR textures from other sources to work similarly in Smash Ultimate.
Converting Metalness
PRM metalness maps are generally compatible between different games and applications. Some applications use separate materials for metals like gold or chrome and non metals. In that case, assume anything with a PRM metalness close to 1.0 is fully metallic.
Metalness values between 0.0 and 1.0 in Smash Ultimate are often used to tint the specular color using the albedo color. A similar effect can be achieved by using a non metallic material and tinting the specular color directly. This is called “Specular Tint” in Blender’s Principled Shader.
Skin materials in Smash Ultimate are a special case in that they aren’t actually metallic. Metalness should be set to 0.0 or use a standard non metallic material and use the PRM metalness map to control subsurface scattering intensity. Similarly, maps that mask subsurface scattering can be used as a metalness maps for skin materials in Smash Ultimate.
Converting Roughness
Smash Ultimate squares its roughness values, which is common in other PBR renderers. Use this page as a reference to match roughness values between Smash Ultimate and other PBR textures. Roughness has values between 0.0 and 1.0, so squaring has the biggest impact on on values closer to 0.0. This has the effect of making smooth surfaces much smoother. Squaring roughness can be done in an image editor using a gamma adjustment of 2.0. Similarly, taking the square root of roughness is a gamma adjustment of 0.5.
Smash Ultimate clamps roughness values to 0.01 to avoid dividing by 0.0 in the shader. Roughness of 0.0 is a special case that may be handled differently by different applications. In general, try to use roughness values close to 0.01 instead of 0.0 for extremely smooth surfaces.
Converting Ambient Occlusion
Ambient occlusion can be baked and/or painted by hand. Some games have very dark ambient occlusion maps that may not work well with Smash Ultimate’s lighting. In that case, the original ambient occlusion map can be rebaked, adjusted to be lighter, or set to white (1.0) if the added contrast and depth to shading isn’t required.
Some physically based renderers such as Blender Cycles don’t have shader inputs for ambient occlusion. The shadowing effect of ambient occlusion is already simulated by the simulation of light rays in the scene. If the PRM ambient occlusion map contains detail not present in the model’s geometry (scales, fur, etc), the albedo color can be multiplied by the ambient occlusion to achieve a similar effect.
Converting Specular
Specular defines the reflectance at normal. This may also be referred to as “f0” or “F0” in some applications. The specular values are scaled by 0.2, so a specular of 1.0 in Smash Ultimate corresponds to a reflectance at normal of 0.2 and 0.0 still corresponds to 0.0.
f0 = 0.2 * smashSpecular
Blender Principled Shader Specular
It’s common for applications to define their own specular scale. Smash Ultimate has a specular range of 0% to 20%. Blender’s Principled BSDF has a specular range of 0% to 8%.
Convert Blender Specular to Smash Ultimate
// Blender -> Smash
smashSpecular = blenderSpecular * 0.4
Use a fill layer with color (0,0,40) in HSL or (102,102,102) in RGB set to the multiply blend mode. This is equivalent to dividing by 2.5 or multiplying by 0.4.
- Fill Layer (Multiply)
- Specular
Convert Smash Ultimate Specular to Blender
// Smash -> Blender
blenderSpecular = smashSpecular * 2.5
Image editors don’t support multiplying by colors greater than 1.0 by default. Use a fill layer with color (0,0,40) in HSL or (102,102,102) in RGB set to the divide blend mode instead. This is equivalent to multiplying by 2.5.
- Fill Layer (Divide)
- Specular
If the application doesn’t support the divide blend mode, set the fill layer color to (0,0,60) in HSL or (153,153,153) in RGB.
- Fill Layer (Color Dodge)
- Specular
IOR
Some applications may use IOR (Index of Reflection or Refraction) instead of specular. IOR values can be converted using the following code or by entering IOR or PRM specular values below.
// IOR -> Smash PRM Specular
f0 = ((1 - ior) / (1 + ior)) ^ 2
prmSpecular = f0 / 0.2

// Smash PRM Specular -> IOR
f0 = prmSpecular * 0.2
ior = -(f0 + 1 + 2*sqrt(f0)) / (f0 - 1)
NOR (Texture4)
Similar to PRM maps, NOR maps are actually composed of a few different textures. The red and green channels correspond to the X+ and Y+ direction of the normal map. The blue channel is a transition blend map for material transitions. The alpha channel is a cavity map.
NOR Color Channels
NOR maps do not contain color data despite being stored in a texture. Avoid saving NOR maps as DDS or NUTEXB with sRGB formats. sRGB formats have names that end in _SRGB. When rendering in programs such as Maya or Blender, set the NOR maps to raw, non color data, or linear to ensure the values aren’t gamma corrected.
Normal Map X+, Y+ (Red, Green)
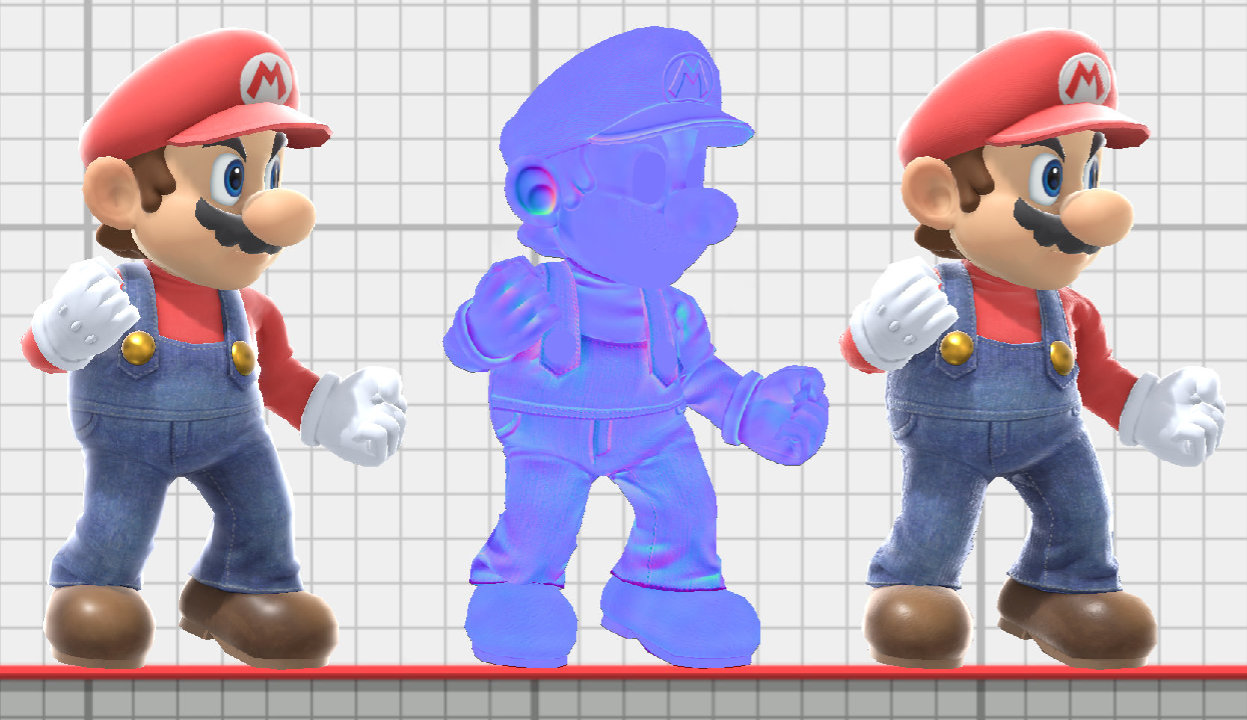
The green channel contains the y component of the tangent space normal. A value of 1.0 is positive y, 0.0 is negative y, and 0.5 has no effect. This is the standard channel layout for OpenGL normal maps, which may also be called “Y+” in some applications. The green channel should be flipped when using normal maps from DirectX or other applications that use Y- for the green channel.
The normal map z component is calculated in the shader using the following calculation.
// Remap the 0 to 1 range of the normal map to -1 to 1.
float x = 2 * norColor.x - 1.0;
float y = 2 * norColor.y - 1.0;
// x*x + y*y + z*z = 1.0
float z = sqrt(1 - (x * x) + (y * y));
// Map back to 0 to 1 range to get the equivalent texture color.
float normalMapZ = z * 0.5 + 0.5;
Transition Blend Map (Blue)
The blue channel contains the transition blend map used for transitioning between materials. See Material Transitions for details and an interactive demo. Some stage models store the z component of the normal map in the NOR blue channel instead of a transition blend map.
Cavity Map (Alpha)
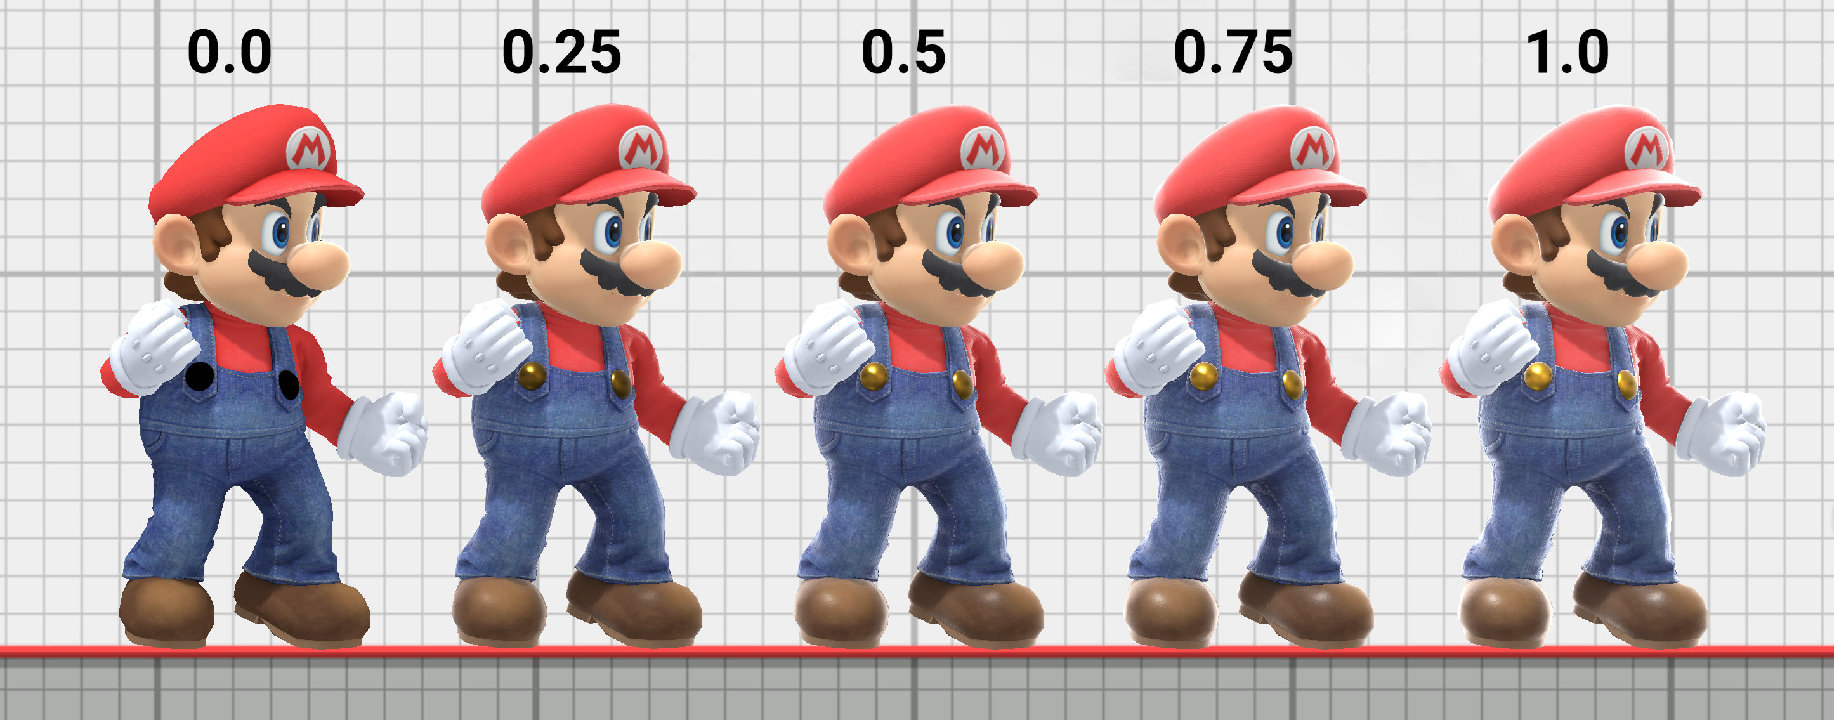 The alpha channel contains the cavity map, which occludes specular reflections and rim lighting.
Unlike the ambient occlusion map in the PRM blue channel, cavity maps do not affect diffuse ambient lighting.
The shaders for some models don’t access the alpha channel of the NOR map, so changing the cavity map may have no effect.
Emi (Texture5, Texture14)
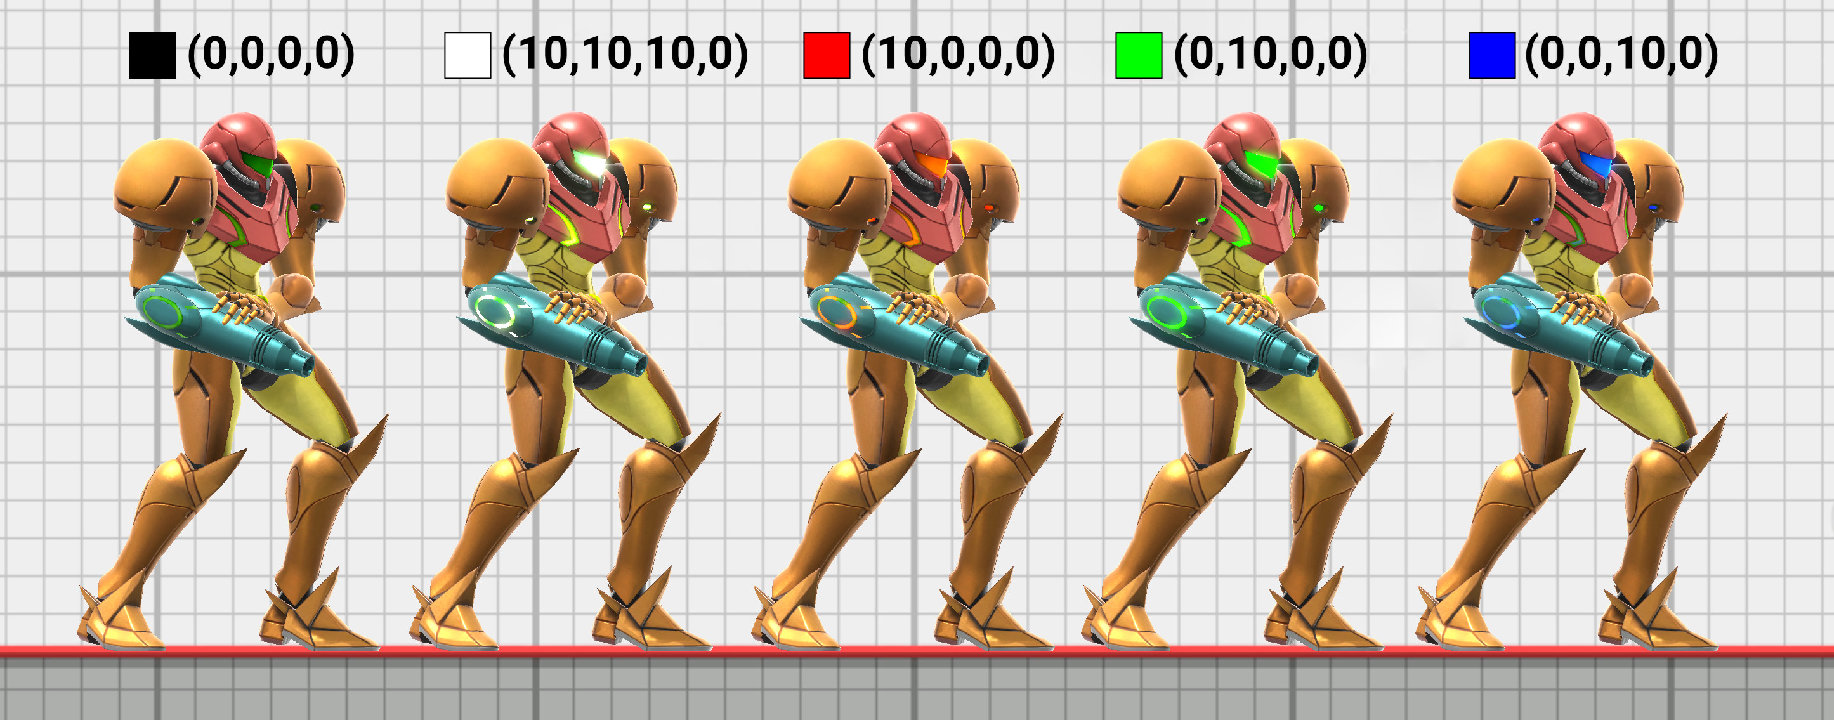
Emissive maps (often abbreviated _emi in texture file names) are used for materials that emit their own light. In Smash Ultimate, these materials don’t actually emit light onto other objects, but emission textures can still be used for lights, glowing patterns, or shadeless materials whose color shouldn’t be affected by lighting.
Emission Color (CustomVector3)
Shadeless Materials
Diffuse Cube (Texture8)
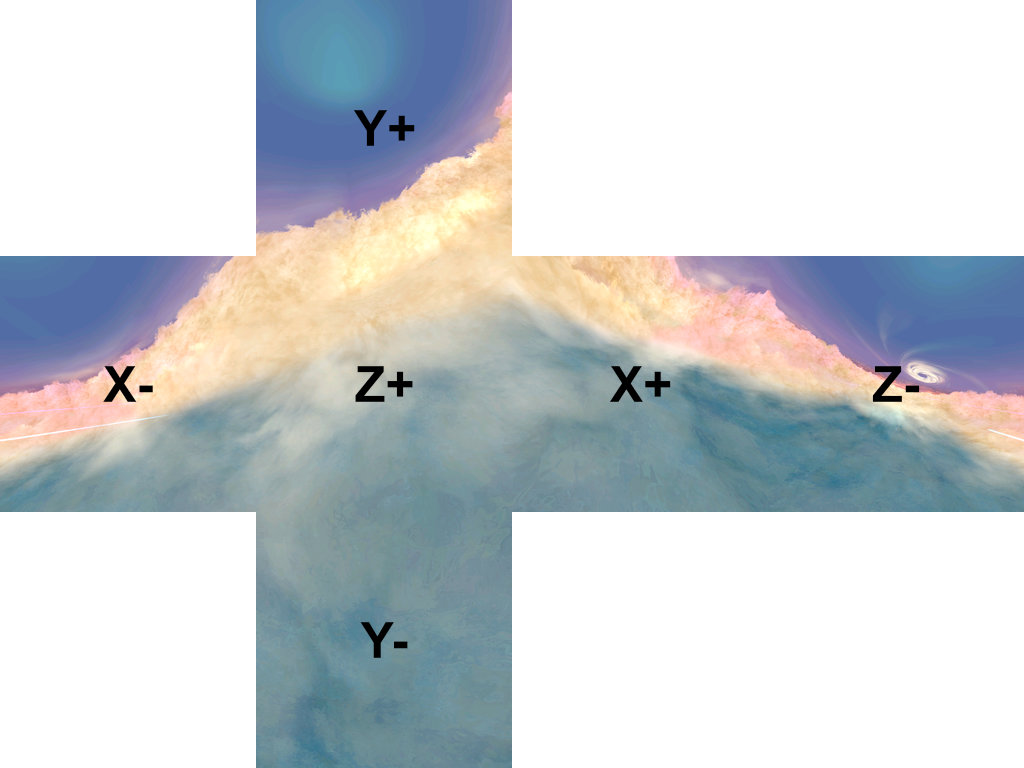
Diffuse cube maps are used for texturing skyboxes such as the stage editor backgrounds or for effects that wouldn’t be possible with traditional texture coordinates such as the galaxy under Rosalina’s dress.
Click and drag on desktop or touch and drag on mobile to orbit the camera in the demo below. Switch between a sphere and cube to see the impact of different geometry on the resulting reflections.
Diffuse Cube Map Channels
Color (RGB)
The RGB color of the diffuse cube map is used to determine the model’s color. Diffuse cube map materials aren’t completely shadeless, but the final color is mostly determined by the cube map color.
Specular Cube (Texture7)
Specular cube maps simulate the specular reflections of a model’s environment. Each stage has its own cube map for specular reflections that can be accessed from materials as the special value “#replace_cubemap”. Specular cube maps can also use cube maps in the model folder for special effects that don’t vary between stages similar to diffuse cube maps.
Specular Roughness
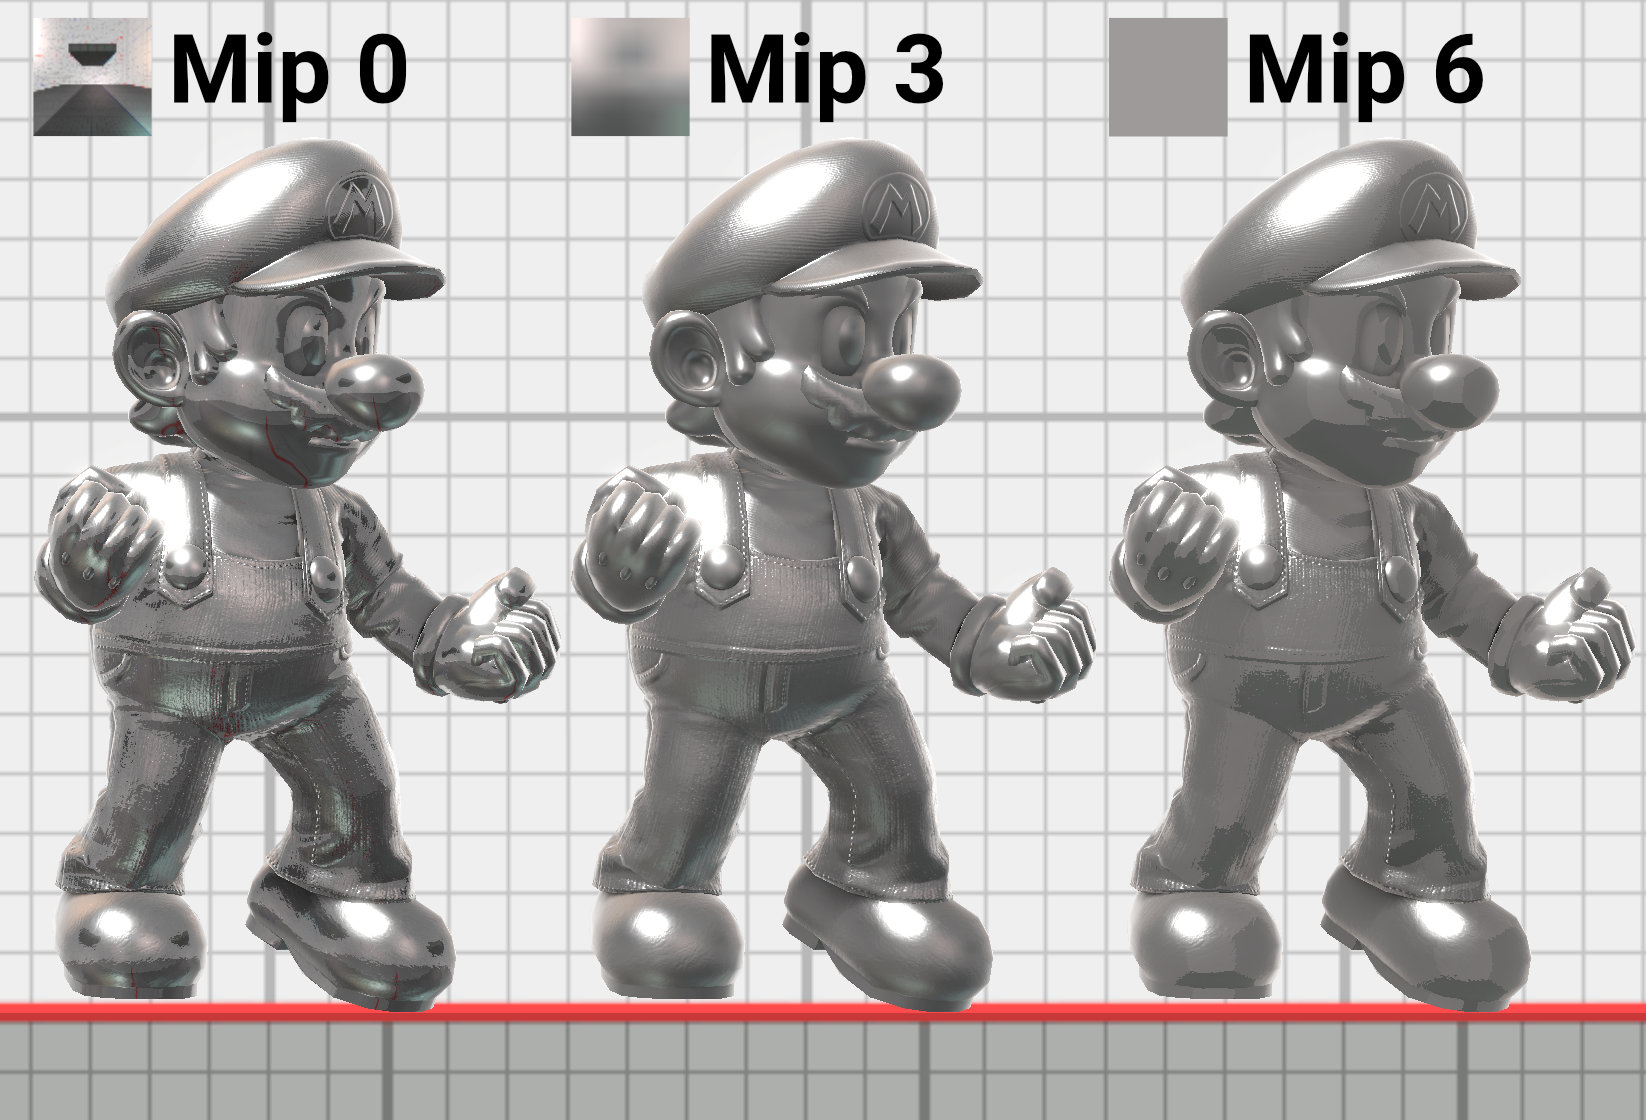
Unlike normal cube map textures, specular cube maps have mipmaps. The mipmaps simulate the appearance of environment reflections at different roughness levels. Stage cube maps are typically 64x64 pixels. The base mipmap is the full 64x64 pixels and corresponds to the detailed reflections for a roughness of 0.. The last mipmap has a size of 1x1 and simulates the blurry reflections for a roughness of 1.0. Roughness values in between 0 and 1 blend between mip levels to create appropriately detailed or blurry reflections.
The actual conversion from PRM roughness to the mip level accessed from the cube map is shown below. This creates a smooth curve from the base mipmap at a roughness of 0.0 to the smallest mipmap at a roughness of 1.0.
float RoughnessToLod(float roughness) {
    // Applies a curves adjustment to roughness.
    // Clamp roughness to avoid divide by 0.
    float r = max(roughness, 0.01);
    float r2 = r * r;
    return log2((1.0 / r2) * 2.0 - 2.0) * -0.4545 + 4.0;
}
HDR Texture Formats
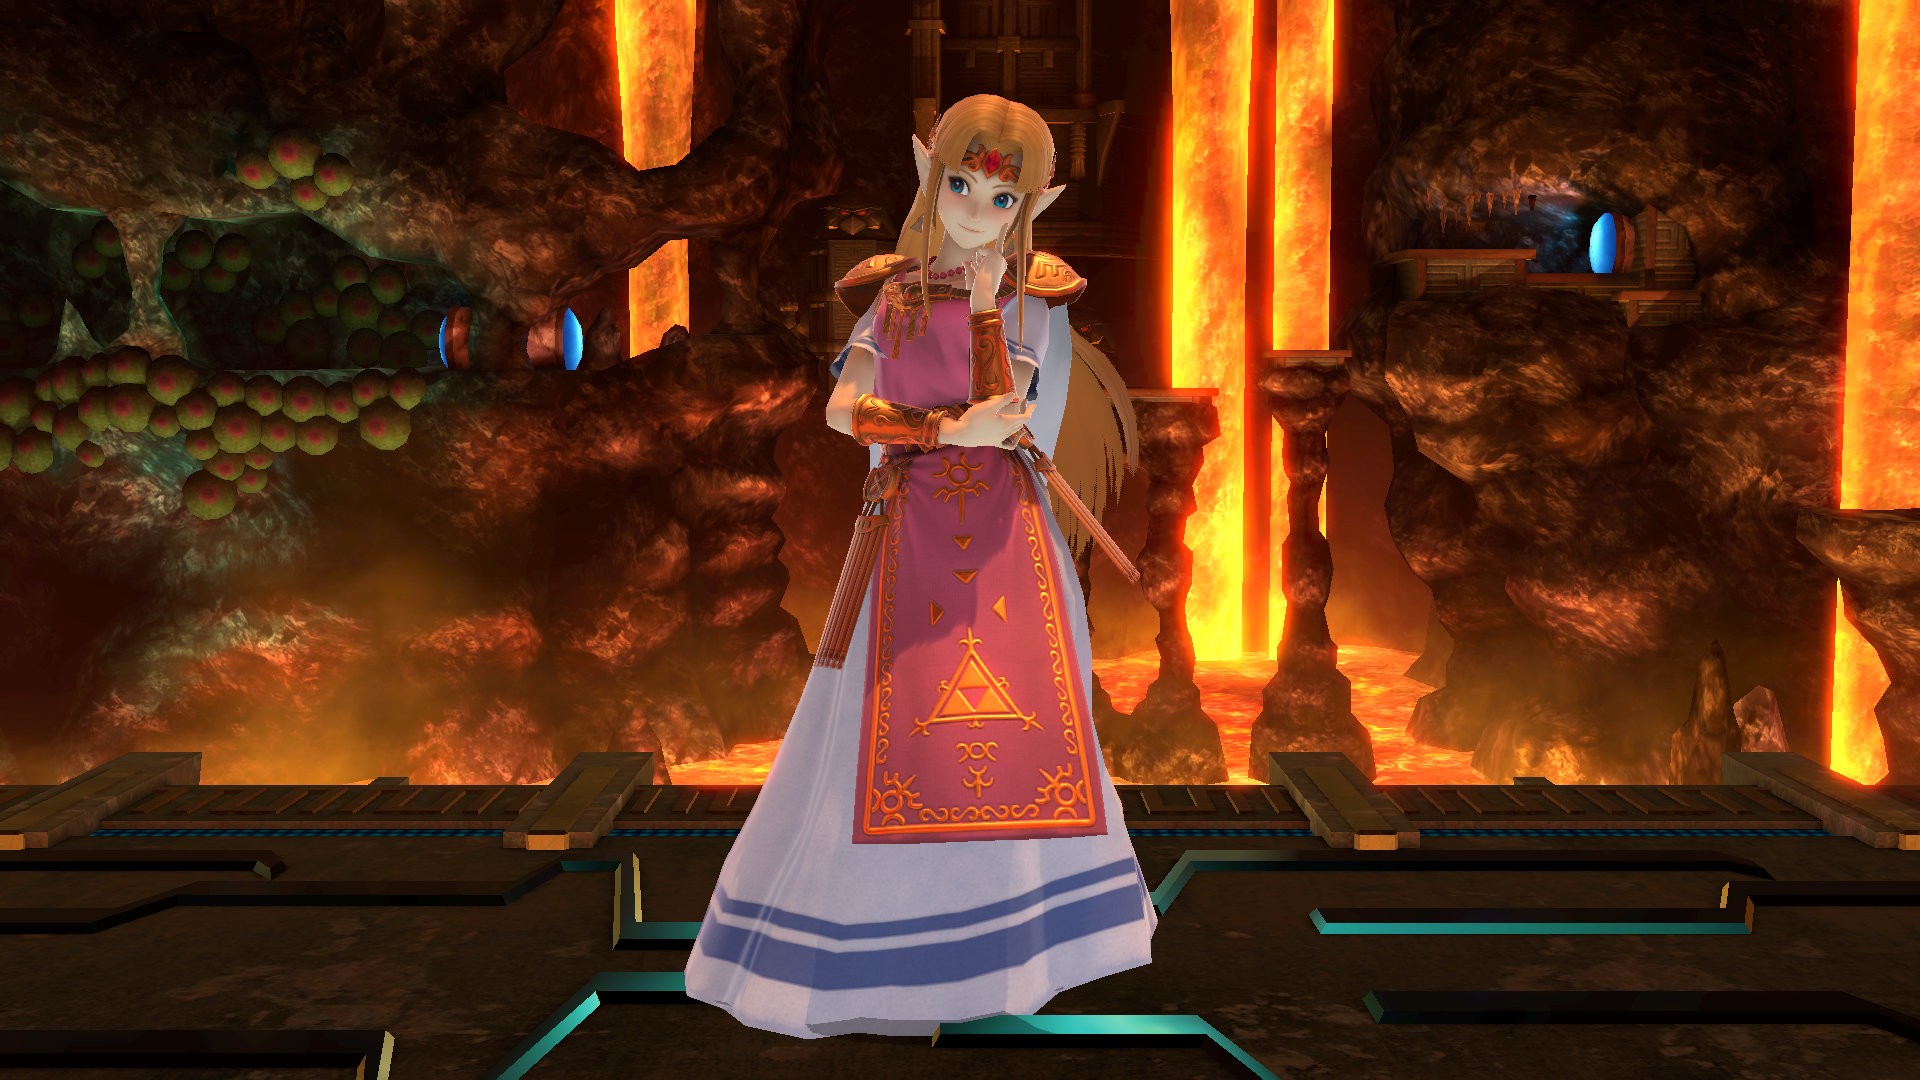
For best results, specular cube maps should use floating point formats like BC6UFloat since they can encode HDR (high dynamic range) lighting data. This gives improved lighting quality when used with PBR materials like in Smash Ultimate. Floating point cube maps can achieve similar quality to an HDRI in Maya or Blender. Specular cube maps in Smash Ultimate do not affect diffuse lighting, however. Note the more vivid reflections in the armor in the demo above when using an HDR format that supports colors brighter than 1.0.
Creating Specular Cube Maps - WIP
The base mip level can be baked using traditional methods for creating cube maps. The mip levels should be not created by hand and must be generated by an appropriate tool to create accurate results.
Limitations
Materials in Smash Ultimate can only reference a single stage specific cube map at a time using the “#replace_cubemap” value. This means the lighting will only be correct for the single point in space used to bake the cube map. Stage models can use their own model specific cube maps to improve the accuracy of the reflections. This doesn’t benefit models that appear on multiple stages like fighters or items.
The floating point format used for HDR lighting improves lighting quality at the cost of greatly increased file sizes. Attempting to increase the cube map size beyond 64x64 may cause memory and stability issues in graphically demanding scenarios. Note that cube map resolution mostly affects materials with low roughness values, since rough surfaces will use higher mip levels with smaller dimensions.
Baked Lighting (Texture9)
Baked lighting maps store precalculated diffuse lighting and shadows for stages.
Like ambient occlusion maps, these maps use the bake1 UVs to assign each part of the model to a unique part of the texture. The bake1 UVs can be easily generated in modeling programs like Blender using automatic UV unwrapping algorithms.
Baked Lighting Channels
Baked lighting maps contain color data, so they should be saved with sRGB formats. sRGB formats have names that end in _SRGB. When rendering in programs such as Maya or Blender, set the baked lighting maps to Color, sRGB, etc to ensure they are properly gamma corrected. Failing to use an sRGB format will result in the textures being too bright and looking washed out.
Ambient Diffuse Lighting (RGB)
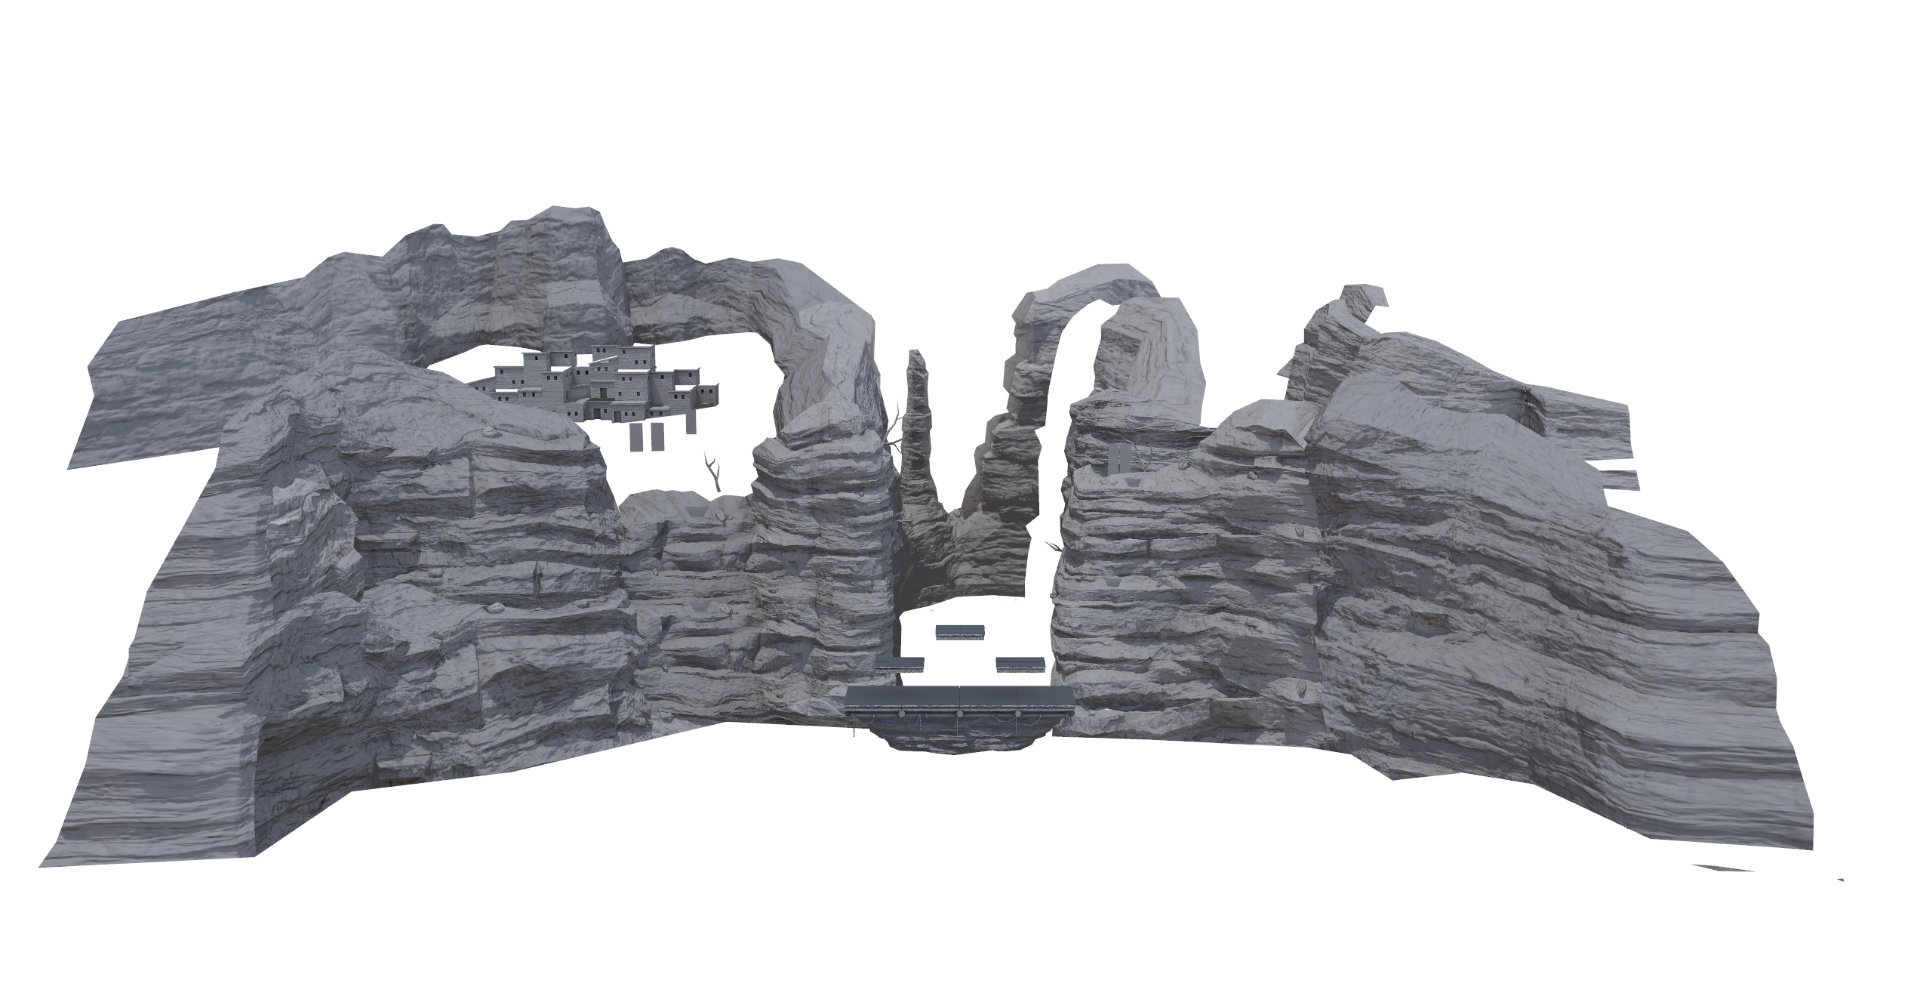
The RGB values are multiplied by 8.0, which allows storing lighting intensities much higher than 1.0 in a standard 8 bits per channel image at the cost of precision. The ambient lighting from the baked lighting maps is not affected by ambient occlusion from PRM maps.
Shadows (Alpha)
The alpha channel masks or occludes the direct lighting, so an alpha value of 0.0 will have no direct lighting and appear to be in shadow. The alpha channel is not scaled like the RGB channels.
Gamma Correction
The shader programs used to draw the character models, stages, and even the UI elements perform almost all of their calculations in floating point. Floating point numbers can store numbers with a range of intensities at high precision such as 0.5, 1.0003, etc.
Image textures, on the other hand, typically use 8 bit unsigned integers for each color channel (similar to HTML/Hex colors) to save space compared to the 32 bits required to store a floating point number. The integer values in the texture are converted to floating point values based on the texture’s format.
Recommended Formats
The texture format must match the type of data stored in the texture for the texture to render correctly in game.
| Texture | Format |
|---|---|
| Col (Texture0,Texture1) | sRGB |
| NOR (Texture4) | Unorm |
| PRM (Texture6) | Unorm |
| Diffuse Cube Map (Texture8) | sRGB |
| Diffuse Map (Texture10,Texture11,Texture12) | sRGB |
| EMI (Texture5/Texture14) | sRGB |
| Chara UI | sRGB1 |
Manual Gamma Correction Hacks
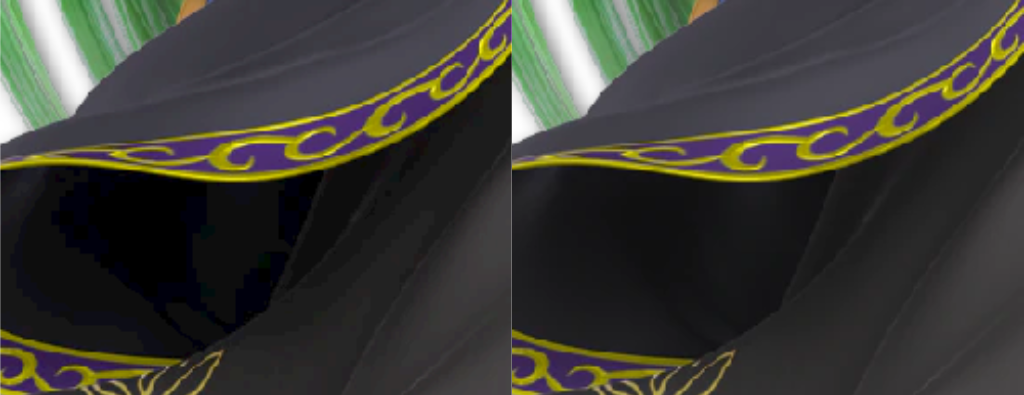
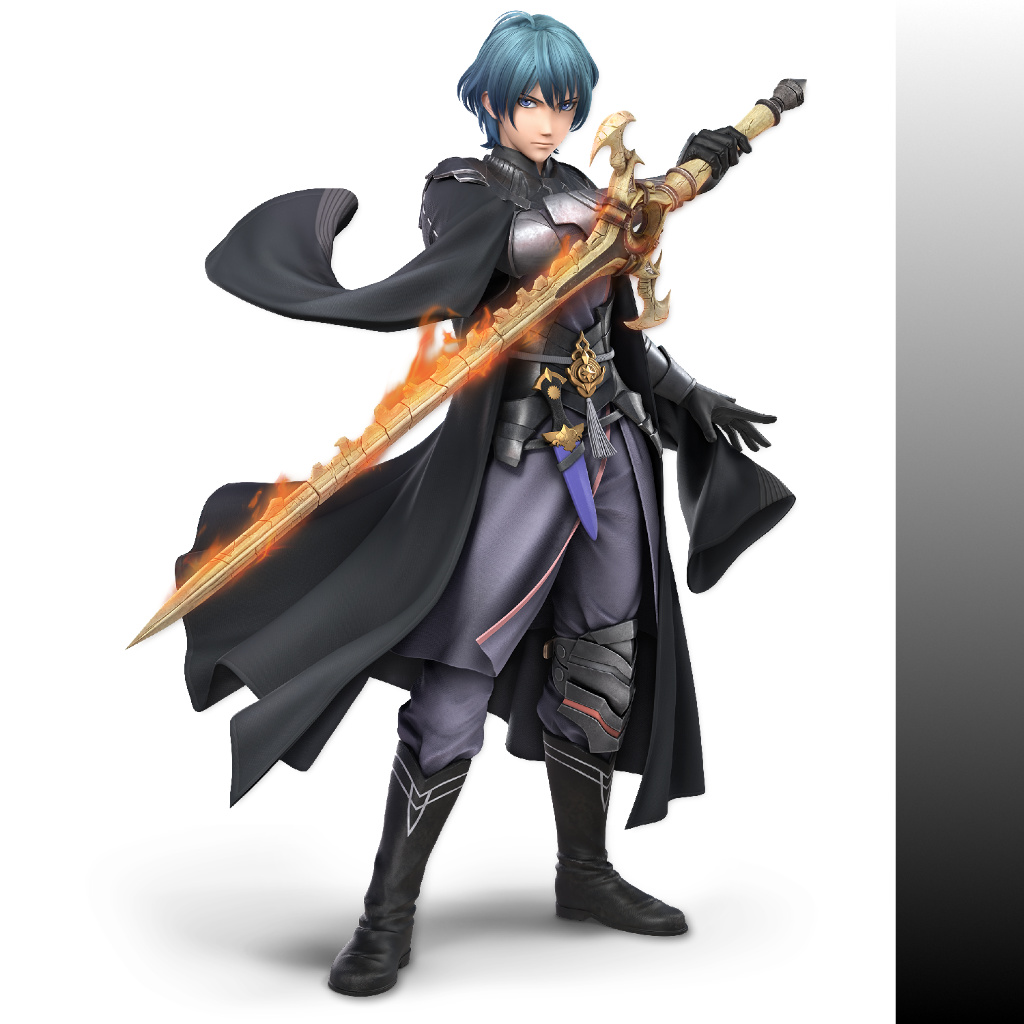
The in game UI texture files use the unorm (linear) format and store already gamma corrected pixel intensities. This results in noticeable visual quality loss compared to using an sRGB format. The blocky regions of identical pixel values are more easily compressed, so the final compressed file size is smaller. There is no change in the image file size before compression. UI textures should be saved using SRGB unless the compressed size needs to match the original file’s compressed size.
Avoid trying to “fix” the texture gamma manually in an image editor. The inverse sRGB adjustment applied before the final color is displayed on screen is not the same as a gamma adjustment of (1.0 / 2.2), so the final color will not be correct if the texture was darkened using a gamma of 2.2 and saved as unorm. The result after applying a gamma or levels adjustment is still only stored using 8 bits per color channel, which produces noticeable banding artifacts in game such as in the above image. The artifacts caused by manually gamma correcting textures but saving as a linear format is most noticeable in darker tones on compressed textures. Saving the texture using an sRGB format performs the correct gamma conversion using floating point and won’t introduce any noticeable quality loss.
Texture Formats
The texture’s format tells the game how to interpret the texture’s data for use in the shaders. The format should match the type of data stored in the texture and it’s intended usage. Changing the format modifier at the end of the format name such as “BC7_SRGB” vs “BC7_UNORM” just indicates how to convert the texture values to float and does not change the texture data or file size. The process of converting the integer values to floating point is called normalization. See the OpenGL wiki’s normalized integer page for technical details.
Textures need to be saved with the correct format to appear correctly in game. Saving with the wrong format will result in the texture appearing too bright or too dark in game. The full format depends on the compression type being used and if the texture has alpha.
sRGB
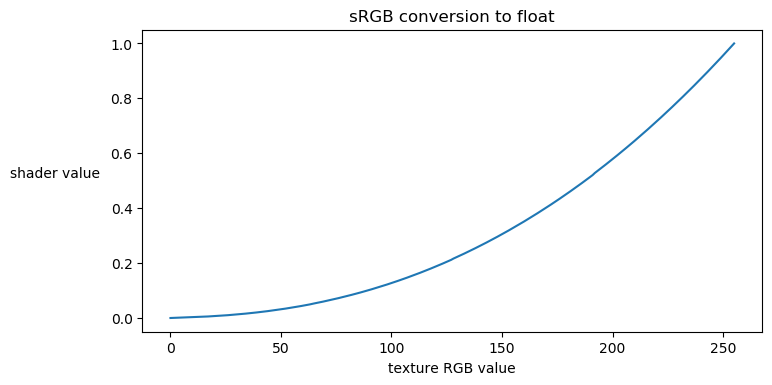
Textures with sRGB formats store nonlinear color data. The texture values are converted to linear floating point values in the range 0.0 to 1.0 using the sRGB transfer function. The conversion from the sRGB texture values directly to floating point doesn’t introduce any of the artifacts caused by applying the adjustment manually in an image editor.
Smash Ultimate uses the sRGB format for storing the final color to be displayed on screen, so textures storing color data should also use a format with “sRGB” as part of the format name.
Unorm (Unsigned Normalized / Linear / Linear Unsigned)
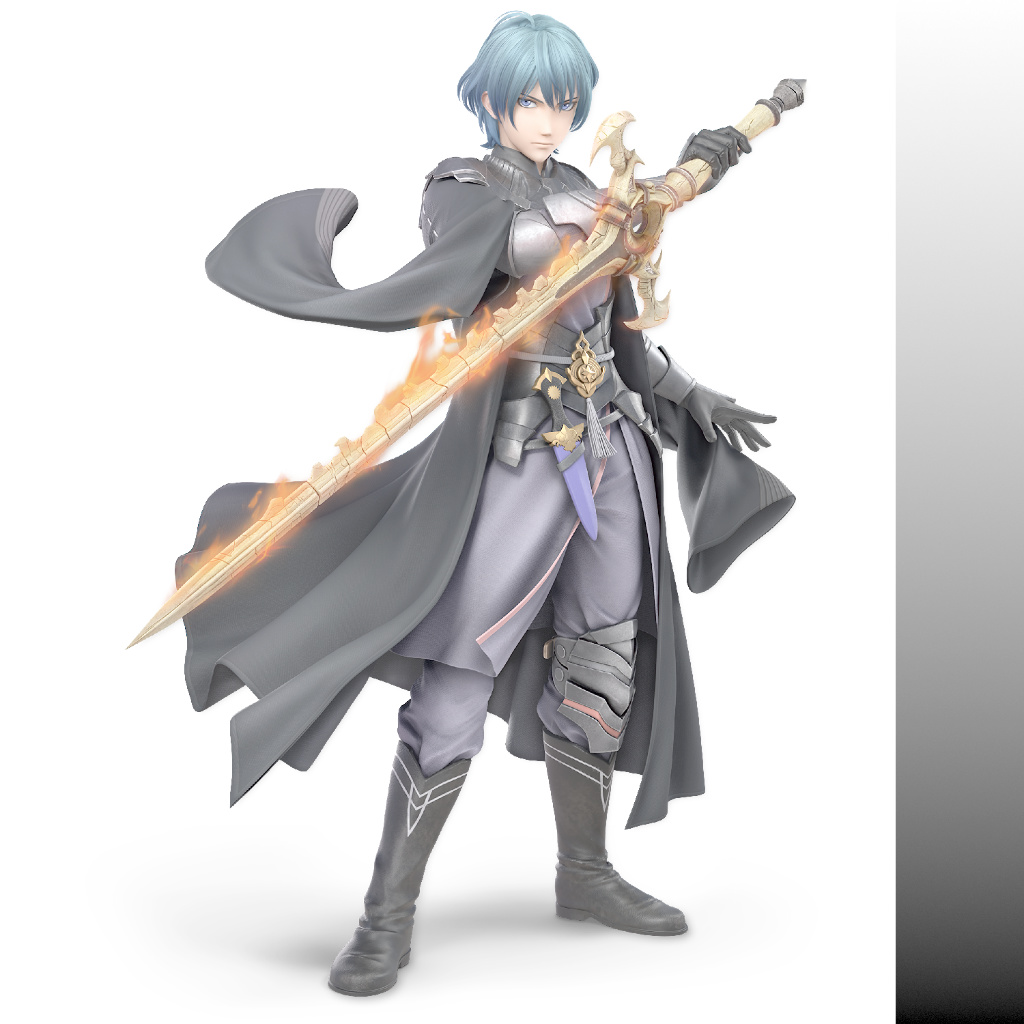
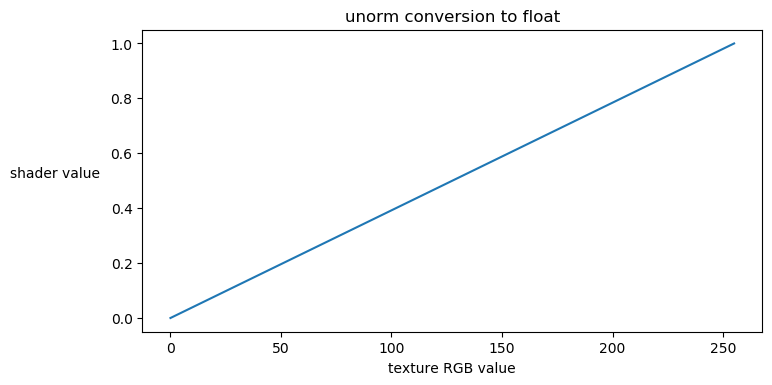
Textures with unorm formats store linear data and are converted to floating point by simply dividing by the type’s max value. 8 bit values are divided by 255, 16 bit values are divided by 16355, etc. This converts unsigned integer values to floating point values in the range 0.0 to 1.0. Textures that don’t store color data, such as NOR maps and PRM maps, must be saved as unorm to render correctly in game.
Snorm (Signed Normalized / Linear Signed)
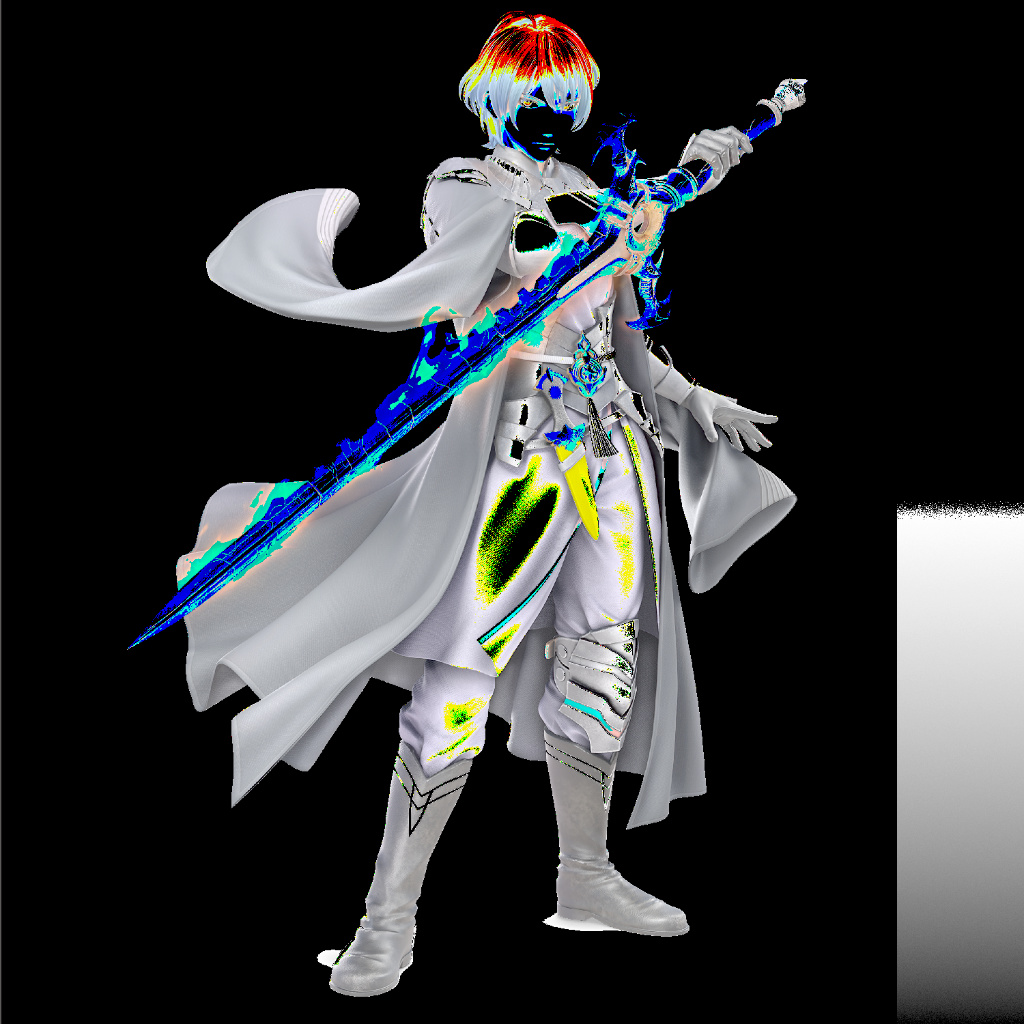
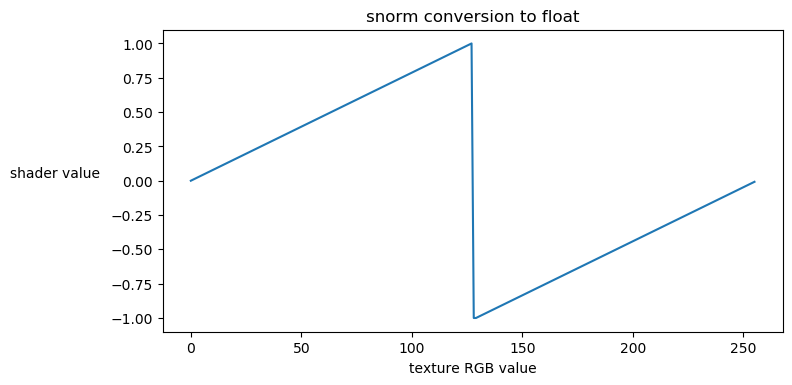
Textures with snorm formats are converted to floating point values in the range -1.0 to 1.0. These formats aren’t as common as unorm or sRGB.
Vertex Attributes
Vertices in Smash Ultimate contain multiple attributes. Every mesh requires Position0, Tangent0, and Normal0. Additional attributes are required by some shaders for certain effects like texture mapping or baked lighting. For a brief overview of all the types of attributes, see the GitHub repository’s Vertex Attributes
Attribute Errors (Yellow Checkerboard)
Smash Ultimate has builtin error handling for cases when a mesh is required attributes for rendering. Each object in a mesh should have a material assigned in the model.numdlb. This assigned material has an assigned shader based on the shader label attribute. The shader is compiled code that runs on the GPU and expects certain attributes to be present. If the game detects that any of these attributes are missing, a yellow checkerboard is rendered instead.
Meshes should be checked in SSBH Editor for potential missing attributes. The application displays warnings if attributes are missing and provide an easy way to add default values for missing attributes if necessary. Missing attributes can also be fixed by using a shader that doesn’t require those attributes or adding the attributes in a model editor like Blender and exporting the model.numshb again.
Vertex Attributes
Position0
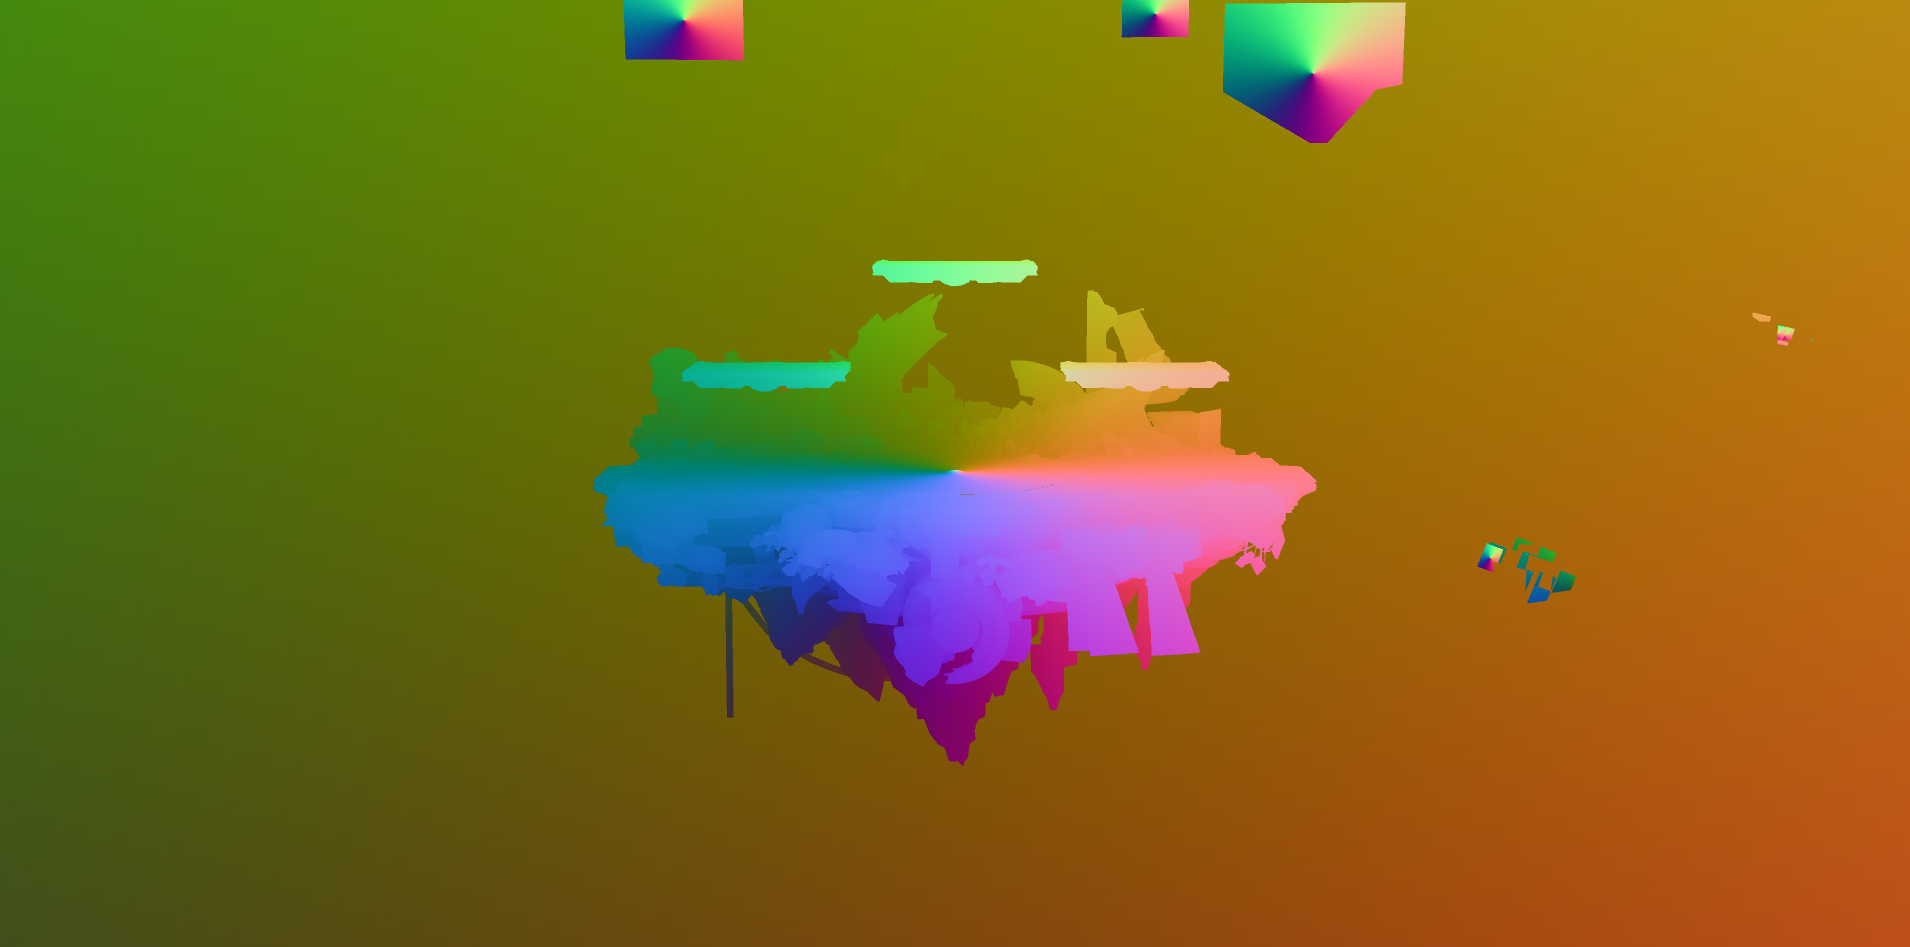 The XYZ components of the Position0 attribute contain the positions of a vertex in object space. Displaying positions as RGB colors using the same technique used for displaying vertex normals creates a colorful visualization. Note how the colors meet at a single point for each object. Object space defines vertex positions relative to the origin point of the object.
Normal0
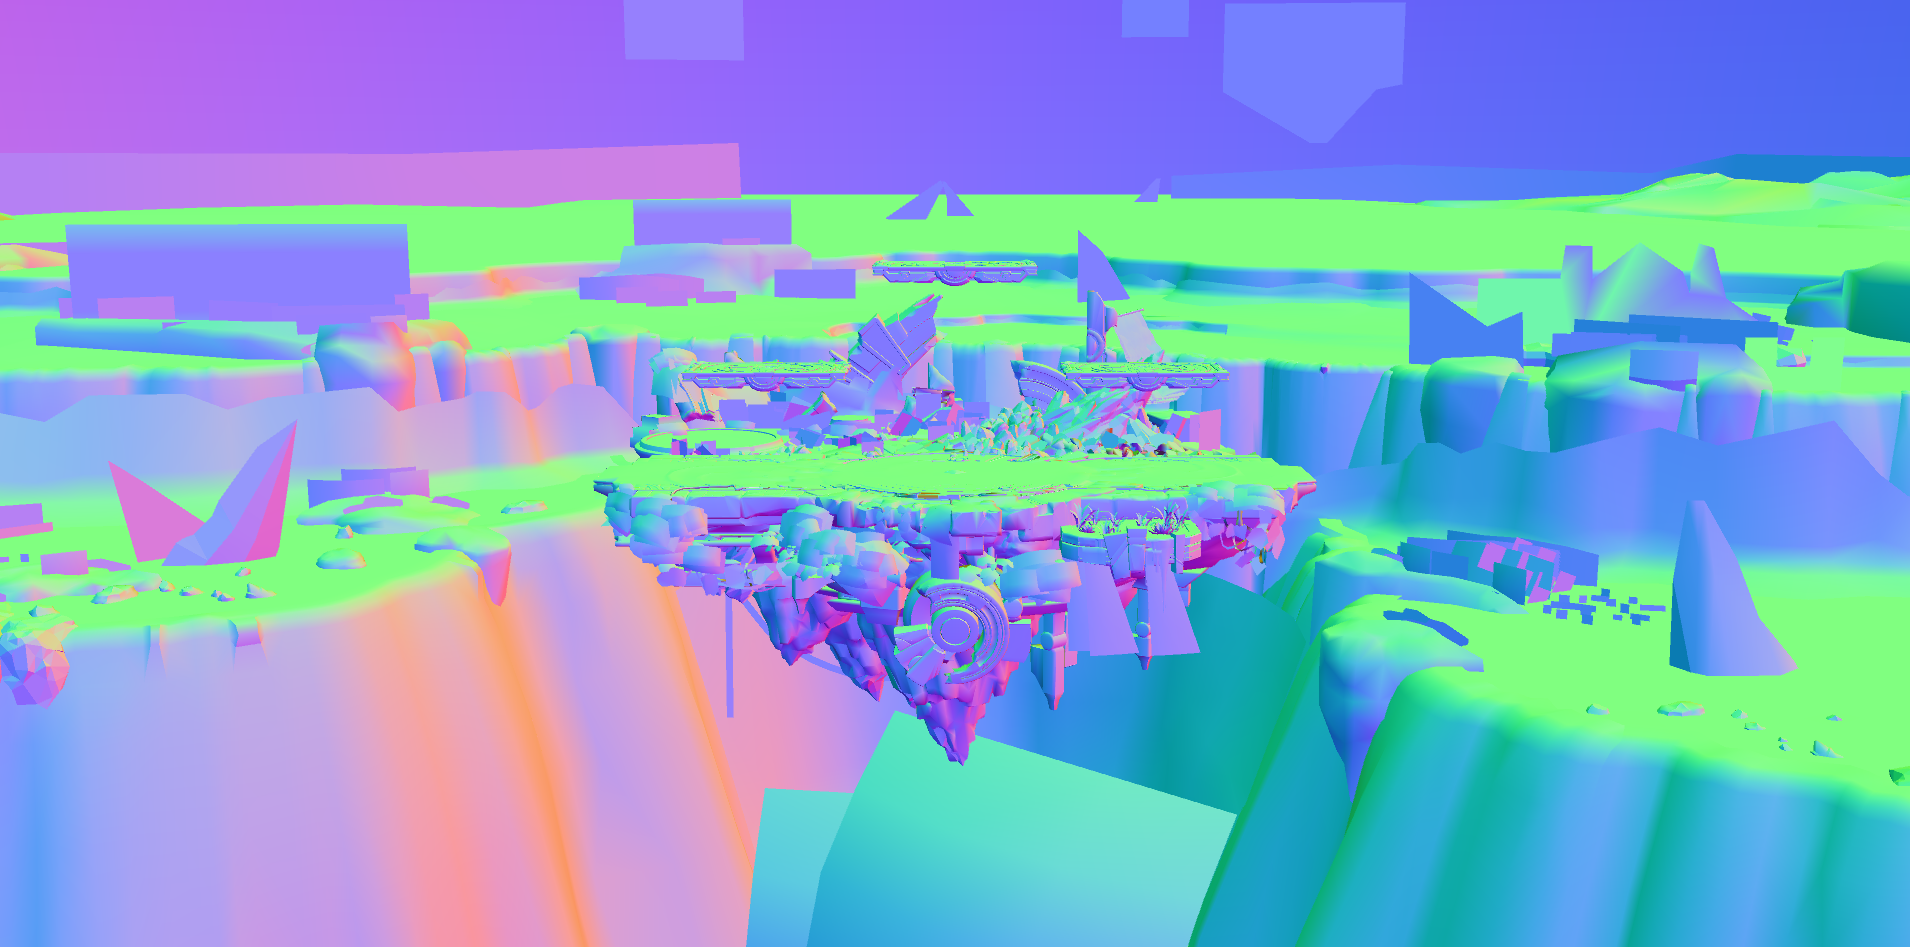 The XYZ components of the Normal0 attribute contain the vertex normal that define the orientation of a surface. The vertex normal is critical for calculating the shading for a surface based on lights, materials, and other properties. The screenshot above shows the Normal0 attribute values for the Battlefield stage.
Vertex normals are direction vectors and not colors. These vectors often contain floating point values that can’t be directly displayed as a color like negative numbers. One approach to visualize vertex normals like in the screenshot above is to scale the XYZ values into the 0.0 to 1.0 range and interpret the XYZ values as RGB colors. Surfaces that point up have a positive Y component and display as green. Surfaces the point right have a positive X component and display as red. Surfaces that point towards the viewer have a positive Z component and display as blue. Other orientations display as some combination of red, green, and blue.
Tangent0
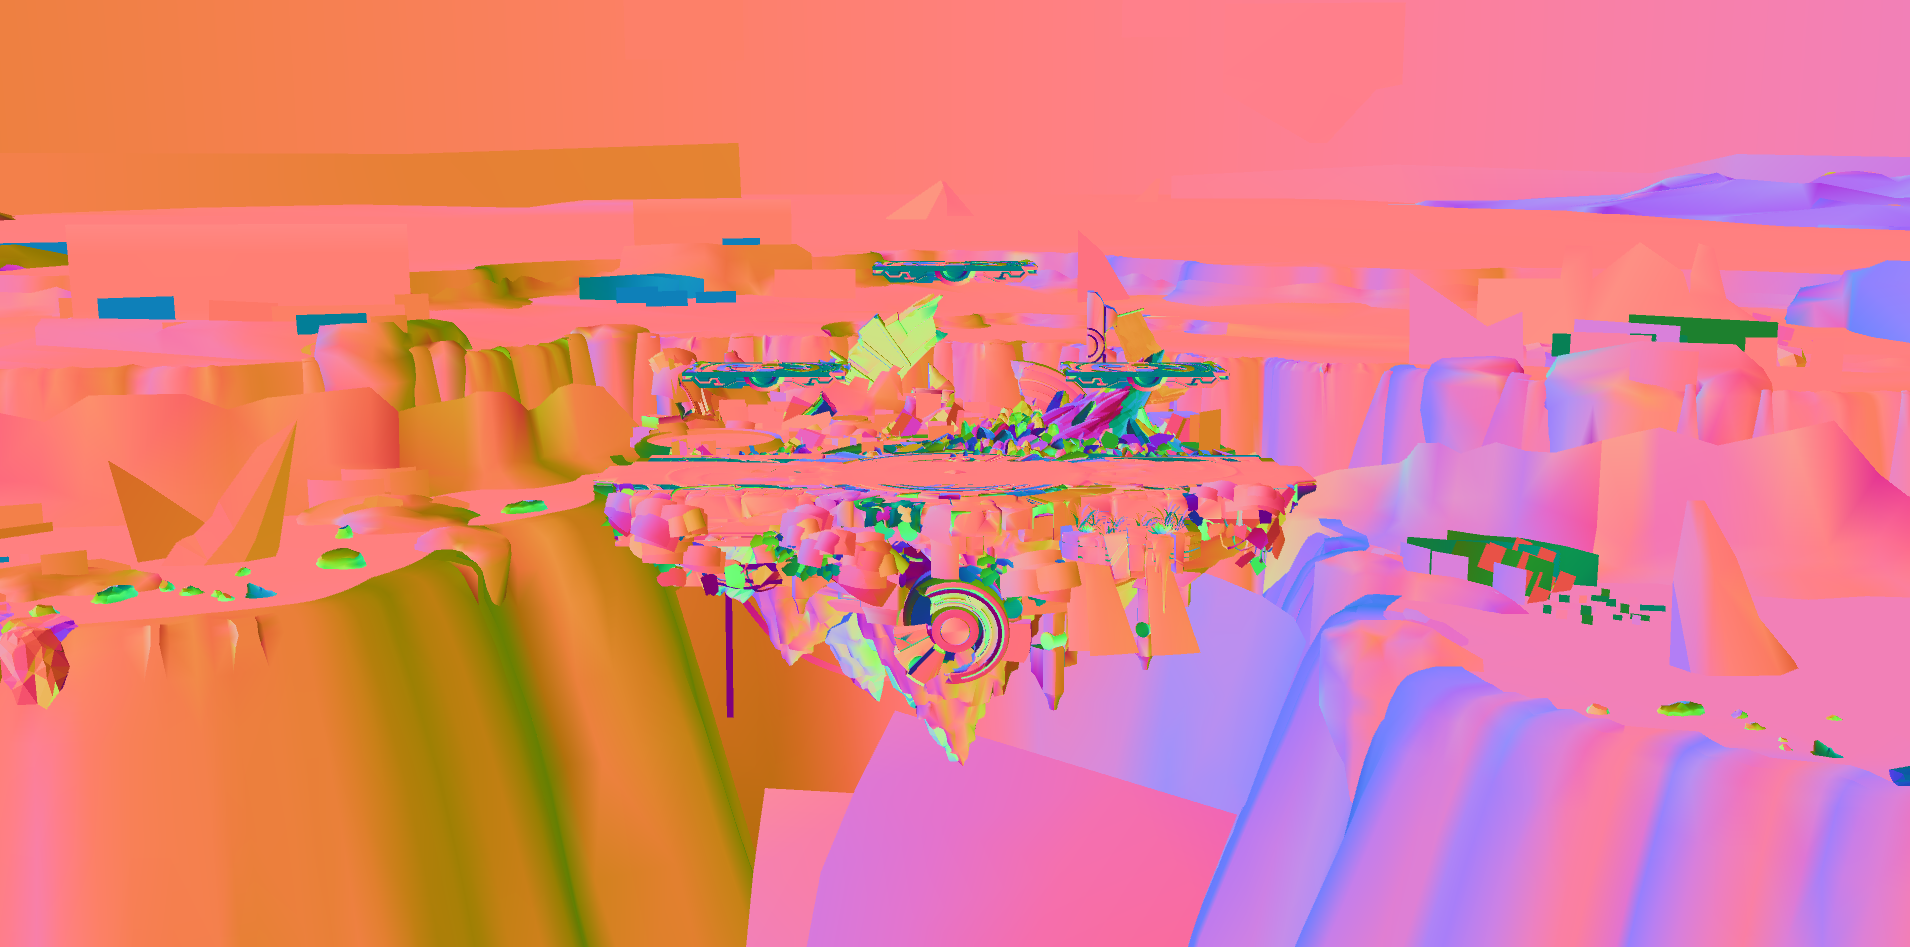 Tangents and bitangents are used for rendering normal maps and anisotropic specular. The tangent vector is the XYZ components of the Tangent0 attribute. The bitangent vector is generated from the tangent vector in the shaders, so there is no way to directly control the bitangent vector.
Similar to vertex normals, tangents are sometimes visualized as colors. Tangents are calculated using vertex normals and texture coordinates, so they don’t have an intuitive mapping to RGB colors like vertex normals. Looking at a color visualization of tangents may help identify potential problems with normals or normal map rendering such as surfaces appearing inverted or identifying seams. Tangents are not directly editable like vertex positions or texture coordinates. Problems with tangents indicate a problem with the model itself usually due to bad topology, vertex normals, or UV maps.
Texture Coordinates
Texture coordinates or UV coordinates (often shortened to UVs) map the vertices to locations on the textures through a process called “UV Mapping”. The UVs define a 2D position in texture space for each vertex in the mesh.
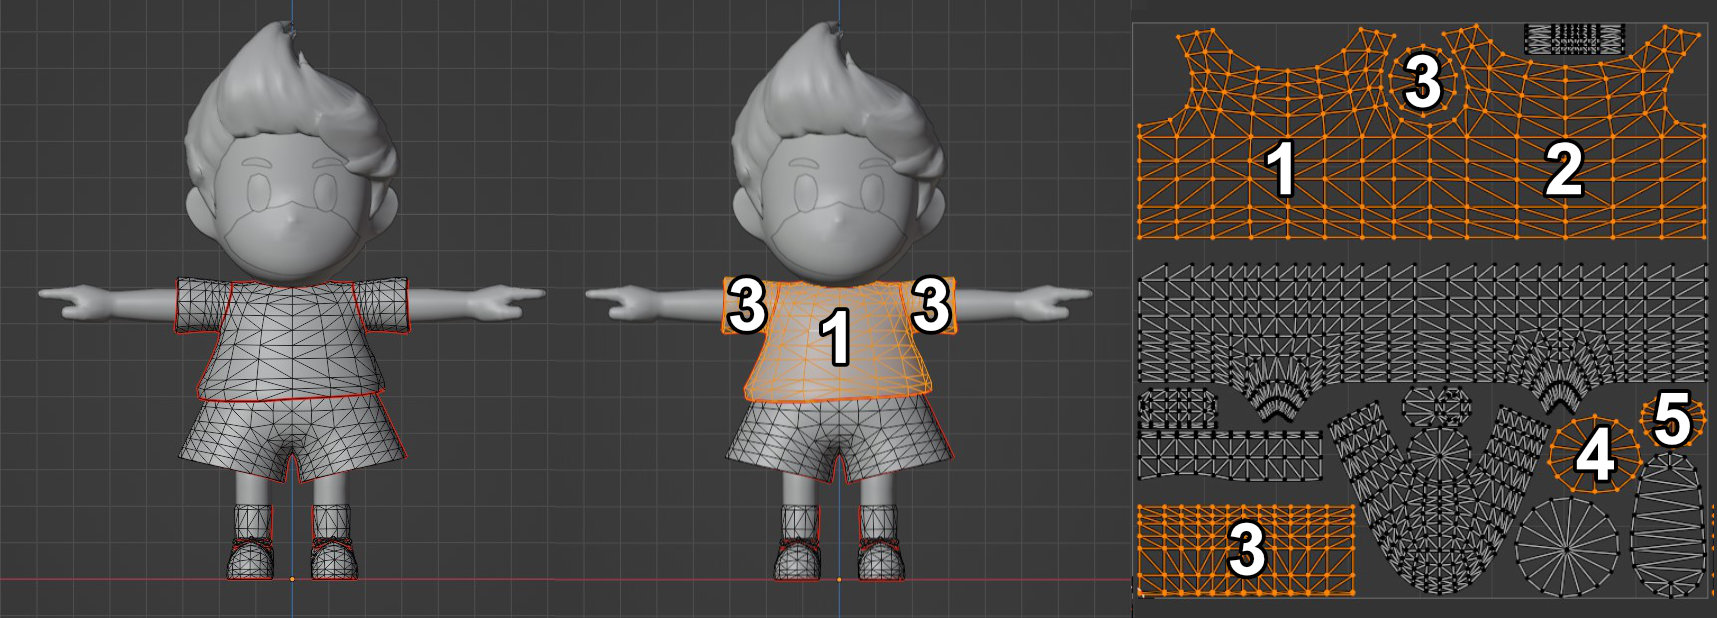
UV coordinates project or “flatten” the 3D model onto 2D space. Real life anologies include sewing a shirt or stuffed animal, wrapping candy, or vinyl wrapping a car. In all these examples, a flat plane is wrapped onto a 3D shape after applying multiple cuts to create seams. UV maps for clothing meshes often match the patterns used to sew physical pieces of clothing. The image above shows the texture coordinates for Lucas’s shirt mesh.
Most meshes have a map1 attribute for the main layer of textures. Additional texture coordinate attributes allow additional layers to have separate texture layouts and use the limited texture resolution more efficiently.
map1
map1 is the main texture layer for col, PRM, NOR, and emissive maps. The map1 attribute is used at asset creation time along with the model’s vertex normals to create the Tangent0 attribute.
bake1
bake1 is designed for baked textures such as baked stage lighting or baked ambient occlusion. The bake1 uvs should have no overlapping or mirrored UVs. All UV coordinates should be in the range 0.0 to 1.0 and fit within the first quadrant in the UV editor. This ensures each vertex can have a unique color in the texture map and avoid issues when baking.
uvSet
uvSet is used for the second texture layer for col, diffuse, and emissive maps. This includes the iris texture layer used for animated eye movement.
uvSet1
uvSet1 adds an additional texture layer and is mostly used for stage materials with many diffuse map layers.
uvSet2
uvSet2 adds an additional texture layer and is mostly used for stage materials with many diffuse map layers.
Color Sets - WIP
The attribute names with “colorSet” store vertex color data. Color set attribute data is stored as RGBA colors with unsigned integer values from 0 to 255. The integer values are then converted to floating point values in the range 0.0 to scale where scale depends on the type of color set. The Vertex Attribute page on the main repository contains a table of color set attributes and their scale values.
Whether or not the mesh’s color set attribute data is used depends on the shader. For example, fighter meshes commonly contain data for a colorSet1 attribute but use a shader that never references colorSet1. The latest version of SSBH Editor enables or disables color set rendering based on the shader listed in the material.
colorSet1
colorSet2
colorSet3
colorSet4
colorSet5
(RGB)
Texture Blend (Alpha)
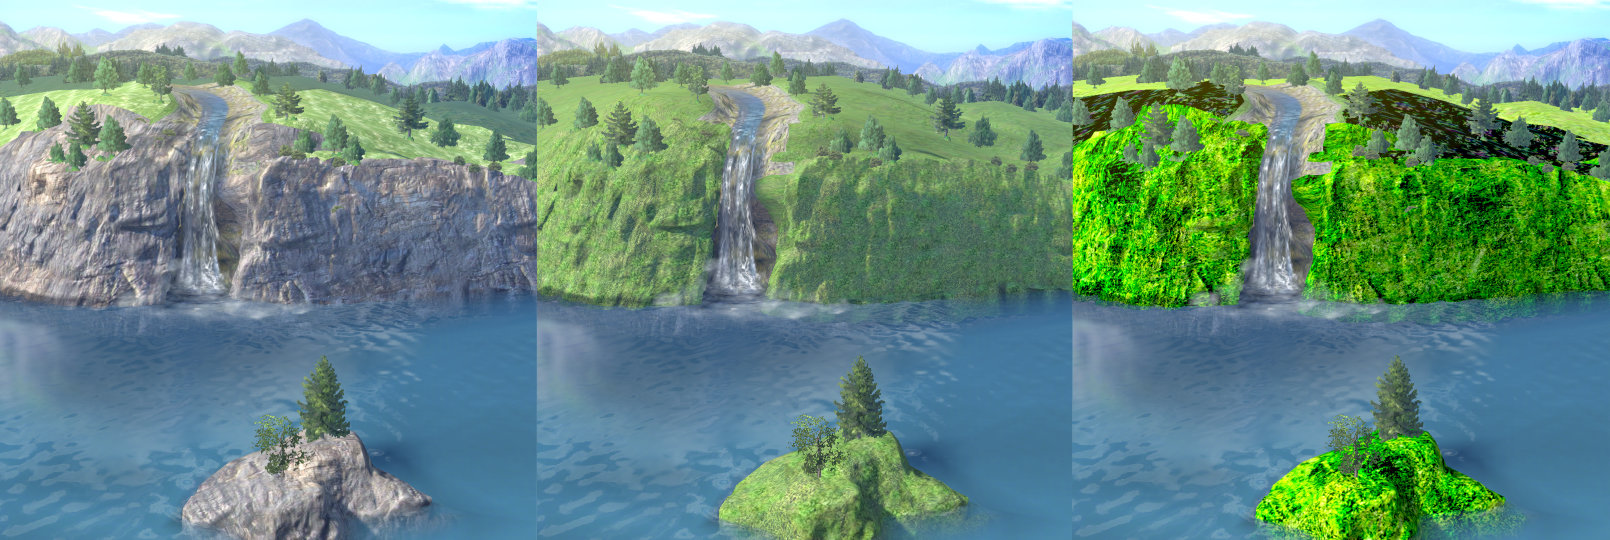
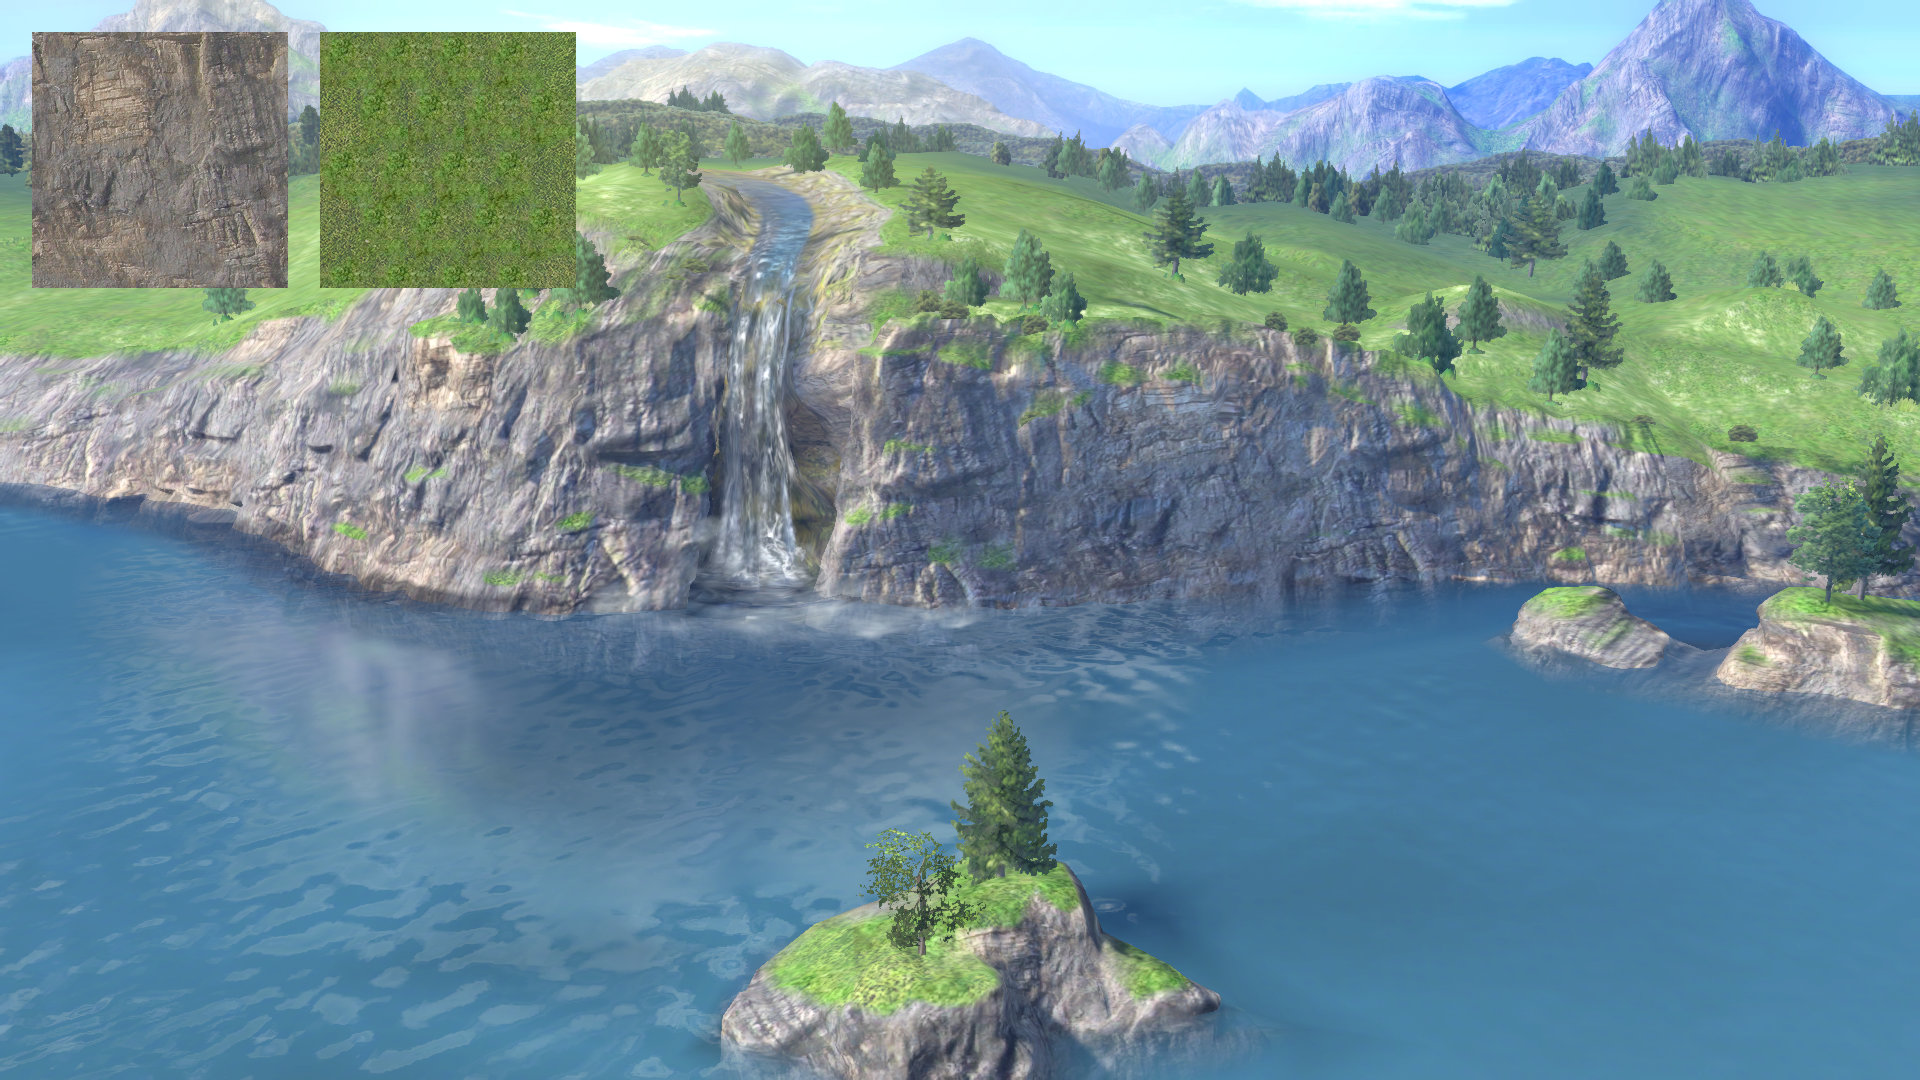
result = mix(texture0.rgb, texture1.rgb, colorSet5.a * 3.0);
colorSet6
colorSet7
Materials
Models are rendered on the GPU using compiled programs called shaders. Shaders take multiple inputs such as textures, geometry, lighting data, and other visual parameters to calculate the rendered color or “shading” for an object on screen. The materials contained in the model.numatb helps determine some of the inputs passed to the shader program for drawing. The additional inputs for drawing come from the mesh parameters and other rendering configuration files. The required inputs for a shader program are hardcoded into the program code, so it is important that the material correctly specifies all the inputs needed by the shader listed in the shader label field of the material. Applications like SSBH Editor will give warnings if the material does not specify all required inputs for the shader.
Materials are assigned to meshes in a model using the model.numdlb file. Each mesh can only have one material active at a time, but each material can be assigned to any number of meshes. Some special effects like the ditto transformation use additional material files like metamon_model.numatb. The game will skip rendering any meshes that don’t have a material assigned, which can be used to make a mesh invisible.
Editing Materials
The easiest way to edit materials is using SSBH Editor’s Matl Editor. The Matl Editor in SSBH Editor gives realtime feedback in the viewport for how most material edits will look in game. SSBH Editor also has additional features for improving the editing experience like saving and applying material presets and checking for common errors during editing.
Materials can also be edited using ssbh_lib_json or ssbh_data_json. Both programs are commandline programs that convert numatb files to and from JSON. JSON is a text format and can be edited in any text editor like notepad++, VSCode, etc. Simply drag the numatb file onto the executable, edit the JSON, and drag the JSON onto the executable to make a new numatb. If no file appears in any of these steps, try running the program from command prompt to check the error output. ssbh_data_json is generally recommended over ssbh_lib_json since ssbh_data_json uses a more concise and readable format. Both programs are available for Windows on the ssbh_lib releases.
For writing Python scripts to edit materials, see ssbh_data_py.
Material Transitions
Smash Ultimate contains a number of animated material transitions. The transitions happen quite quickly, so it’s easy to miss the effect during normal gameplay. Examples of material transitions include inkling’s ink or the metal box item. An animated threshold value combined with the model’s NOR map blue channel enables models to smoothly transition between two completely different materials. The demo below demonstrates the effect of adjusting the threshold value.
Material Transition Blending
The pseudocode below describes how the blending factor is calculated using the model’s NOR map. The smooth light to dark transitions in the NOR map blue channel are converted to values of either 0.0 or 1.0 using a threshold value. In the demo above, note the difference in appearance between the NOR.b and calculated transition blend values.
As the threshold value approaches 1.0, the transition material fills in more of the model, starting with brighter regions of the NOR map blue channel and growing into darker regions. A NOR map blue channel value of 0.0 would transition instantly, a value of 0.5 would take later to transition, and a value of 1.0 takes the longest to transition to the transition material. As the threshold value approaches 0.0, the transition is reversed with the brightest regions of the NOR map blue channel being the last regions of the model to return to the normal material.
Materials are blended together by blending their input parameters rather than blending the final colors for both materials. Blending the input parameters is generally more efficient because the model only has to be rendered once rather than rendering with each material separately and blending the results.
// Calculate the blending factor between the original and transition material.
float transitionBlend = 0.0;
if (norColor.b >= (1.0 - threshold)) {
    transitionBlend = 1.0;
}
// Blend the relevant shading parameters.
shadingParameter = mix(originalParameter, transitionMaterialParameter, transitionBlend);
Transition Materials - WIP
Inkling’s Ink
Metal Box
Gold (Xerneas)
Ditto
Creating Transition Blend Maps - WIP
Transparency
Smash Ultimate uses a number of different techniques to simulate transparent or translucent surfaces. Transparency effects are controlled using the BlendState0 and CustomVector0 material parameters. Alpha blending is the most costly but provides the most control over layering. Alpha testing is cheap to compute but uses a hard cutoff threshold between opaque and fully transparent pixels. Alpha sample to coverage is similar to alpha testing but uses pixelated dithering patterns to support more levels of transparency.
Due to hardware constraints such as low memory bandwidth and limited computing power, these techniques are only approximations. Each technique has different tradeoffs in terms of quality and performance. Avoid using transparency effects at all when possible for best performance in game. The more layers of transparent or semitransparent objects, the more work the game needs to do to render the scene.
| Technique | Order Independent | Transparency Levels |
|---|---|---|
| Alpha Blending | ❌ | Smooth Blending |
| Alpha Testing | ✔️ | Transparent or Opaque |
| Alpha Sample to Coverage | ✔️ | Dithered Blending |
Alpha Blending
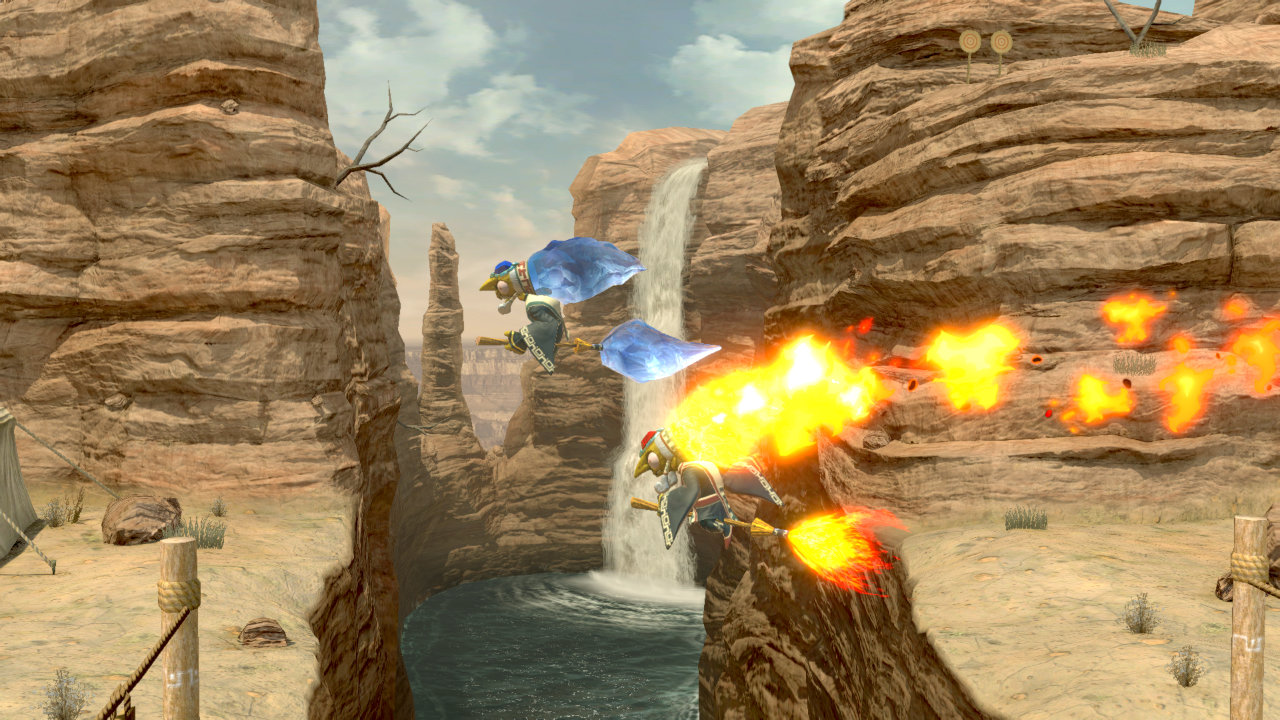
Alpha blending can simulate the appearance of transparent or translucent materials such as water, glass, smoke, etc. A background color called the “destination color” or “dst color” is blended with a foreground color called the “source color” or “src color”. The effect is very similar to layer blend modes in Gimp or Photoshop.
The above image shows examples of alpha blending on the Gerudo Valley stage for Kotake (ice) and additive alpha blending for Koume (fire). The opaque pass shows the scene before drawing any meshes with transparency effects. The alpha pass shows just the transparent meshes. The combined result shows the final rendered image with post processing applied.
Alpha Blending Blend Modes
The alpha blending parameters are controlled by BlendState0 in the materials. The material’s source factor and destination factor are controlled by the first and third value for BlendState0, respectively.
See the BlendState0 documentation for information on additional blending factors.
Materials that use one of the blending presets will likely want to find a material without alpha testing. This prevents unwanted harsh transitions from fully transparent to fully opaque when the model’s alpha falls below the threshold.
Alpha Blending Presets
| Preset | Source Color | Destination Color | Description |
|---|---|---|---|
| Opaque | One | Zero | Opaque with no alpha blending. The material may still have alpha testing. |
| Additive | One | One | Add the source and destination color for effects like fire, lasers, or spotlights. |
| Alpha Blending (premultiplied1) | One | One Minus Source Alpha | Transparency blending for effects like glass, ice, or thin cloth. |
| Alpha Blending | Src Alpha | One Minus Source Alpha | Transparency blending for effects like glass, ice, or thin cloth. |
| Black | Zero | Zero | A hack to render the model as black (0,0,0). The material may still have alpha testing. |
1. Some shaders already multiply the output color by the alpha. There’s no need to premultiply the nutexb texture in this case.
Premultiplied Alpha
Alpha blending works by mixing the source color with the destination color using the alpha of the source color. In some rare cases the alpha of the destination color or background color is used as well. The multiplication of the source or foreground alpha can be baked into the source color (premultiplied) or calculated later (postmultiplied or “straight” alpha). Using premultiplied alpha generally produces better results in more cases. See the Nvidia documentation or gamedev StackExchange for more information.
// Postmultiplied or Straight Alpha
destinationColor.rgb = (sourceColor.rgb * sourceColor.a) + (destinationColor.rgb * (1.0 - sourceColor.a));

// Premultiplied Alpha
destinationColor.rgb = (sourceColor.rgb * 1.0) + (destinationColor.rgb * (1.0 - sourceColor.a));
It’s important to note that some shaders in Smash Ultimate premultiply the rendered color by the calculated alpha value. In this case, it is usually unecessary to premultiply the input textures themselves. Whether a shader premultiplies the rendered color or not is hardcoded and difficult to determine at this time. These shaders usually use blend state factors of “One” and “OneMinusSourceAlpha”. These are the same blend factors required to make premultiplied alpha work when premultiplying the RGB color of the nutexb texture for a shader that does premultiply the calculated shader alpha.
Alpha Testing
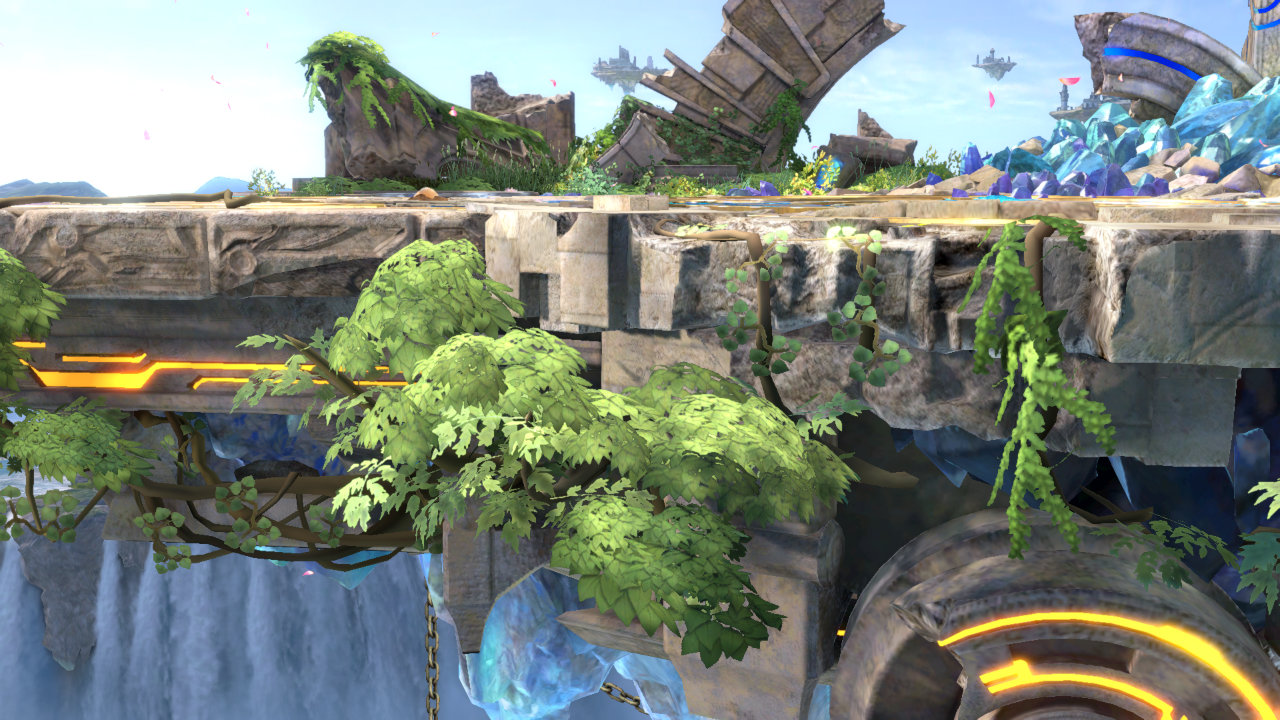
Alpha testing skips rendering any pixels that have an alpha value less than a certain threshold. The texture’s alpha channel acts as a mask to “cut out” transparent regions of the model. This avoids the sorting issues with alpha blending but can only be used for making regions of a model completely opaque or completely transparent. This works well for hair, leaves, or other materials that would have significant sorting issues with alpha blending and don’t require being partially transparent.
The above image shows examples of alpha testing on the Battlefield stage. Note that leaves are in the opaque pass despite having transparency. This is fine since alpha testing doesn’t depend on render order like alpha blending. With alpha testing disabled in the shaders, the leaves render the same as other opaque meshes. The combined result shows the final rendered image with alpha testing enabled and post processing applied.
Alpha testing is hardcoded into certain shaders with a threshold of 0.5. Adjusting the first value of CustomVector0 to 1.0 effectively disables alpha testing because the texture alpha will be clamped to 1.0.
// Don't render any pixels with texture alpha less than 0.5.
// The texture alpha is usually from the col map.
float alpha = max(texture.a, CustomVector0.x);
if (alpha < 0.5)
    discard;
Alpha Sample to Coverage
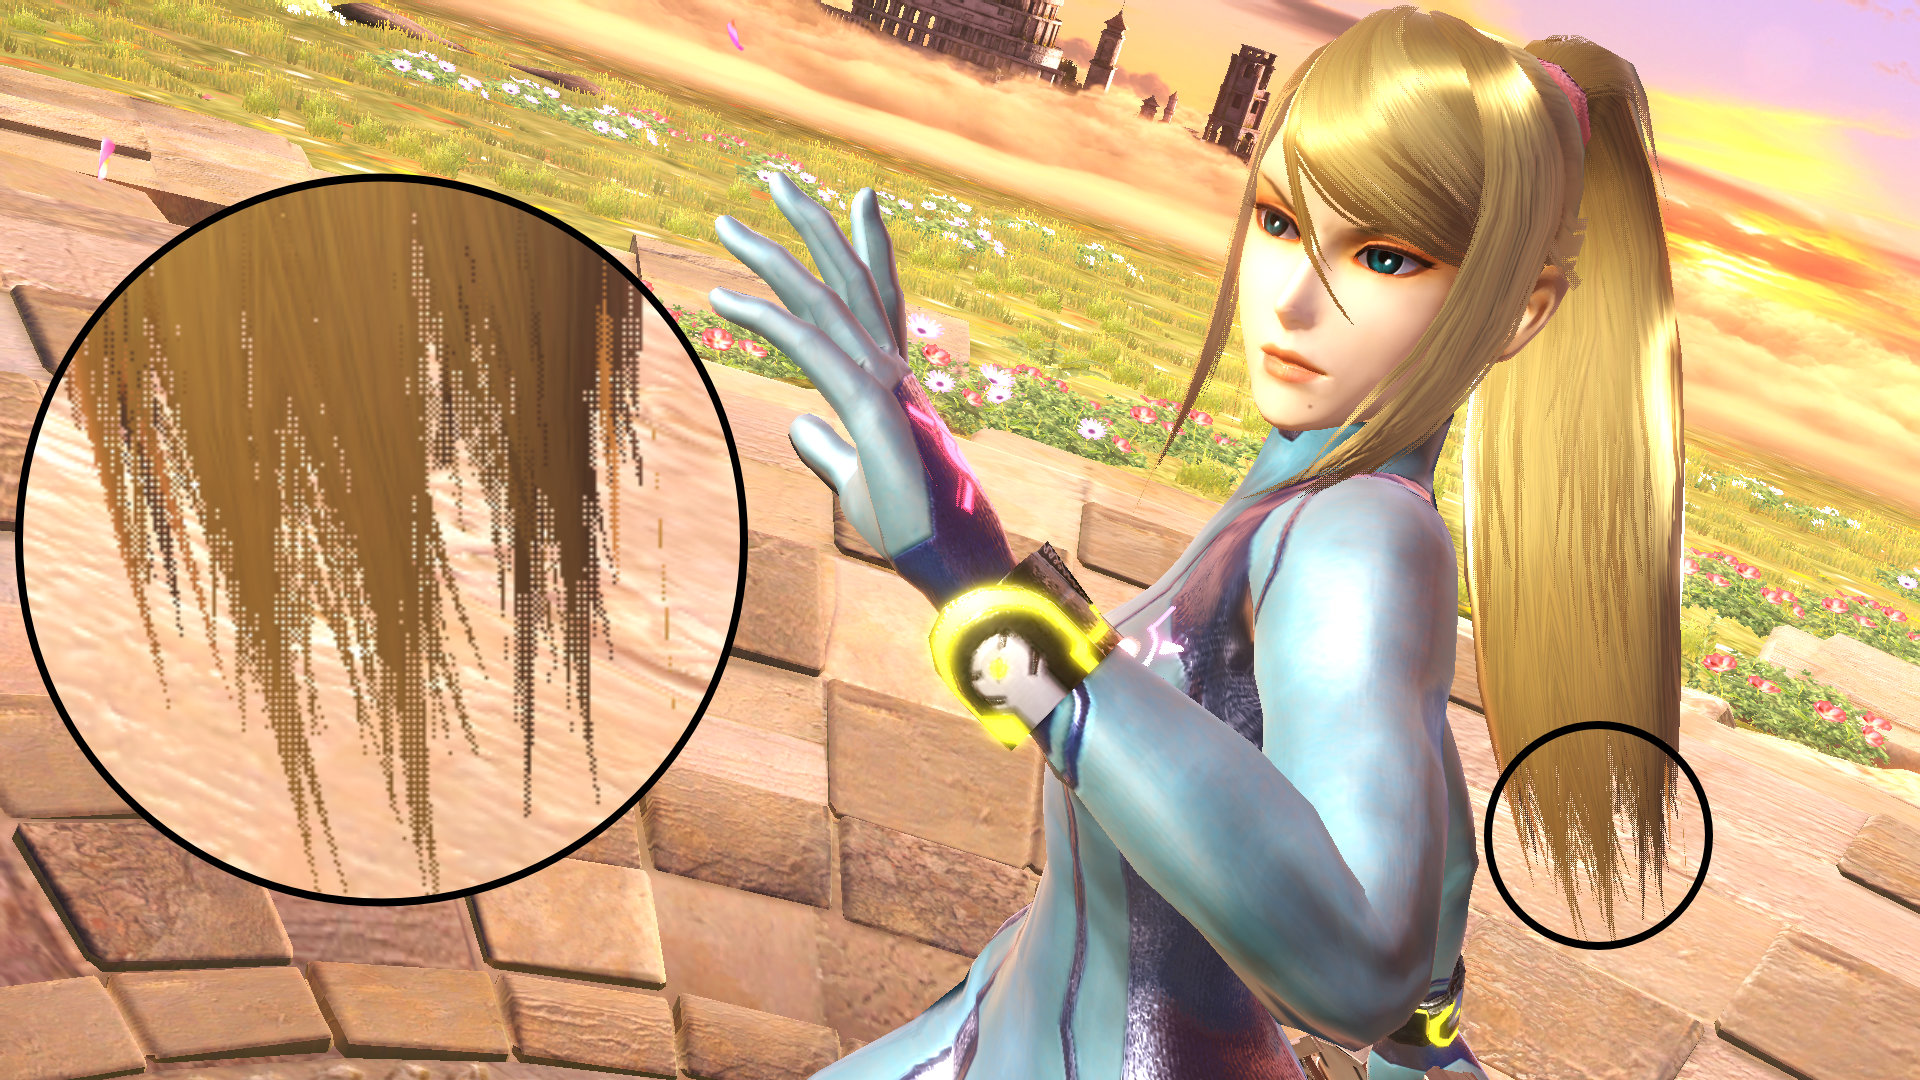
Alpha blending provides smooth blending but is prone to sorting issues. Alpha testing doesn’t have any sorting issues but can only render parts of a model as fully opaque or fully transparent. Alpha sample to coverage represents transparency by sampling fragments or pixels based on their alpha.
A 50% transparent white surface and a 50% black surface with normal alpha blending will produce the expected result of gray. Alpha testing will only display one of the surfaces due to the alpha threshold that is applied. Alpha sample to coverage will render roughly 50% of the pixels as black and roughly 50% of the pixels as white. From a distance, the overall effect is a surface that looks roughly gray. Like alpha testing, this effect doesn’t have any sorting issues but can look noticeably grainy due to the game only rendering at 1080p.
Alpha sample to coverage works best for translucent surfaces with lots of intersections that won’t work well with other techniques like hair modeled with lots of 2D planes. Many games use a similar technique for LOD transitions or hiding objects blocking the camera. It’s cheaper to render than alpha blending and creates a smoother transition than simply toggling the visibility.
Render Order
Like layers in Photoshop, the render order for meshes matters for alpha blending to work correctly. Alpha testing and alpha sample to coverage are order independent and don’t require a specific render order. Opaque meshes should use the _opaque pass to be rendered first. Meshes with alpha blending should use _far or _sort to ensure they layer on top of the opaque meshes. The _near render pass tag is a special case for transparent meshes that should render without any bloom applied.
The order in which different meshes for a model are rendered depends on the shader label. The tag at the end of the shader label splits the meshes into different rendering passes. For example, all meshes with “_far” will render before any meshes with “_sort” regardless of the parent model. In general, meshes with alpha blending should use “_sort”, and all other meshes should use “_opaque”.
- _opaque
- _far
- _sort
- bloom pass
- _near
- color grading pass
Skin Materials
Many fighters have separate materials for approximating the subsurface scattering of skin. The parameters can also be tweaked for more stylized diffuse shading, such as cel-shading or toon shading.
Blending Intensity

// CustomVector30.x is the overall intensity.
// Metalness acts like a mask.
float sssBlend = CustomVector30.x * metalness;
Albedo Color
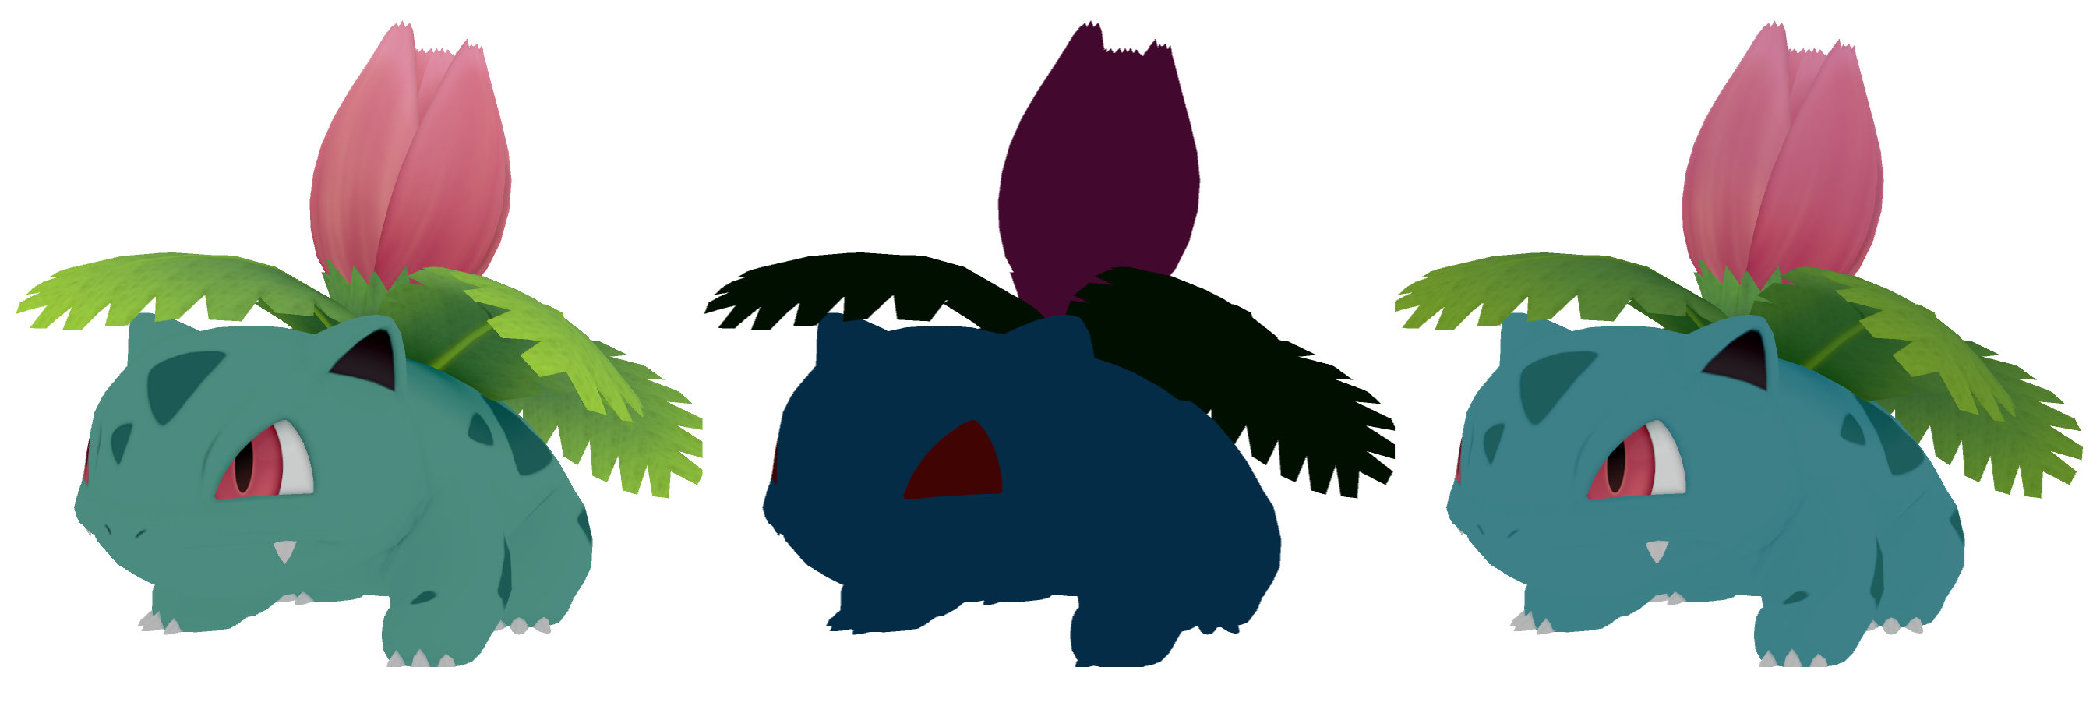
// Blend the col map color with the subsurface color.
vec3 albedoFinal = mix(col.rgb, CustomVector11.rgb, sssBlend);

Diffuse Shading
CustomVector30.y is multiplied by the diffuse shading to control the smoothness of the shading. Using a very high value for the second value of CustomVector30 creates a cel-shaded look because diffuse shading is clamped to 1.0. A very similar technique is used for Breath of the Wild’s shaders, for example.
float skinShading = nDotL * CustomVector30.y * 0.5 + 0.5;
skinShading = clamp(skinShading, 0.0, 1.0) ;
float finalDiffuseShading = mix(nDotL, skinShading, sssBlend);
The third and fourth parameters are unused, despite having values set for some models.
Hair Materials - WIP
Hair materials have separate parameters to control specular highlights to better recreate the way light interacts with hair. The highlights on hair materials are not symmetrical and appear to wrap around the surface. The anisotropic (not symmetrical) specular can be used for recreating the look strands of hair or brushed metal without having to model or texture the fine surface detail.
Anisotropic Specular
CustomFloat10 controls the amount of anisotropy. This works identically to the anisotropy input of Blender’s Principled BSDF. A value of 0.0 produces a round, symmetrical highlight. Higher values produce a more stretched highlight.
Anisotropic Rotation
Some materials use the PRM alpha value as anisotropic rotation instead of controlling specular. A value of 0.0 is no rotation. A value of 0.5 rotates the highlight by 90 degrees. A value of 1.0 rotates the highlight by 180 degrees. Anisotropic rotation can be used to fix the highlight direction on surfaces with UV layouts that cause the highlight to appear rotated or distorted.
Correcting Specular Highlight Direction
If the following are all true, then the anisotropic rotation map is not required or can be set to 0.0 (no rotation).
- Hair strands run from top to bottom on the texture
- The hair meshes are all UV mapped so the hair strands run vertically on the UV map
- CustomFloat10 is between 0.0 and 1.0
If the UV islands for the hair are rotated or CustomFloat10 is > 1.0, the anisototropic rotation map can be used to correct the highlight direct for different parts of the mesh.
Model Brightness
Custom models in Smash Ultimate often appear brighter than expected. This page explains the main sources of overly bright models and potential fixes.
Albedo Color
Explanation
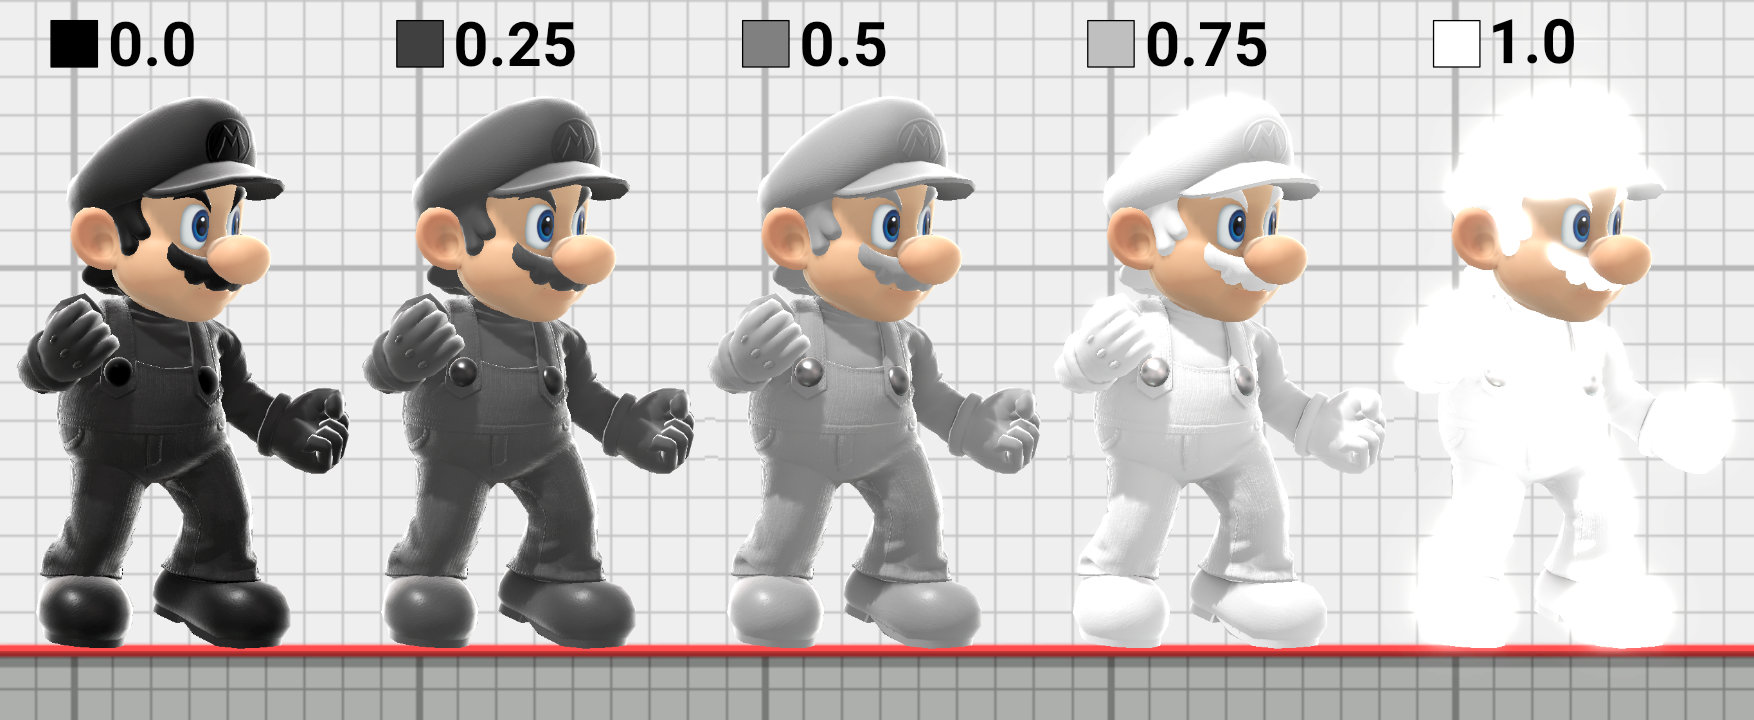
The model’s col maps determine its overall albedo or base color. The albedo color stored in the col map determines how much red, green, and blue light a model reflects rather than the final color that appears on screen. For example, an albedo brightness of 50% with a lighting intensity of 2.0 will have the same apparent brightness on screen as an albedo brightness of 100% with a lighting intensity of 1.0. In general, col map colors with 70% brightness will appear fully white on most stages. The wikipedia albedo page has a diagram with common real world albedo values that also tend to work well in Smash Ultimate. Real world example of surfaces that reflect approximately 70% of incoming light are paper and some white paints.
Fixes
The final brightness in game will vary depending on the stage’s lighting. As a general rule, take the desired color on screen and reduce the brightness to 70% of the original. For example, a model that should appear solid white (255,255,255) on screen should actually be closer to (180,180,180) in the col map. An easy way to lower the texture brightness is to use a levels adjustment in an image editor. Lower the output brightness until the brightest part of the texture is below 70% brightness.
The albedo color brightness can also be controlled by material editing CustomVector13. Setting the RGB values between 0.0 and 1.0 will darken the albedo color without needing to edit any textures. If the brightest value in the col map has a brightness of 100%, setting CustomVector13 to roughly (0.70, 0.70, 0.70, 1.0) will likely eliminate most of the blooming.
Specular Highlights
Explanation

The GGX function used for specular in Smash Ultimate is prone to having bright highlights, especially for metallic materials with low roughness values. This clipping in bright regions occurs even without bloom. This effect is easiest to see in the PRM demo, which doesn’t contain any post processing.
Fixing Metallic Materials
Metallic materials use the albedo color from the col map as the specular color. Col maps are often much brighter than the recommended specular value of 0.16. Lowering the metalness will use a blend of the col map and PRM alpha channel, which can produce darker but less saturated highlights.
The decrease in apparent saturation from lowering metalness may not always be desired. The only reliable way to produce saturated highlights without the risk of being too bright is to increase roughness. Roughness values above 0.7 are unlikely to cause clipping such as in the comparison of Samus above.
Fixing Non Metallic Materials
The most common cause of overly bright highlights for non metallic materials is setting the specular map brightness too high. The PRM alpha channel is scaled differently than many other PBR applications and games, so a reasonable starting value is 0.16 or lower. See the PRM page for details. Increasing roughness can also make non metallic specular appear darker but tends to be less of an issue than for metallic materials.
Vertex Color
Explanation
Vertex color attributes in Smash Ultimate are scaled during rendering. A colorSet1 value of (0.5, 0.5, 0.5, 0.5) will render as white in game since colorSet1 is scaled by a factor of 2.0. For a full list of scaling values, see Vertex Attributes. Different exporting applications will handle vertex color scaling differently, which may result in models rendering as brighter than intended.
Fixes
The render settings menu for SSBH Editor has various render modes and toggles for vertex color. If the model appears too bright with vertex color rendering enabled, check the color set debug modes like colorSet1. Unchecking the vertex color scaling will show the raw color values. For example, colorSet1 values should usually not exceed (0.5, 0.5, 0.5, 0.5) with scaling unchecked for most models. The actual values on screen may differ slightly due to gamma correction. Vertex color scaling should be fixed in the 3d modeling program used to export such as Blender.
Renormal Materials
A small number of materials in game have material labels that begin with the “RENORMAL_” prefix like “RENORMAL_skin_pikachu_001”. This special prefix instructs the game to recalculate the normals during animation for any meshes assigned to that material. Recalculating normals can reduce shading artifacts on meshes with heavy deformations such as eliminating shading artifacts on Pikachu’s crawling animation. This technique isn’t enabled for all meshes to save on performance. Recalculating normals will override any custom normals in the numshb file. Renormal materials have no benefits for meshes without vertex skinning such as most stage meshes.
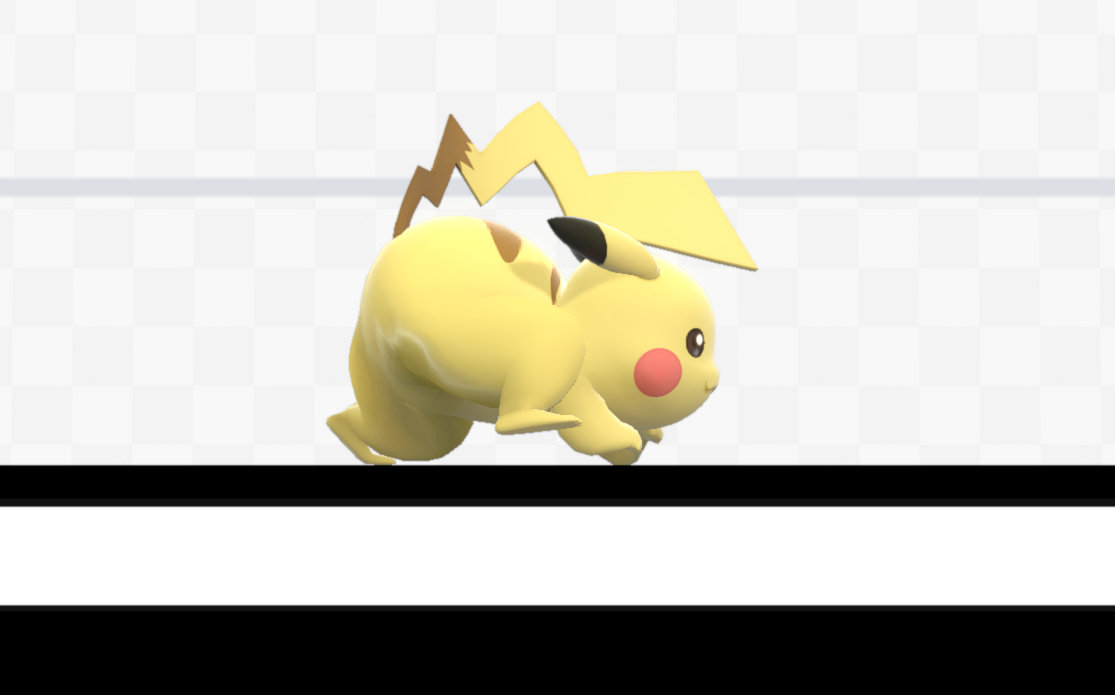
The model.adjb file contains precomputed triangle adjacency information for select meshes from the model.numshb. The adjacency information specifies the adjacent faces for each vertex to allow the game to calculate smooth vertex normals by averaging the normals calculated from the vertex positions of each adjacent face.
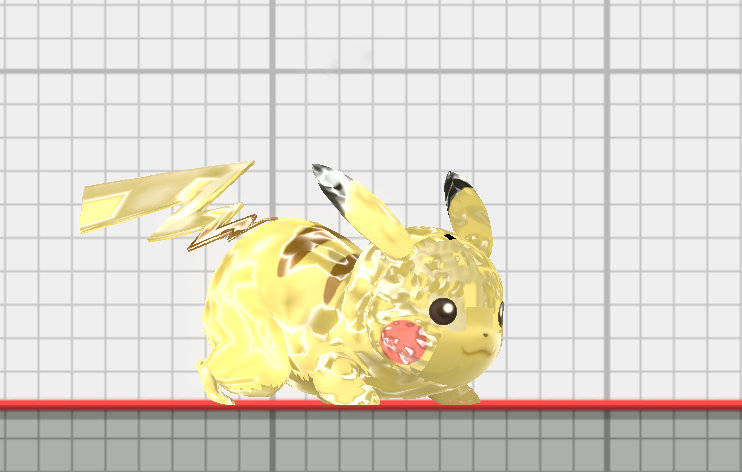
Meshes with materials with the “RENORMAL_” prefix but no entry in the model.adjb will have broken normals in game. Note the broken normals in the screenshot above. SSBH Editor can automatically detect this and provides ways to easily create a missing model.adjb or add missing entries to an existing model.adjb.
Post Processing
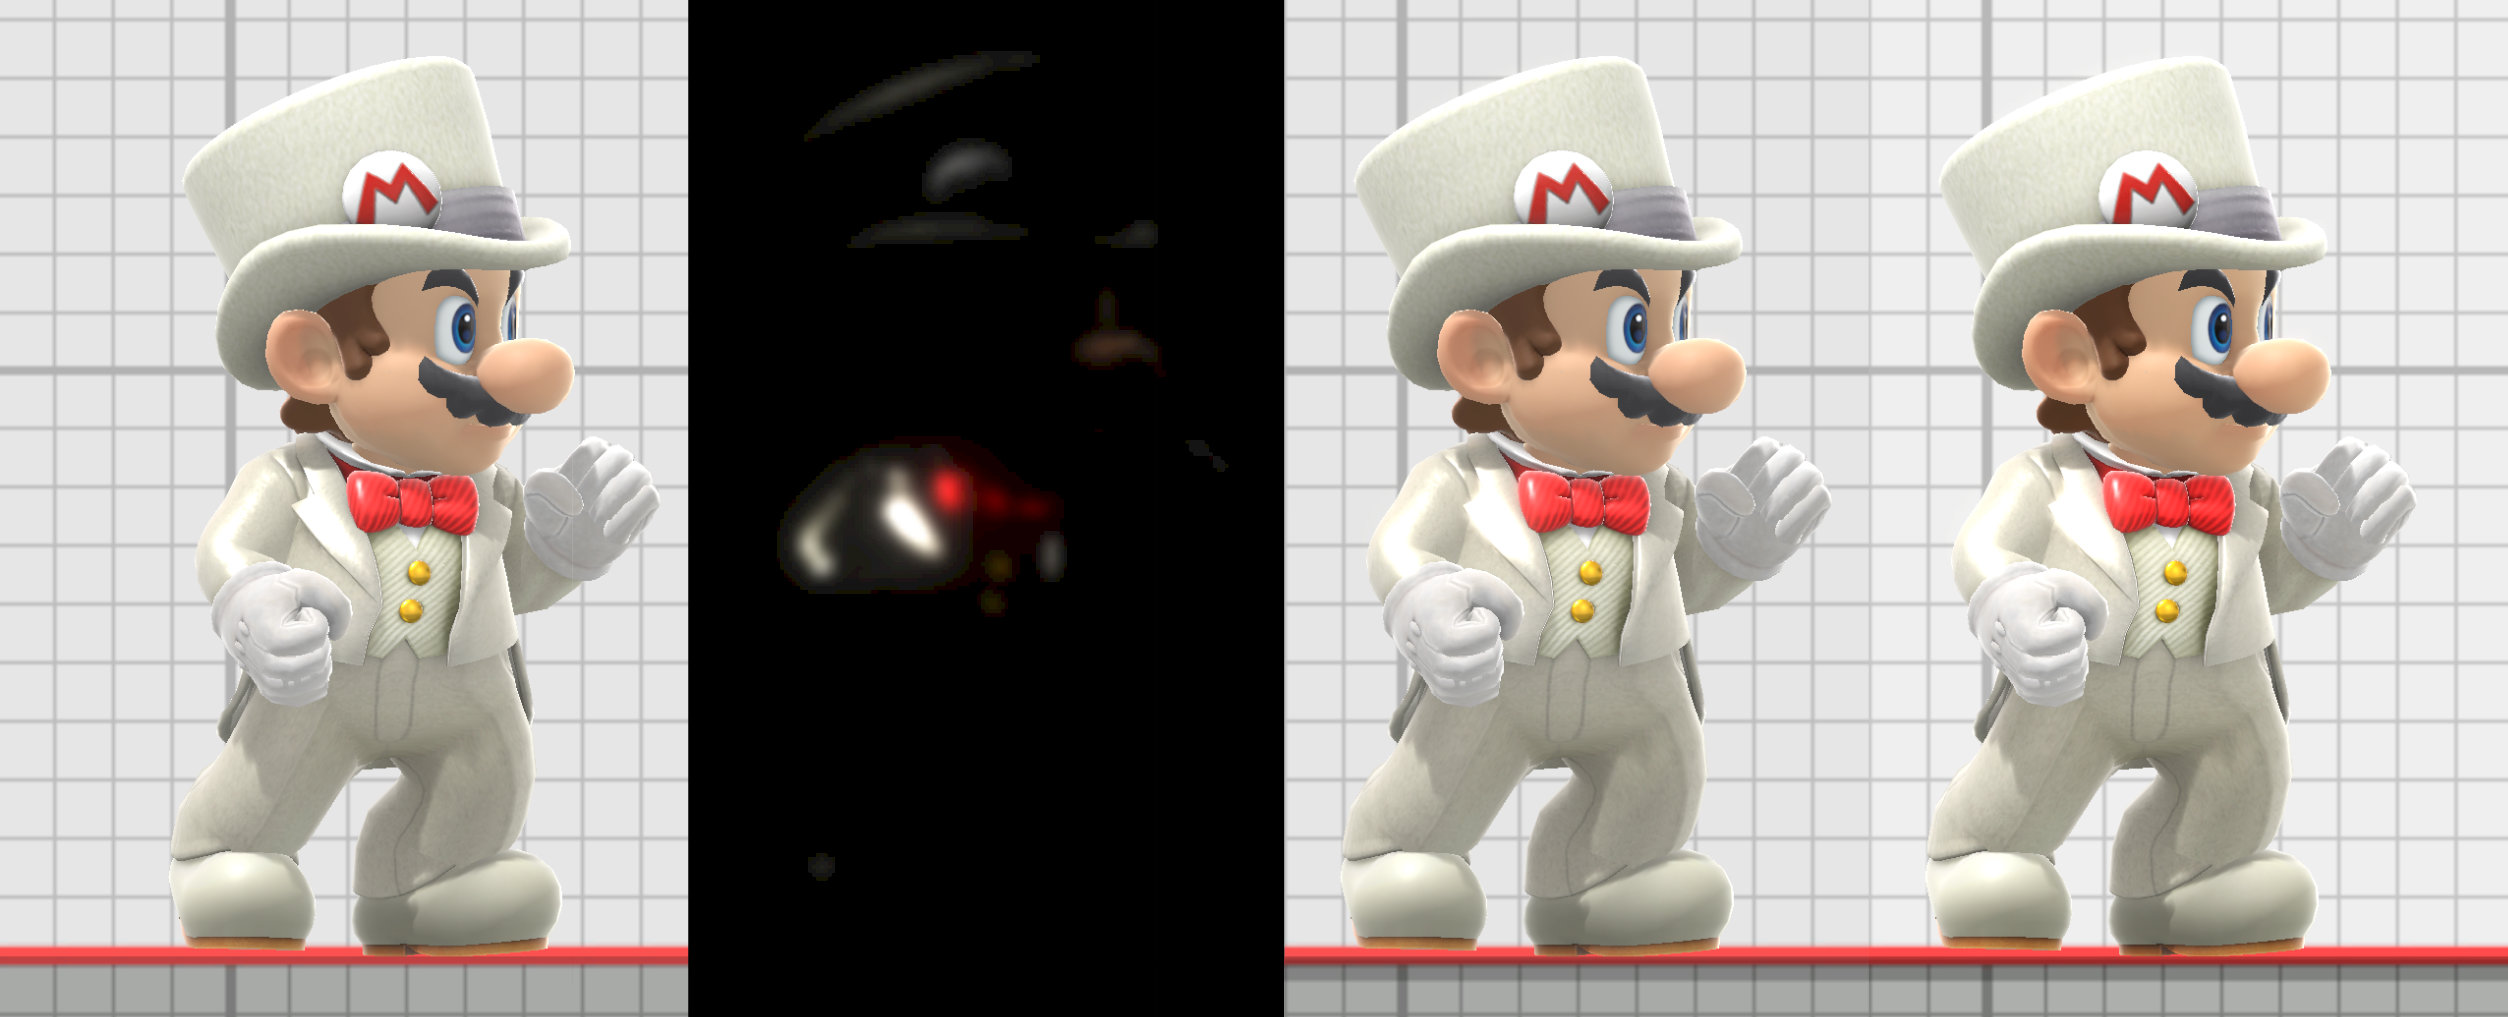
- Rendering
- Render models
- Render effects
- Post Processing
- Add bloom
- Color Grading LUT
- Additional post processing
- UI Elements
Bloom
Bloom adds a glow around bright parts of the image. Any pixel in the frame that is brighter than a certain threshold contributes to bloom. The brighter the pixel, the more intense the bloom. The bloom threshold is calculated as follows.
float componentMax = max(max(inputColor.r, max(inputColor.g, inputColor.b)), 0.001);
float scale = max(0.925 * -0.5 + componentMax, 0.0);
vec3 bloomColor = inputColor.rgb / componentMax * scale * 6.0;
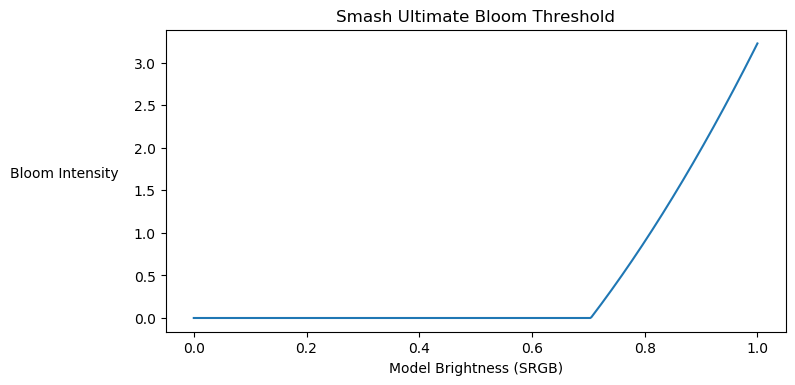
The graph below demonstrates the bloom intensity for different brightness values. The brightness threshold is roughly 75%, so any pixels with a brightness of 75% or higher will have some blooming. The graph only shows input values in the range 0.0 to 1.0, but its normal for models to have rendered brightness values much higher than 1.0 due to specular highlights, bright lighting, or certain material parameters.
Code Sample
The post processing shader code translated to GLSL is listed below. This is shader code is also used for SSBH Editor’s rendering.
vec3 GetPostProcessingResult(vec3 linear)
{
    // Convert to sRGB before applying the LUT.
    vec3 srgb = pow(linear, vec3(0.454545));
    vec3 result = srgb * 0.9375 + 0.03125;

    // Apply the color grading LUT.
    result = texture(colorGradingLut, result.rgb).rgb;

    // Brighten the overall image.
    result = (result - srgb) * 0.99961 + srgb;
    result *= 1.3703;

    // Convert back to linear.
    result = pow(result, vec3(2.2));
    return result;
}
Color Grading Lut
The normal and battlefield forms for each stage have a 3D LUT (lookup table) texture to add color grading to the rendered image. The same technique is used for the snapshot filters. The 3D texture is a lookup table, so each input RGB color on the screen is mapped to its corresponding output color. The Unreal Engine Docs have a good description of how a 3D LUT can be used to perform color grading.

Explanation
A color grading LUT texture transforms the pixel colors based on the input pixel’s color rather than the input pixel’s position on the screen. A LUT texture can replace all the green pixels with red, set all pixels to black, desaturate the image, etc. A LUT texture can’t change the pixels in the top left corner to red or apply any sort of textured overlays or borders since the LUT only knows the input pixel’s color. The following sections start with a simple gradient map, which can be described as a 1D LUT, and move towards the more powerful 3D LUTs used in Smash Ultimate.
1D LUT

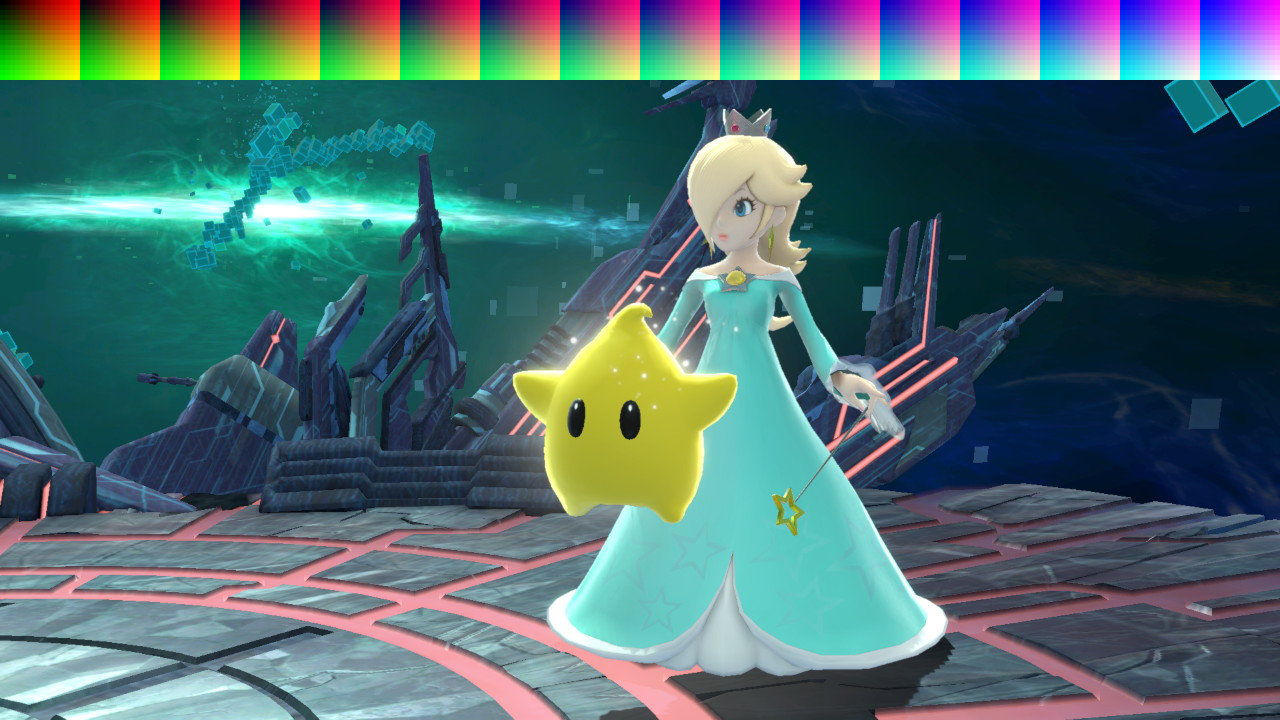
A one dimensional LUT texture takes a single value (usually luminosity) as input and maps it to an output RGB color. The effect is similar to a gradient map or color ramp adjustment in an image editor. Any effect that can be achieved with a 1D lut such as a gradient map or color ramp can be achieved with a 3D lut as well. The above image shows an example of a gradient map or color ramp and the corresponding 3D color grading LUT texture.

3D LUT
A 3D LUT takes three values (usually RGB) instead of one as input and maps them to an output RGB color. Rather than being a single strip like a color ramp or gradient map, 3D LUT textures define a volume of colors with RGB values corresponding to the XYZ axes. This enables more complex effects like any combination of HSL/HSV adjustments, RGB curves, levels, exposure, etc.
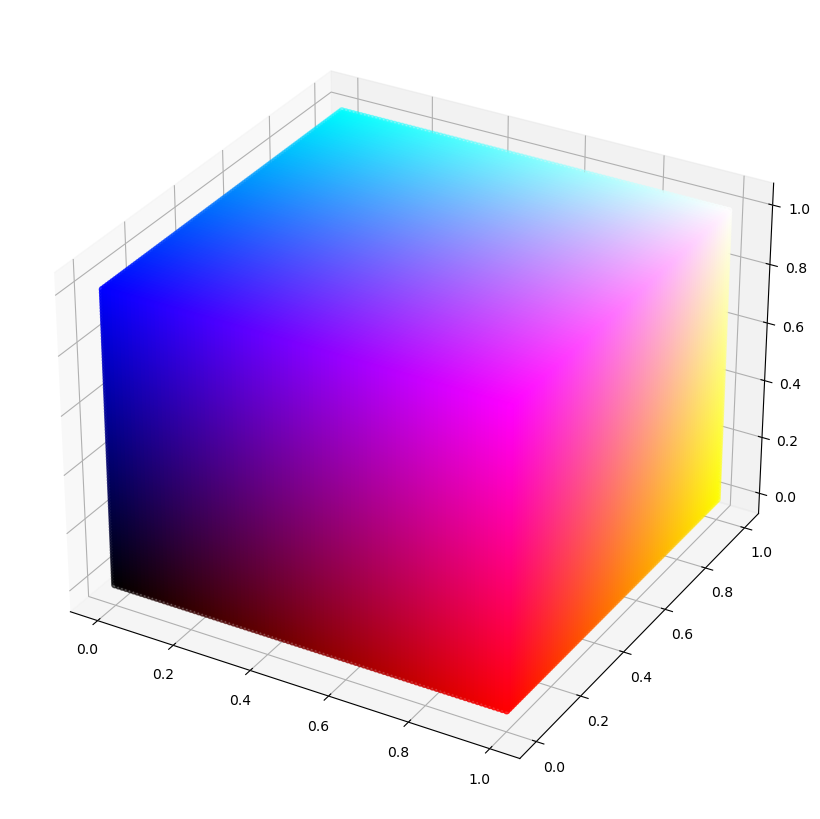
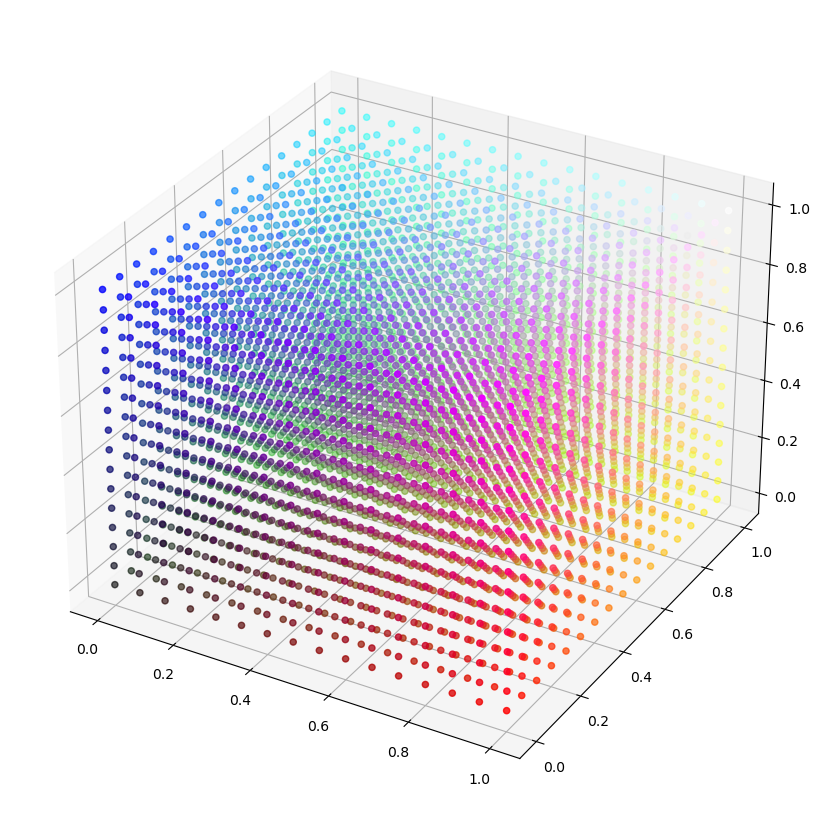
Specifying all colors in a 256x256x256 LUT would require 64 MB of memory! In practice, the in game LUT textures are only 16x16x16 and require only 16 KB of memory. This poses a problem since not all of the 16,777,216 possible input RGB colors have a corresponding point in the LUT. This is handled by interpolation, so if a color isn’t present in the LUT, it takes a combination of neighboring points in the LUT weighted by how close they are to the input point.
Editing 3D LUTs
A useful property of color grading LUTs is that color grading applied to the LUT will also apply to the final image. Simply apply the adjustments to a neutral color grading LUT and then save the result. A tool for creating color grading LUTs is available on the Smush LUT Github repository.
Examples
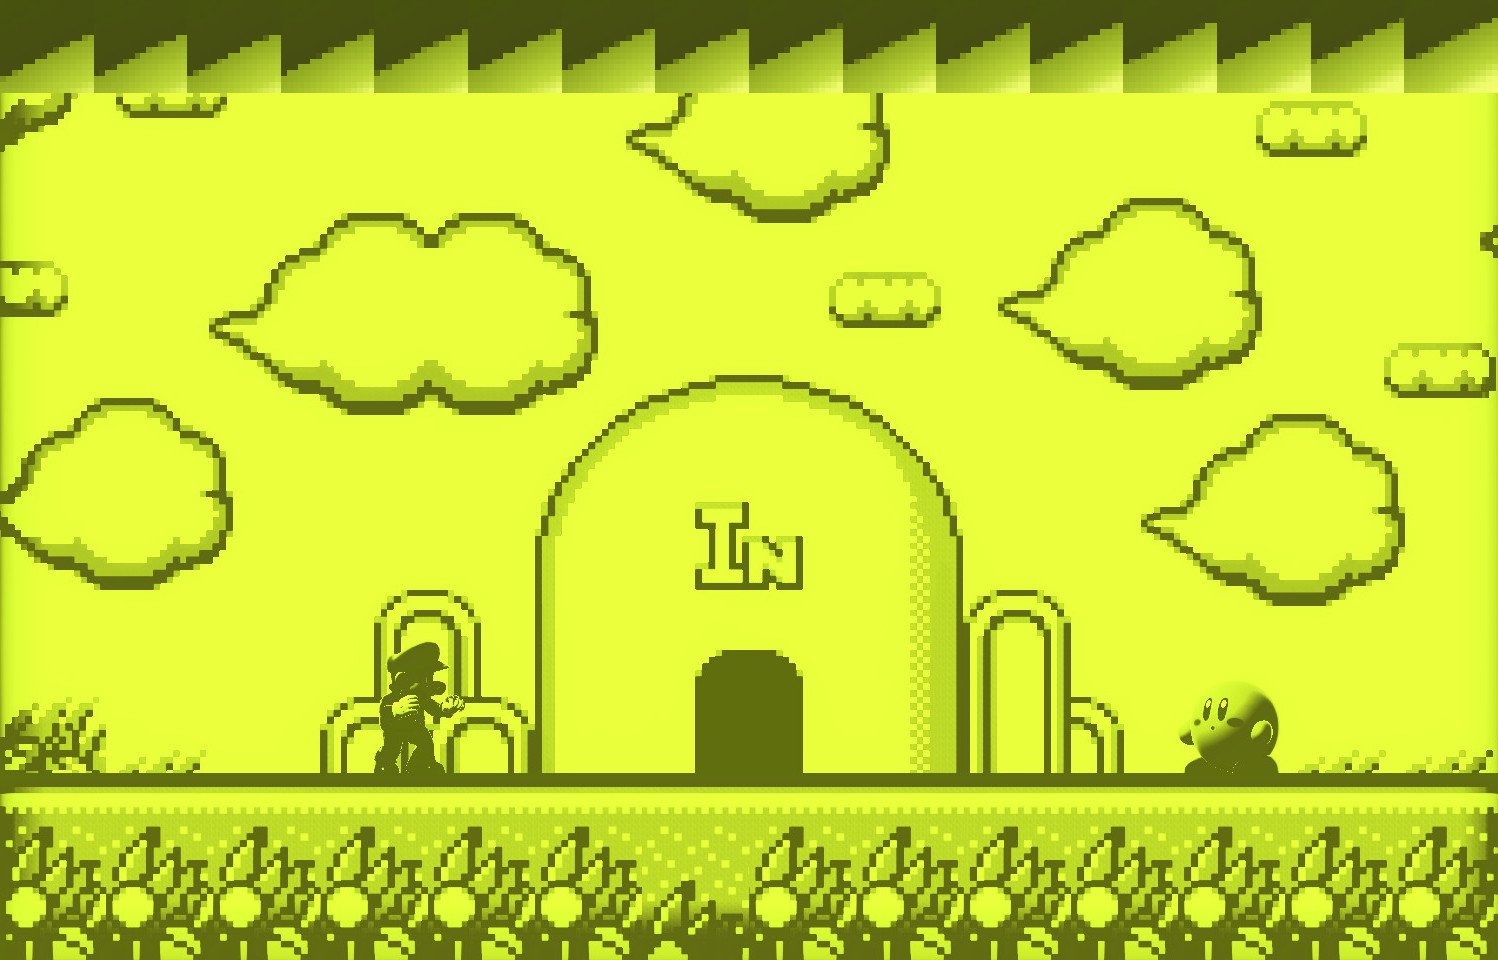
Snapshot Filters - WIP
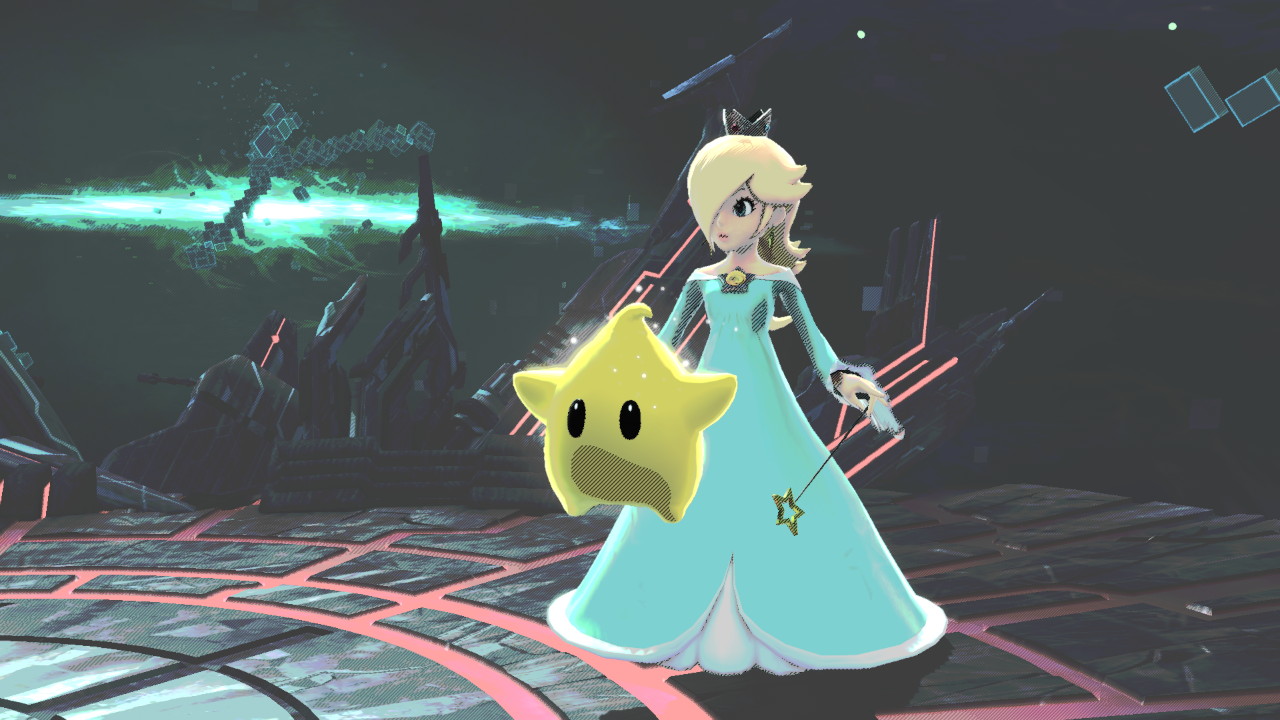
No Filter
Close Up
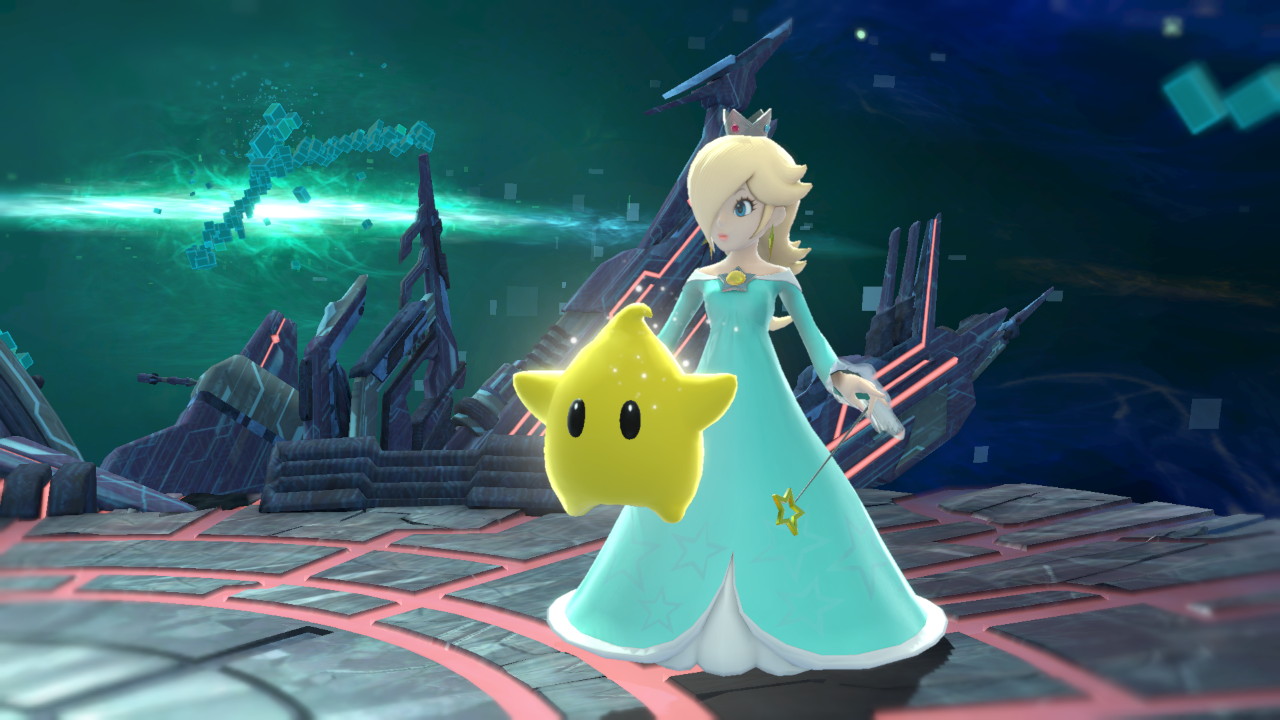
Vivid
snapshot/lut/ss_filter_highsaturation.nutexb
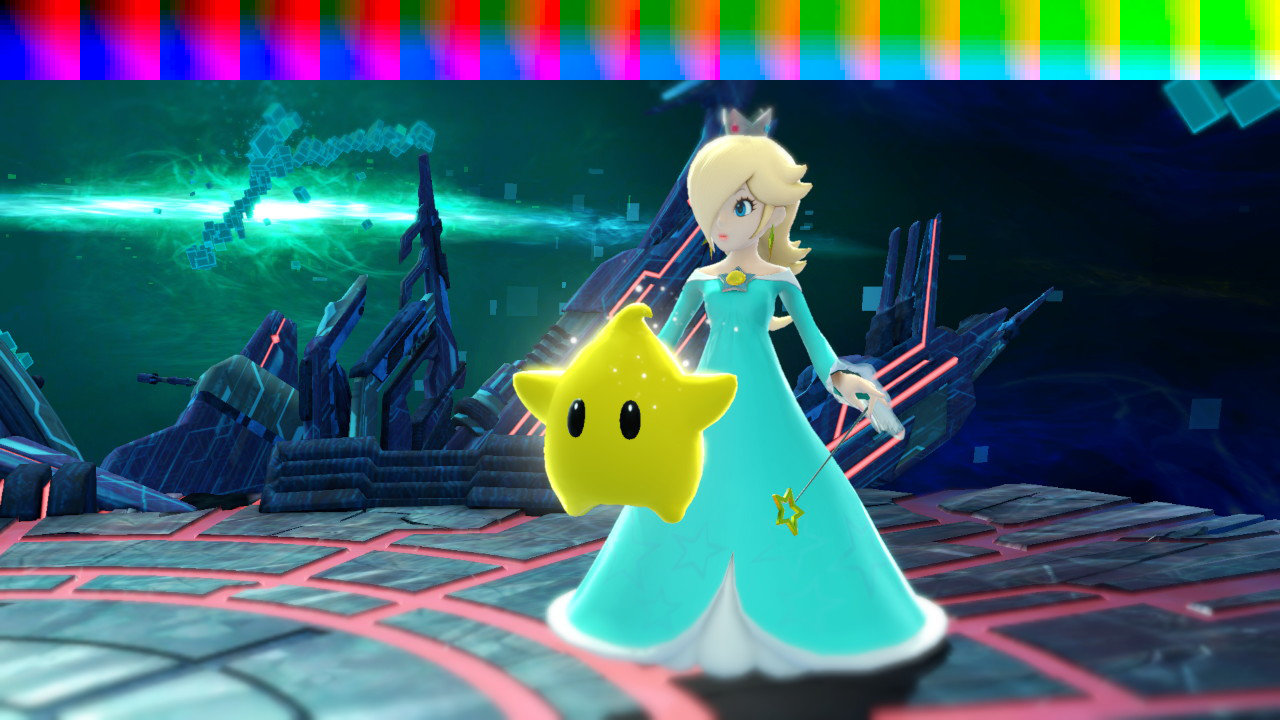
Clear
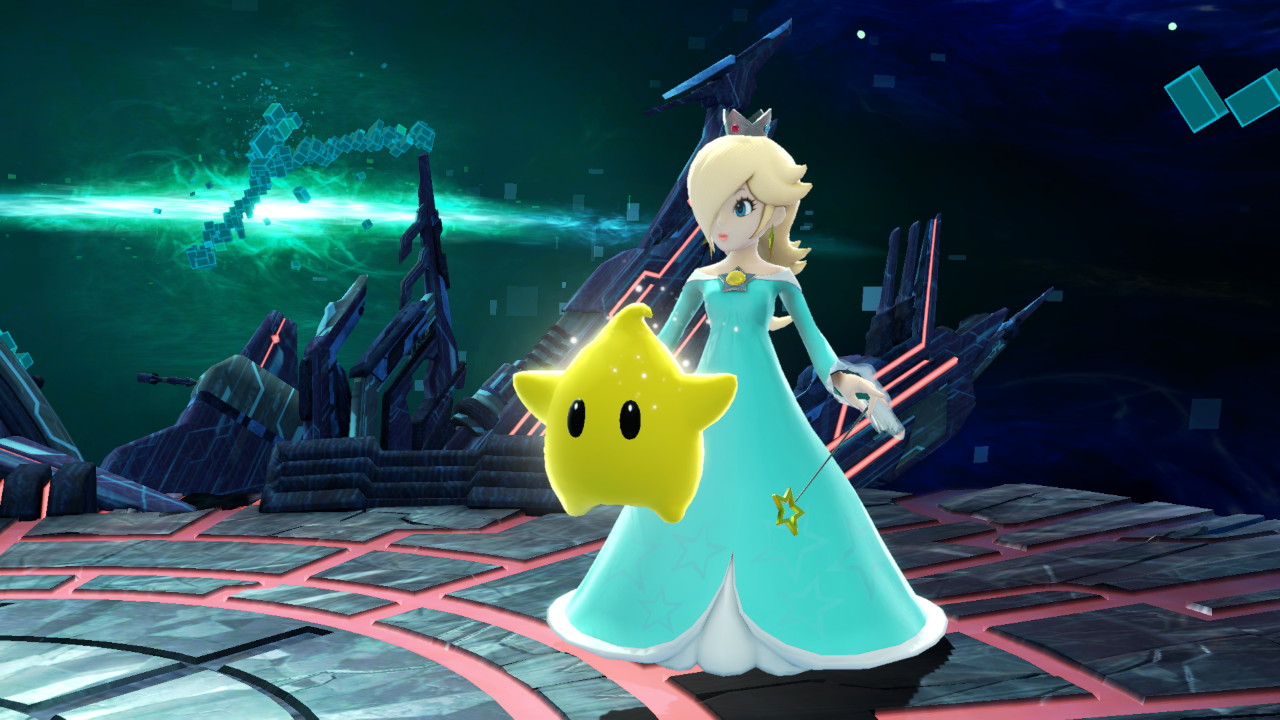
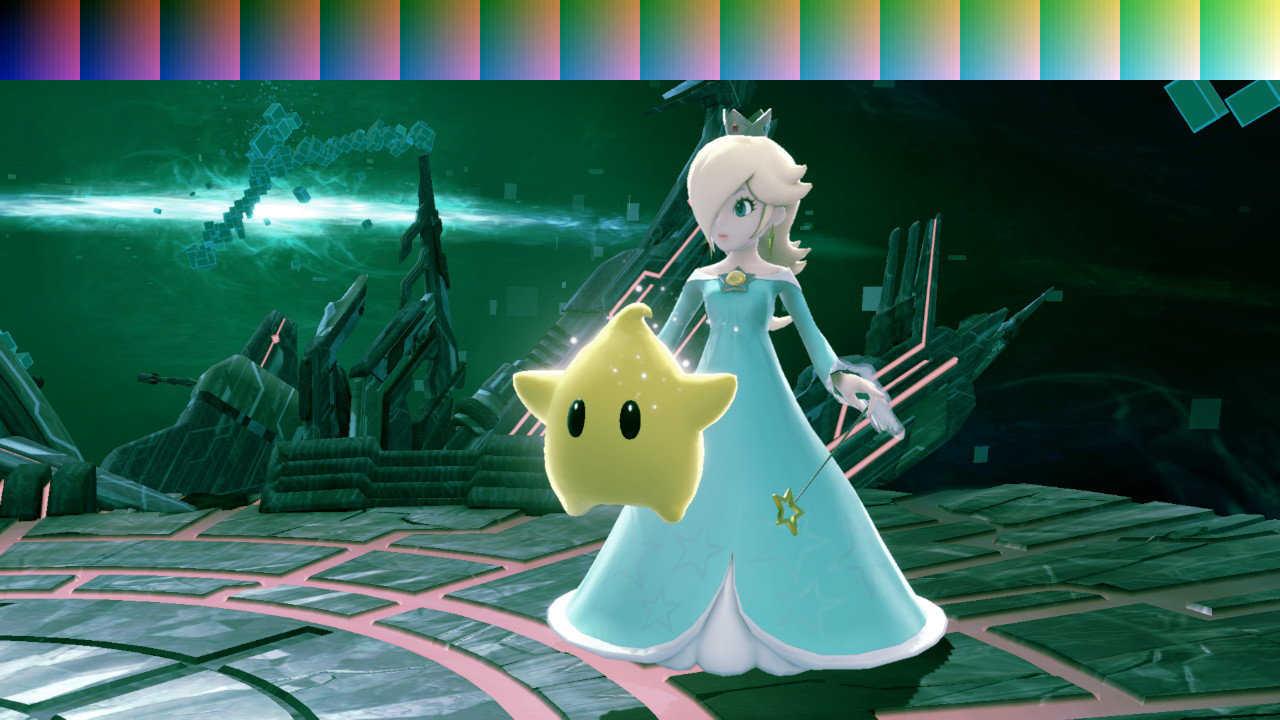
Green
snapshot/lut/ss_filter_greenish.nutexb
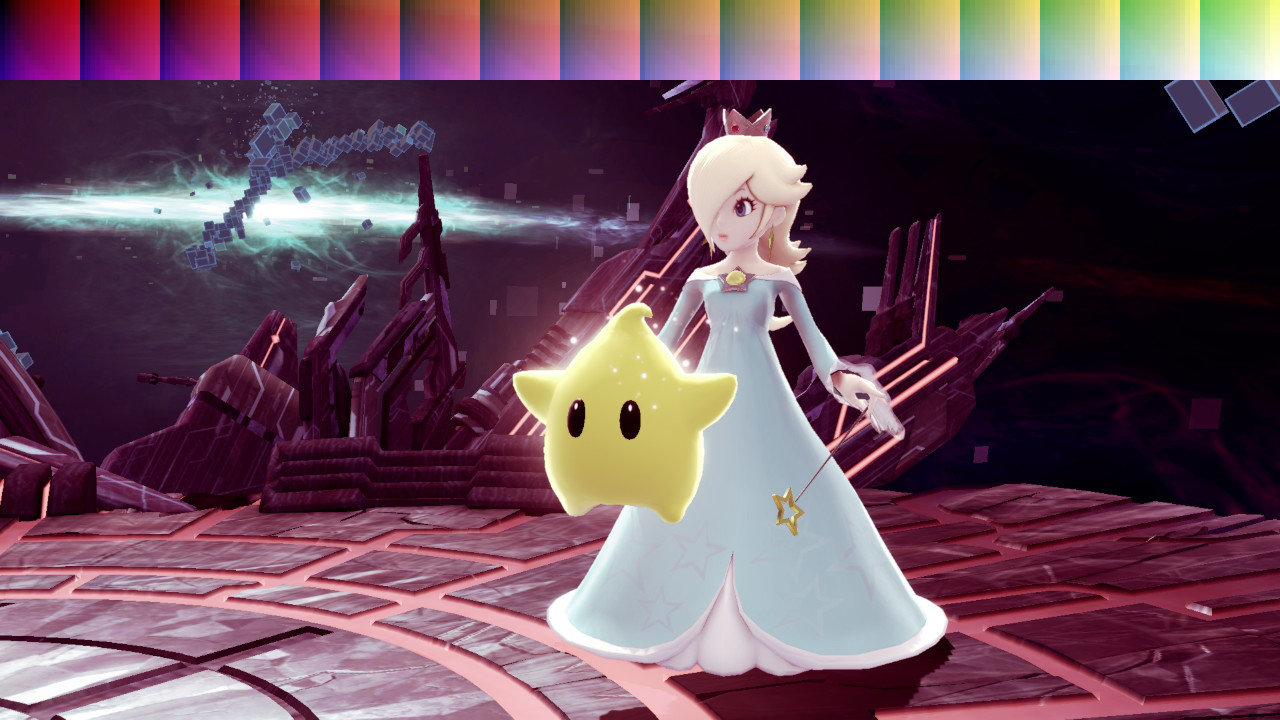
Scarlet
snapshot/lut/ss_filter_pinkish.nutexb
Shadow
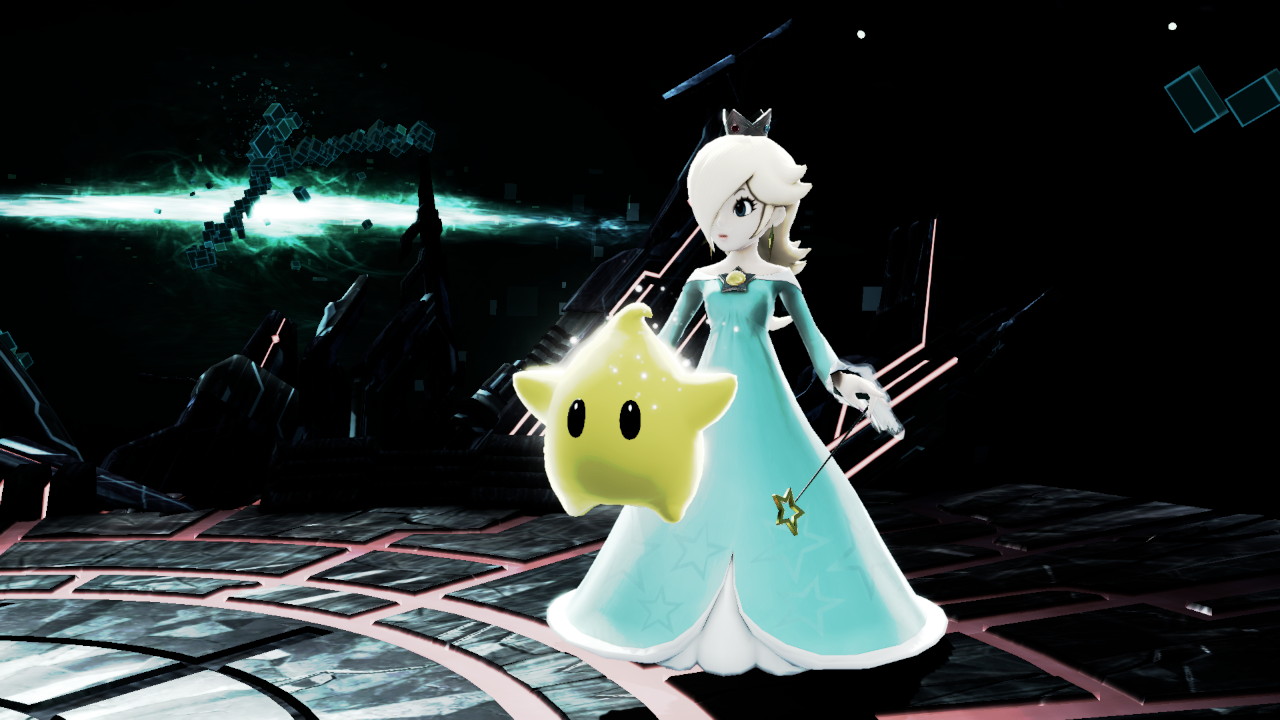
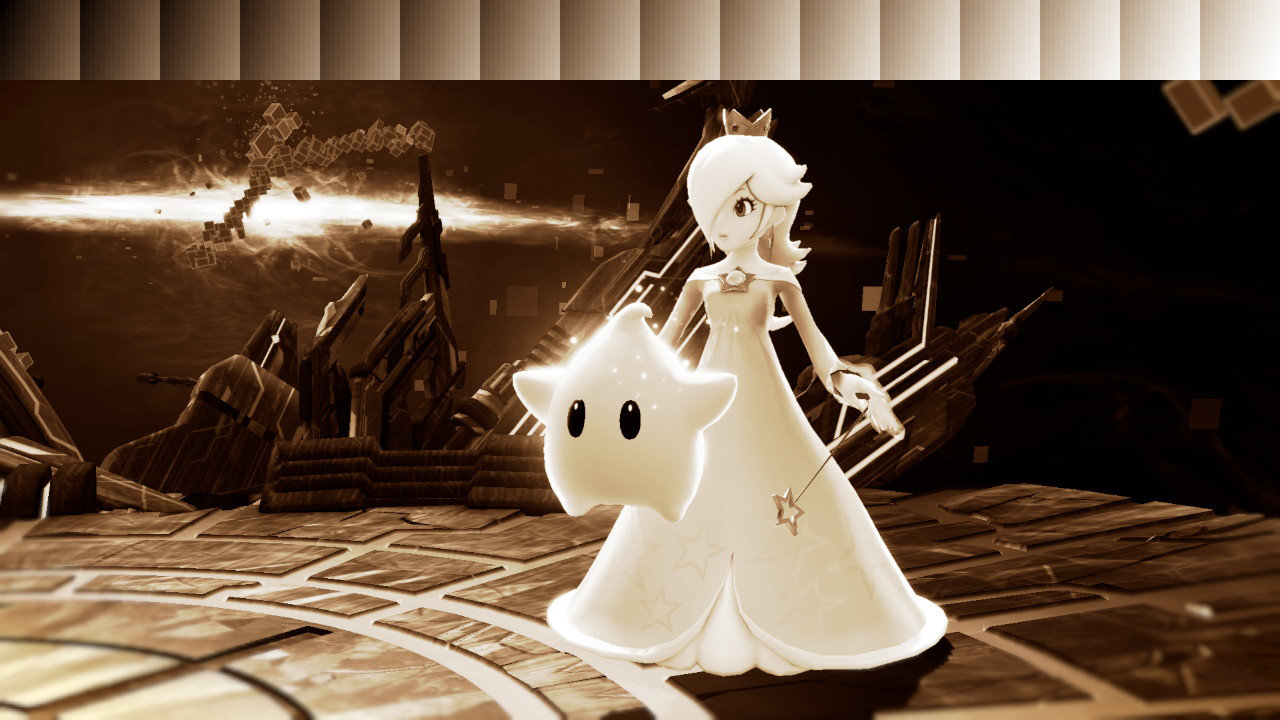
Sepia
snapshot/lut/ss_filter_sepia.nutexb
Retro
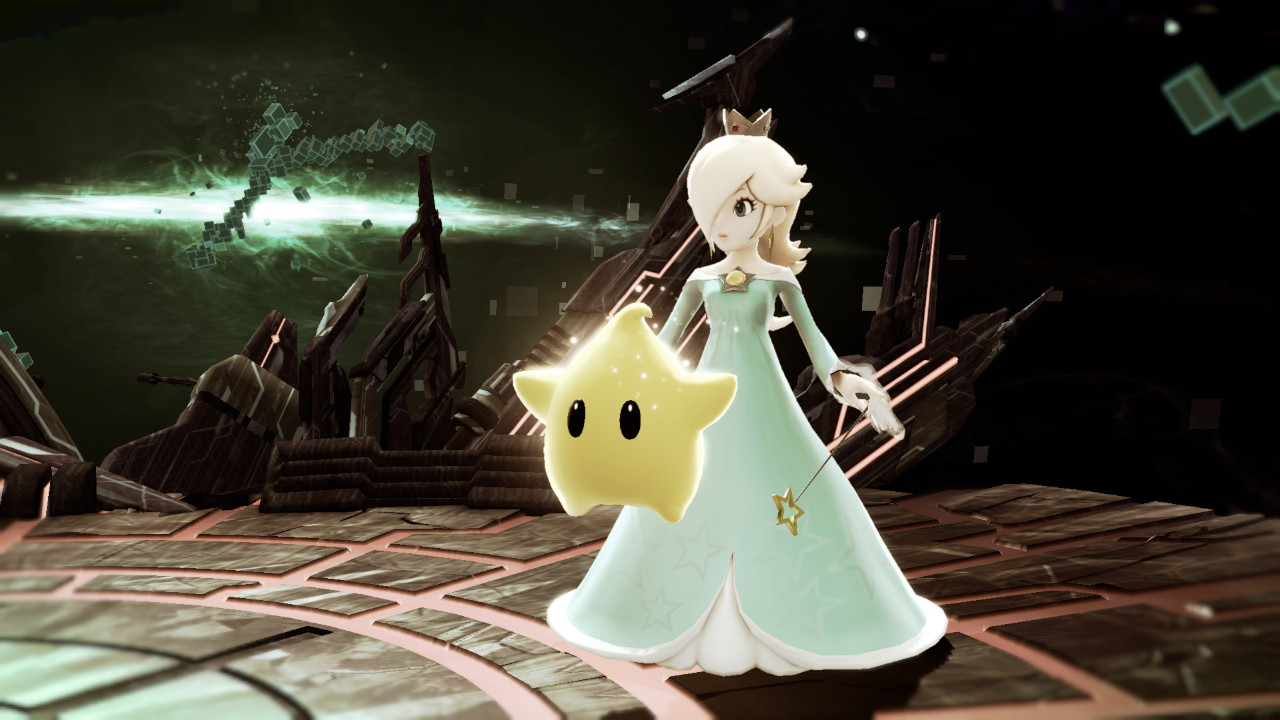
Soft
snapshot/lut/ss_filter_pastel.nutexb
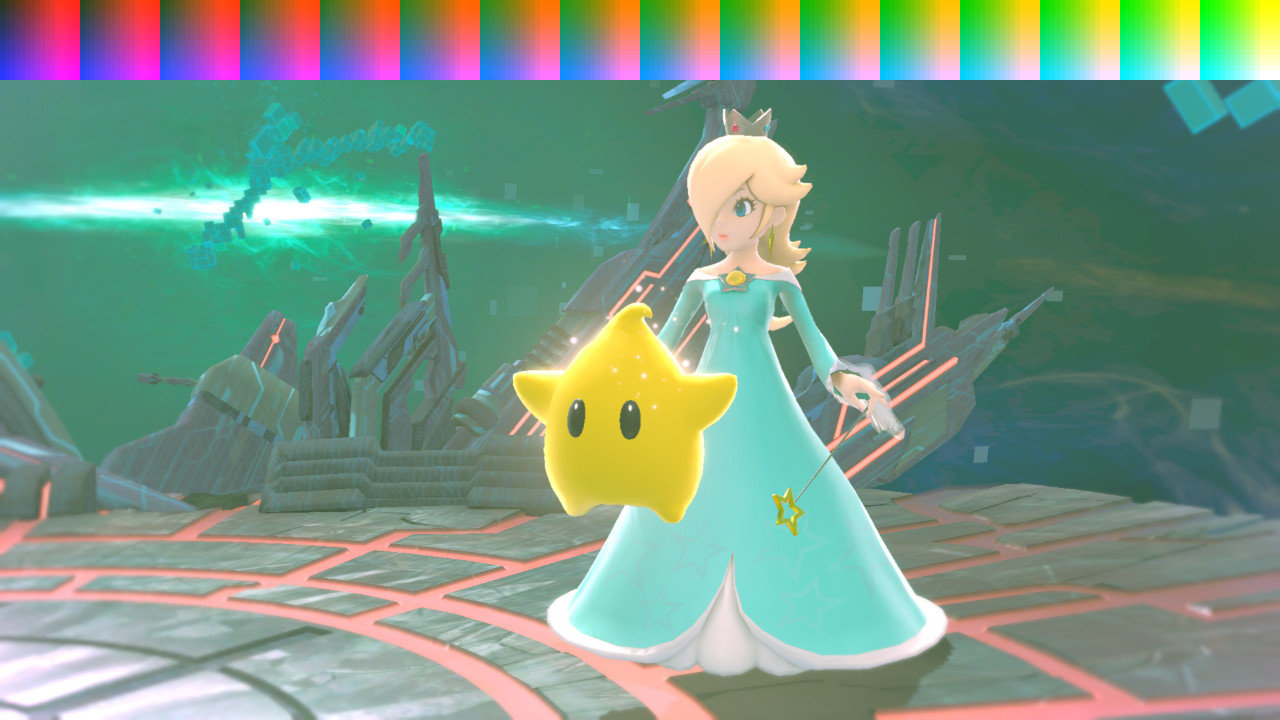
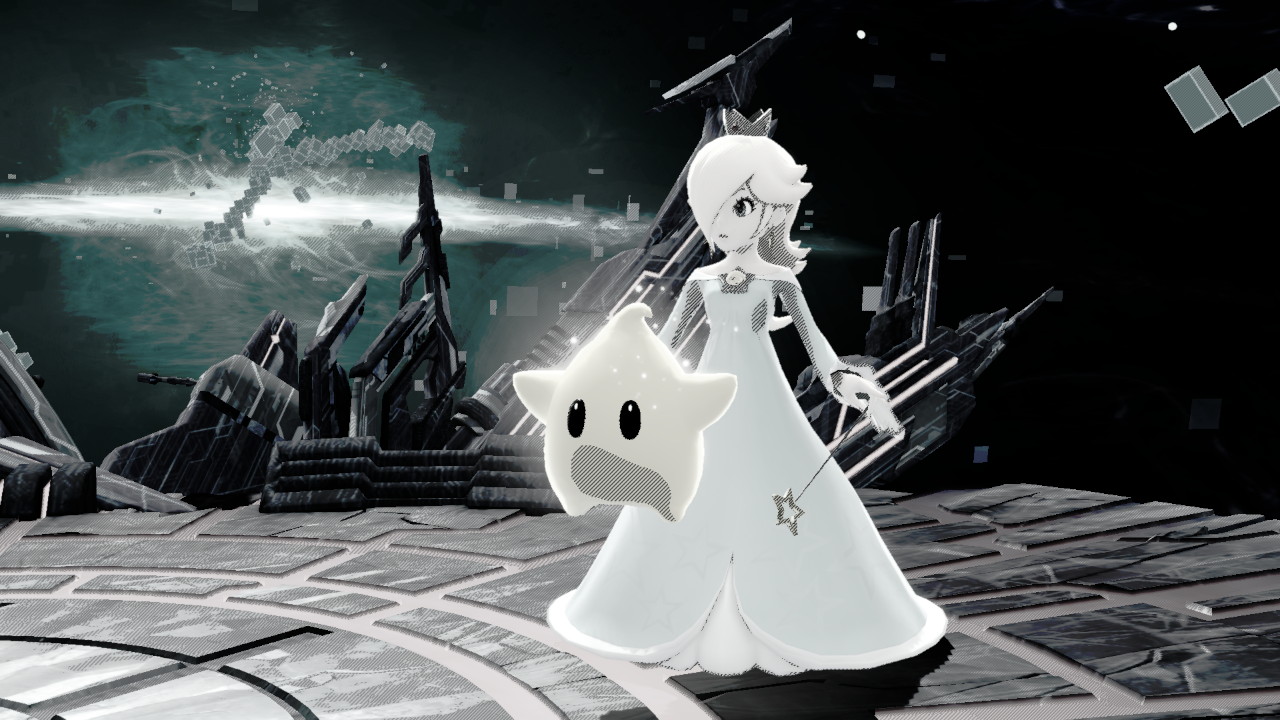
Comic
Manga
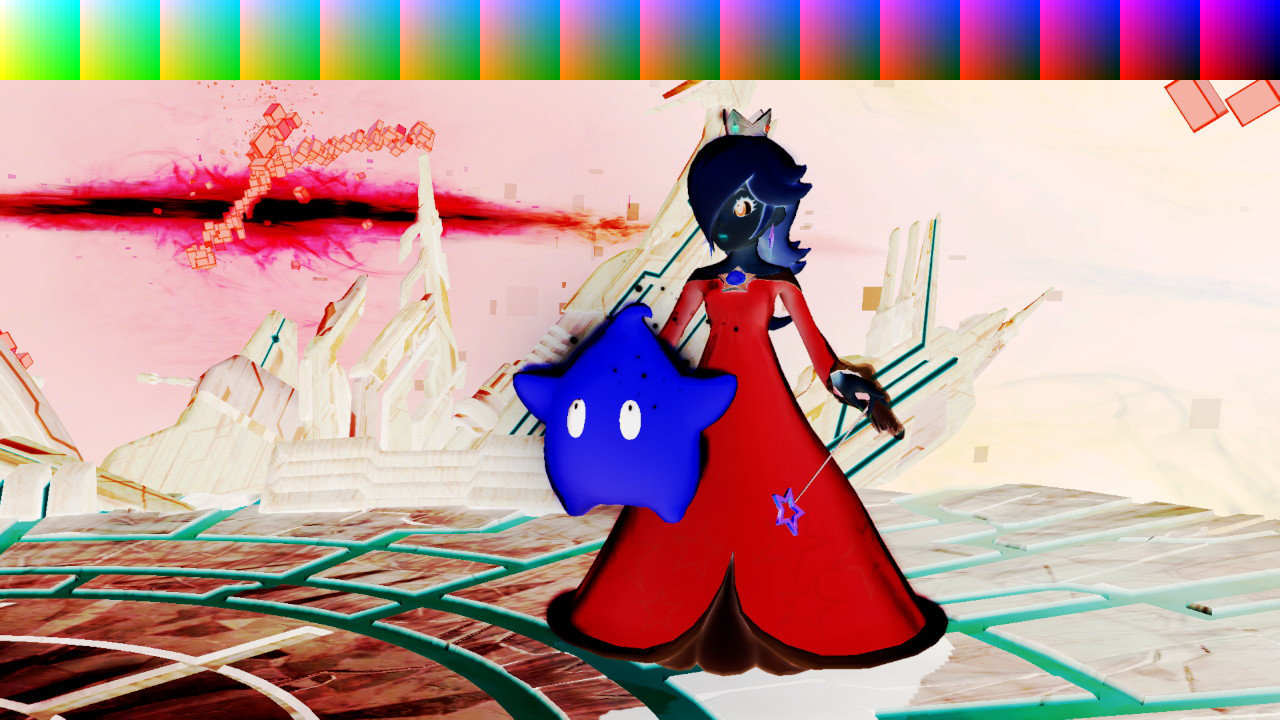
Shock
snapshot/lut/ss_filter_reverse.nutexb
Two-Tone (Black)
snapshot/lut/ss_filter_bilevel1.nutexb
.jpg)
Two-Tone
snapshot/lut/ss_filter_bilevel2.nutexb
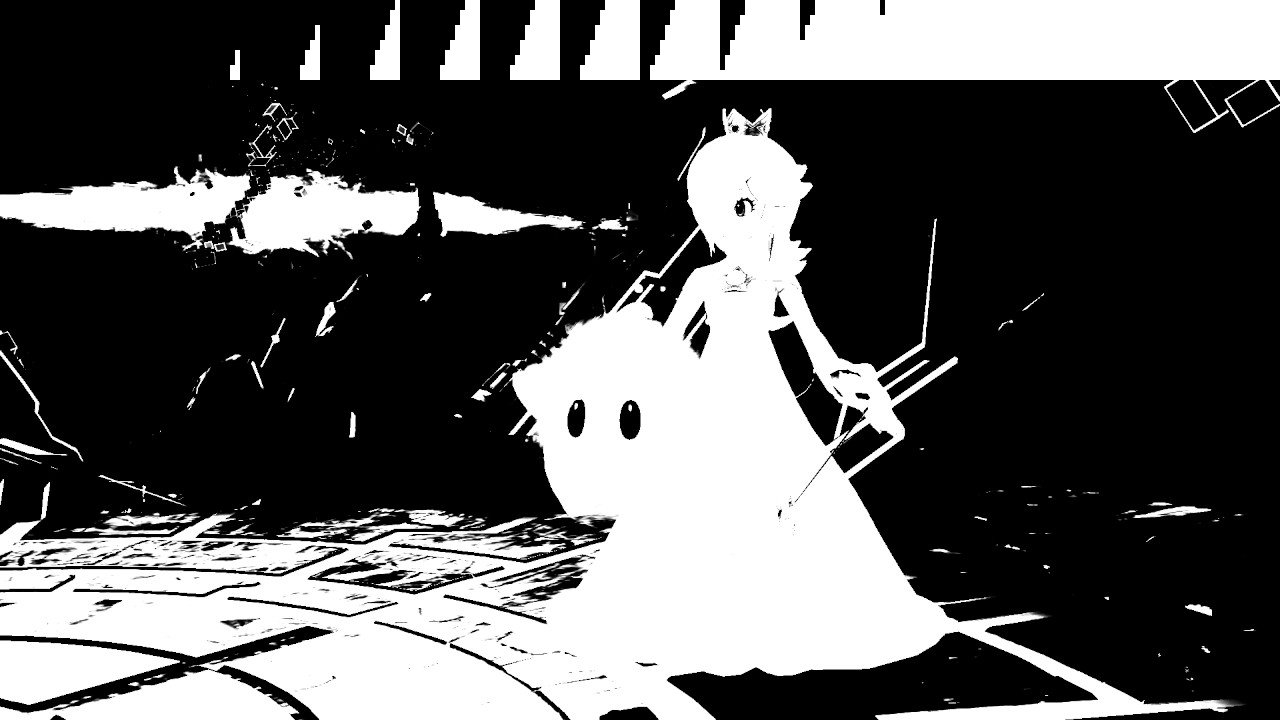
Two-Tone (White)
snapshot/lut/ss_filter_bilevel3.nutexb
.jpg)
Albedo Recoloring
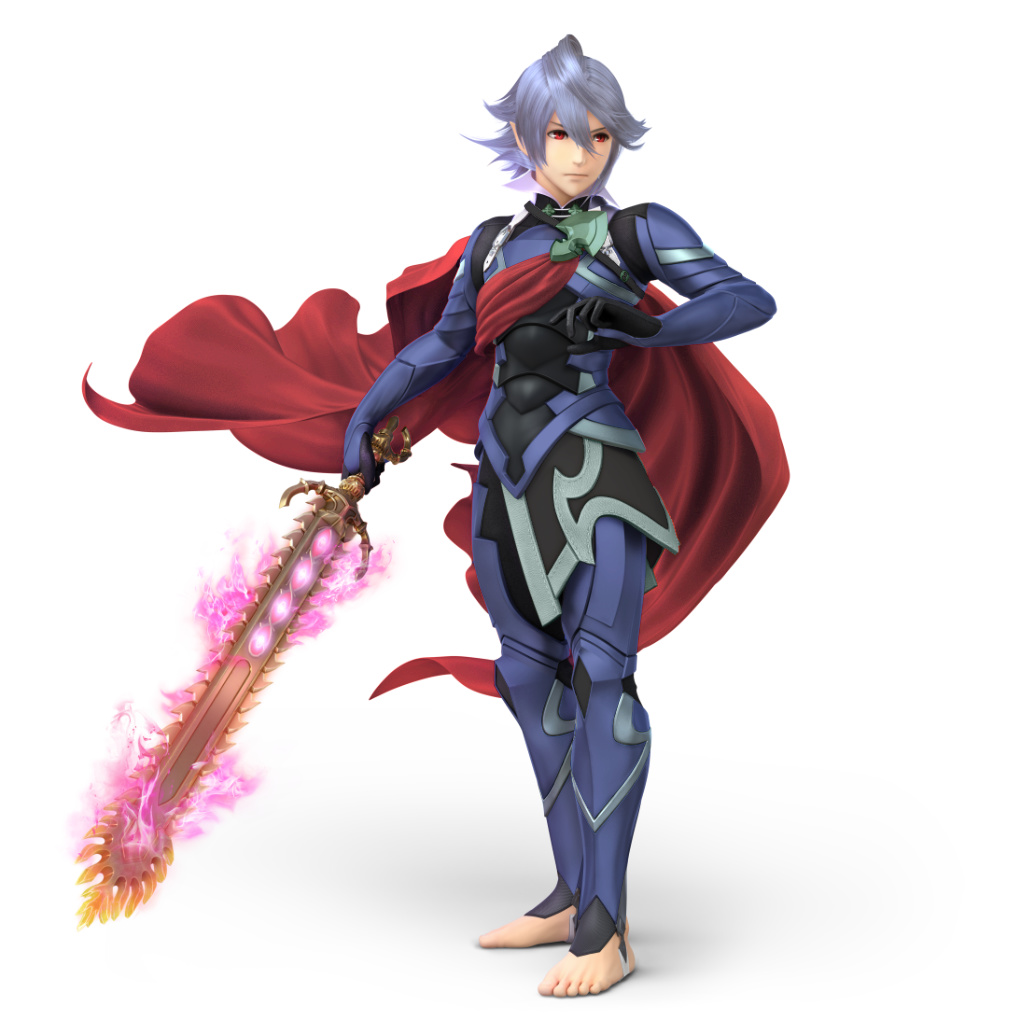
Renders can be recolored by extracting the lighting information and then applying a new albedo color. If the same color is used for the previous and new albedo, the final result is unchanged. The render will accurately match the selected new albedo color without the need for a levels/curves adjustment. This also preserves the color variations in the original lighting unlike automatic recoloring or similar HSL techniques.
Select a new albedo color to see the armor on the render update in real time.
Details
This technique approximates well how fully metallic objects are rendered in game (PRM red channel is 1.0) because metallic objects have no diffuse component. The results for non metallic materials will still match the desired overall luminance, but there may be discolorations. Potential fixes are discussed in the image editing section.
How to Determine Albedo Color
The albedo values can be copied from the Col maps for non skin materials. For skin materials, copy paste the values from SSBH Editor’s albedo rendering mode by taking a screenshot or using a screen color picker. This takes into account the fake subsurface scattering effect applied in game. See Skin Materials for details.
Example Code
// Metals
final = albedo x specular_light

// Non Metals
final = (albedo x diffuse_light) + (specular_light)

// Recoloring Metals
lighting = final / col_rgb
recolored = lighting * new_albedo

// Recoloring Non Metals
lighting = final / previous_albedo
recolored = lighting * new_albedo
Albedo Recoloring in an Image Editor
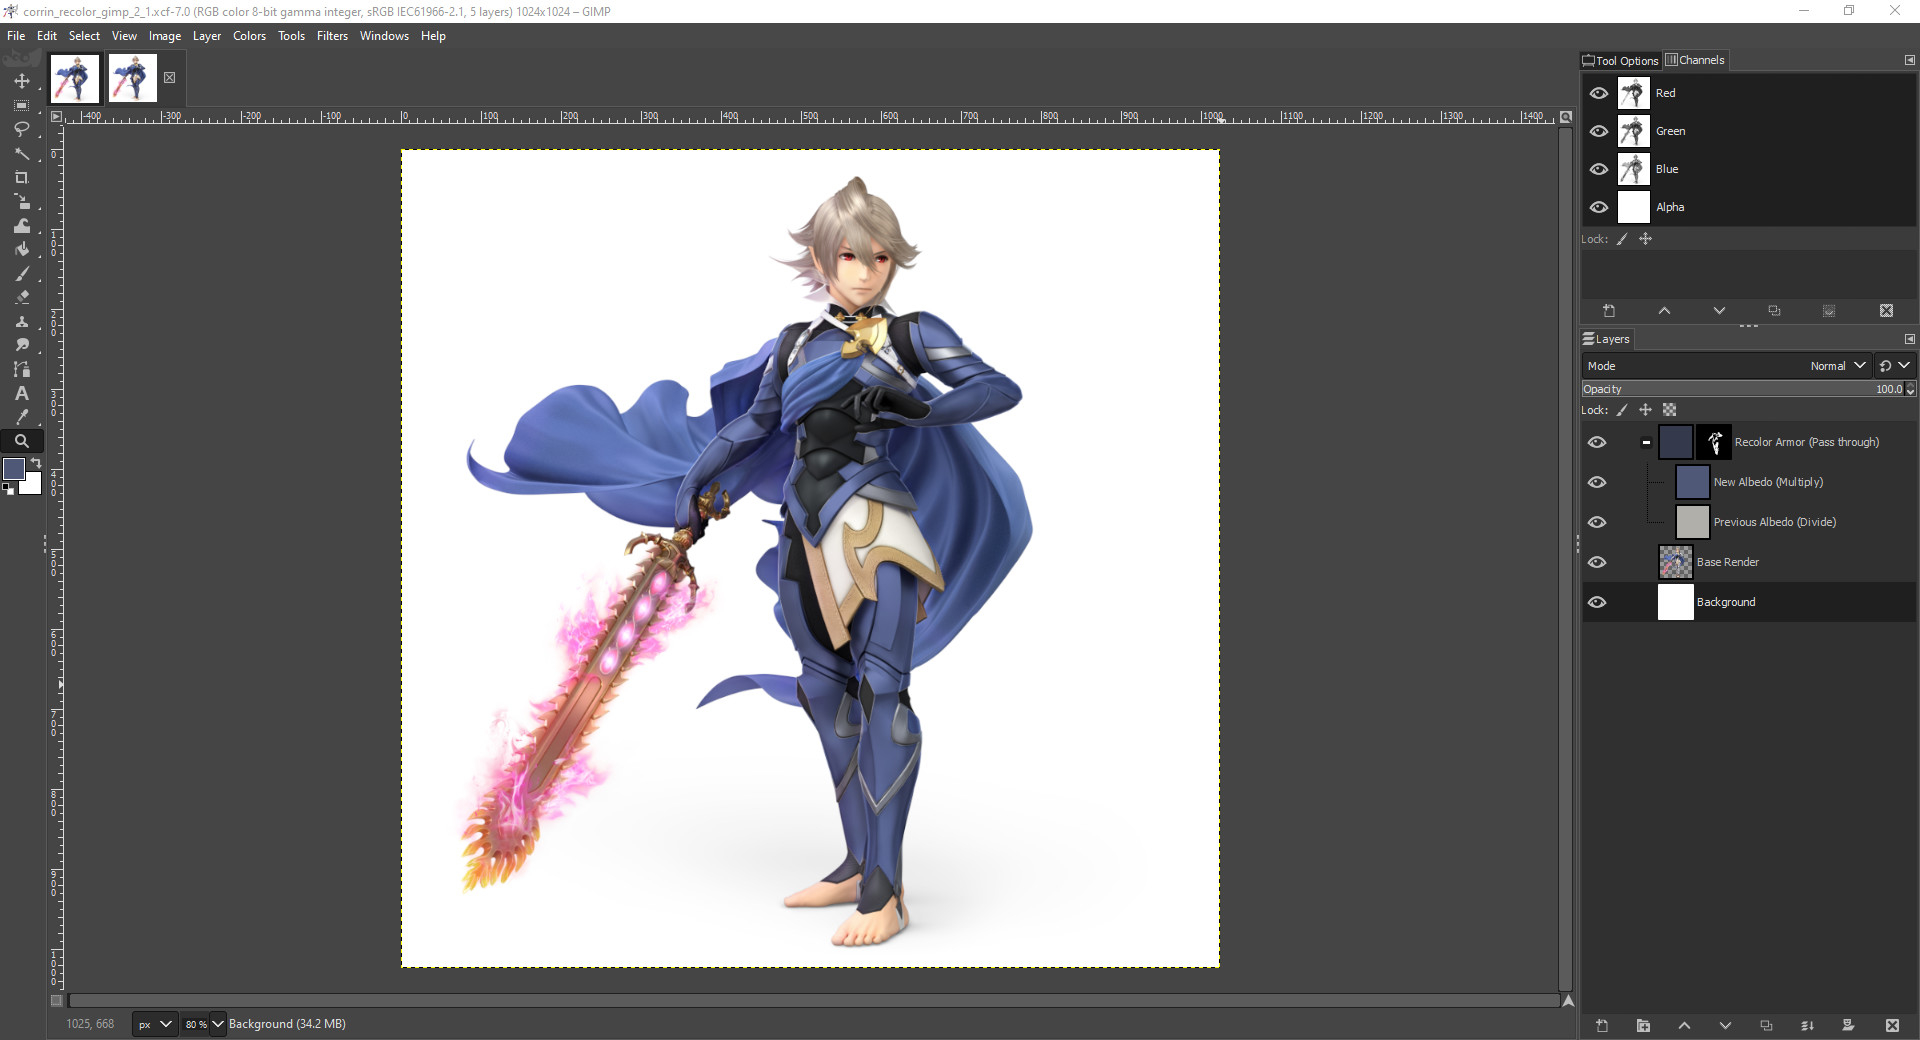 The arrangement of the layers depends on the image editor being used. The above image is from Gimp 2.1.
If using layer groups, make sure the blend mode for the group is set to Pass through.
The order is important when working in 8 bits per channel images. Multiplying first mitigates potential clipping issues from the divide layer. If the effect still introduces noticeable banding artifacts, try switching to 16 bits per channel.
Gimp, Photoshop, Krita
- Recolor Group + Mask (Pass through)
- Previous Albedo (Divide)
- New Albedo (Multiply)
- Base Render
If the final result is very discolored, double check the color used for the original albedo. Another copy of the new albedo layer can be added to even out the color with the opacity adjusted as needed. The color blend mode should be available in most image editors.
- Recolor Group + Mask (Pass through)
- New Albedo (Color)
- Previous Albedo (Divide)
- New Albedo (Multiply)
- Base Render
Affinity Photo
If the image editor doesn’t support the divide blending mode, invert the previous albedo color and set the layer blend mode to color dodge. This performs the same operation as divide.
- Recolor Group (Pass through)
- Mask
- 1 - Previous Albedo (Color Dodge)
- New Albedo (Multiply)
- Base Render
Examples
Further Reading
For custom renders, there are more render passes available that can perfectly recreate the final render. See Blender’s AOV Documentation for details. Remember to composite AOVs in 32 bit floating point with linear gamma (1.0) for proper blending and to avoid clipping!